
Karaoke is a fun activity that everyone can enjoy. However, it might be confusing to set up the karaoke system with a TV.
You might not be aware of this, but you can easily connect your karaoke system to your TV. It’s a great idea because you’ll be able to see lyrics on the screen, which will make it easier for all who are singing to sing along. Plus, if you have other people over, they’ll be entertained by watching others sing, or maybe even join in!
This article will guide you through the process of setting up your karaoke system with TV. It will help you understand how to connect your devices and what are the benefits of using this kind of setup for your home entertainment needs.
The best part about this setup is that you don’t have to buy expensive equipment or deal with complicated setups in order to enjoy the experience at home. All you need are some basic tools and materials, which we have listed below, along with instructions on how to use them properly so that everything works out perfectly fine for you!
What You Need To Set Up Karaoke System To Tv
In order to set up your karaoke system with TV, you will need to have the following items:
- A karaoke system that has an audio output. (If you don’t have a karaoke system, check our reviews on the Best Karaoke machines for TV)
- A TV with HDMI input or RCA input
- An HDMI cable or RCA cable (you can purchase one here)
Once you have these items, getting your karaoke system up and running with the TV is a breeze. All you need to do is follow the easy steps further down in this article, and soon enough, you’ll be able to sing along while enjoying the visuals on a bigger screen!
How To Set Up A Karaoke System With TV – Two Methods
Method #1: Using RCA Cable
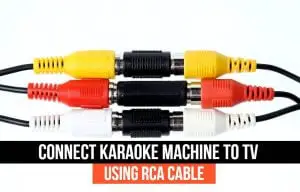
This method is suitable for Old TVs which don’t have an HDMI port but have RCA input. Setting up your karaoke system with TV is a much easier process than you might have originally thought. In fact, it’s one of the simplest setups that you can complete, as there are only a few steps that need to be followed in order for you to successfully get it up and running.
Here is a step by step guide on how to do it:
Step 1: Turn off the TV and disconnect any devices that are plugged into it. This includes DVD players, gaming systems, etc.
Step 2: Connect your audio wires from the back of your karaoke machine into the Red and White RCA outlets on the back of your television using an RCA cable. Usually, you will notice that there is an input on the back of your TV marked as “Audio In” or something similar. If there is, use it instead of one of the Red and White outlets.
Step 3: Connect your video wires from the back of your karaoke machine into the Red and White RCA outlets on the back of your television using another RCA cable. If you happen to have a TV that only has one Red and White outlet, then your video will need to go into the Yellow RCA outlet instead of the Red or White one.
Step 4: Turn the TV on and turn the volume up on the TV. If you hear sound coming from it, then move on to the next step.
Step 5: Turn on your karaoke machine and go to the settings on it. Make sure that you set your karaoke machine to “TV” mode, also known as LINE IN mode.
Step 6: Skip to the next song on your karaoke machine and press play. If you can see lyrics on screen and hear sounds from the karaoke machines, then you’re all set congratulations! You’ve successfully set up your karaoke system with TV.
Method #2: Using HDMI Cable (Best For Smart TVs)
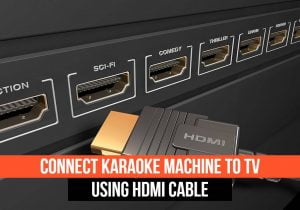
Make sure that you have a karaoke machine with HDMI input and output ports. If not, then get one now (Check our post on Best Karaoke Machines).
If you have a modern TV that has an HDMI input/output, then this is by far the easiest way to connect your home theater equipment (including speakers and karaoke machines) to your Smart Tv screen.
Let’s get started with the setup process.
Step 1: Turn off your Smart TV. Make sure that all devices are disconnected before continuing with the next step.
Step 2: Connect the HDMI cable to the karaoke machine and connect the other end of the cable to your TV. This is a digital cable with a complete audio and video signal, so there is never a problem with sound or picture.
Step 3: Plug in your karaoke machine and turn on the TV.
Step 4: Select the HDMI input source on your Smart Tv screen. It should appear as Karaoke Player.
Step 5: Play any CD+G song on your karaoke machine. Lyrics should now appear on your screen. You are now ready to sing along with your friends and family.
Note: If your TV does not have an HDMI input source, then you could use an A/V cable. This is composed of three cables (red, white, and yellow). If you want better picture quality, then use an HDMI cable.
FAQs
Q. Do karaoke machines connect to TV?
Karaoke machines can connect to a TV via analog cables and digital cables. Digital connections provide the best sound and picture quality for watching your karaoke songs lyrics on TV screens.
Q. Will my karaoke machine work with TV?
Most karaoke machines have either an RCA output jacks on the back of them, and the latest ones even have an HDMI output port that allows you to connect it with a TV or projector. If you have either, then your karaoke machine should work with TV without any hassles.
Q. Do Smart TVs work with karaoke machines?
Yes, you can connect your smart tv with karaoke machines using HDMI cable. We have provided step-by-step instructions on how to connect your karaoke machine to smart tv above.
Q. Does wireless karaoke microphones work with TV?
Wireless microphones work with TVs, but you will need a wireless receiver and transmitter to connect them with your Tv.
Conclusion
Connecting your karaoke machine to a TV is quite easy, and using either method we have described in this guide, you should be able to get it working in no time.
We hope using these methods; you can have a home karaoke system set up for a fun time with family and friends.
If these methods didn’t work out or you have additional questions, then leave us a comment. Our friendly team will be happy to help you out.
Also, if you want to buy a karaoke machine for your home, check out our post on Karaoke Machines for home use.
Thanks and happy singing!

John Smith is the founder and CEO of Karaoke Machines Guru. He is a karaoke tutor and karaoke enthusiast and has been passionate about karaoke since he was a child. He also writes about karaoke-related tips, guides, and product reviews on this website.
He overlooks the whole website and makes sure that everything is running smoothly. Learn more!