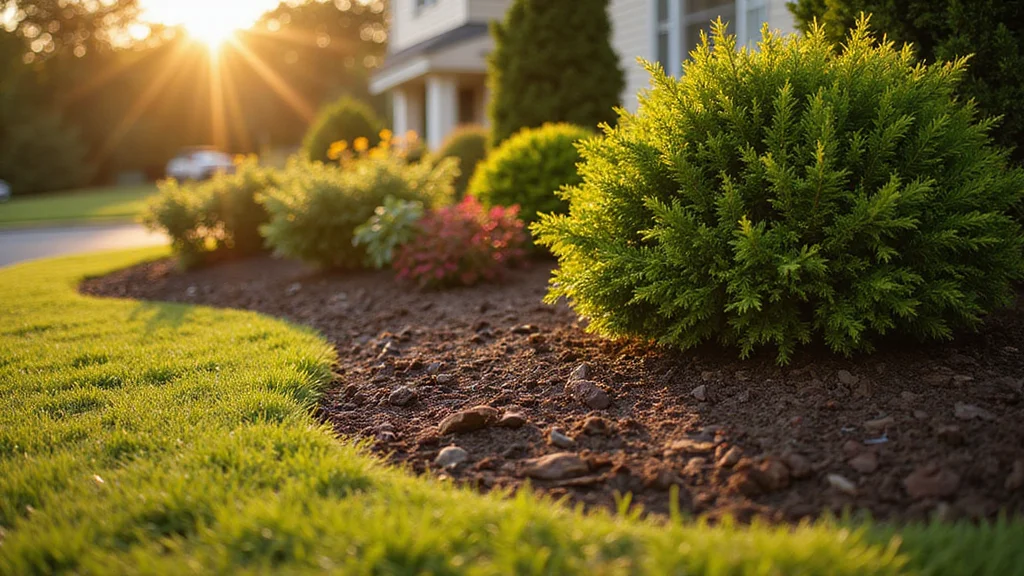
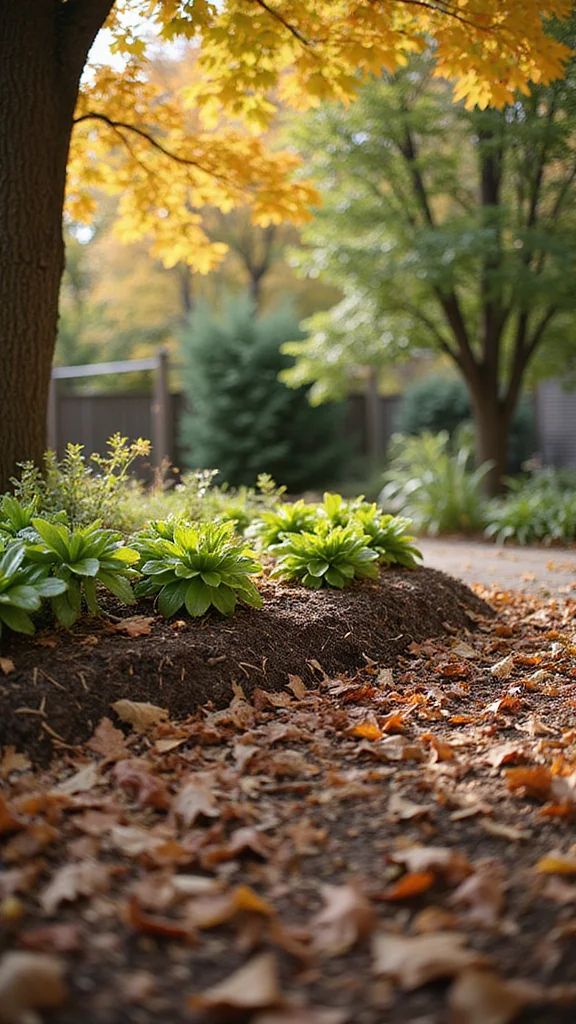
As fall approaches, many of us find ourselves craving that fresh, tidy look in our front gardens. The vibrant hues of autumn leaves and the crisp air beckon us to revitalize our outdoor spaces. One of the best ways to achieve that polished appearance is by mulching your front garden beds. This post is crafted for those who want their gardens to look sharp and well-maintained while also reaping the benefits of seasonal care.
If you’re someone who takes pride in their front yard but struggles to keep it looking its best, you’re in the right place. Whether you’re new to gardening or have been nurturing your plants for years, this guide offers practical tips and techniques that will help you achieve a clean, professional finish. You’ll learn about choosing the right mulch, preparing your garden beds, and applying it properly, all tailored for the fall season. By the end of this post, you’ll have the tools and knowledge to create a front garden that makes you proud all year round.
Key Takeaways
– Choose the Right Mulch: Select materials that suit your plants and enhance your garden’s aesthetics. Options vary from organic mulches like wood chips to inorganic choices like gravel.
– Prepare Your Garden Bed: Clear any weeds and debris from your garden beds. This ensures your plants have the best environment to thrive and allows the mulch to work effectively.
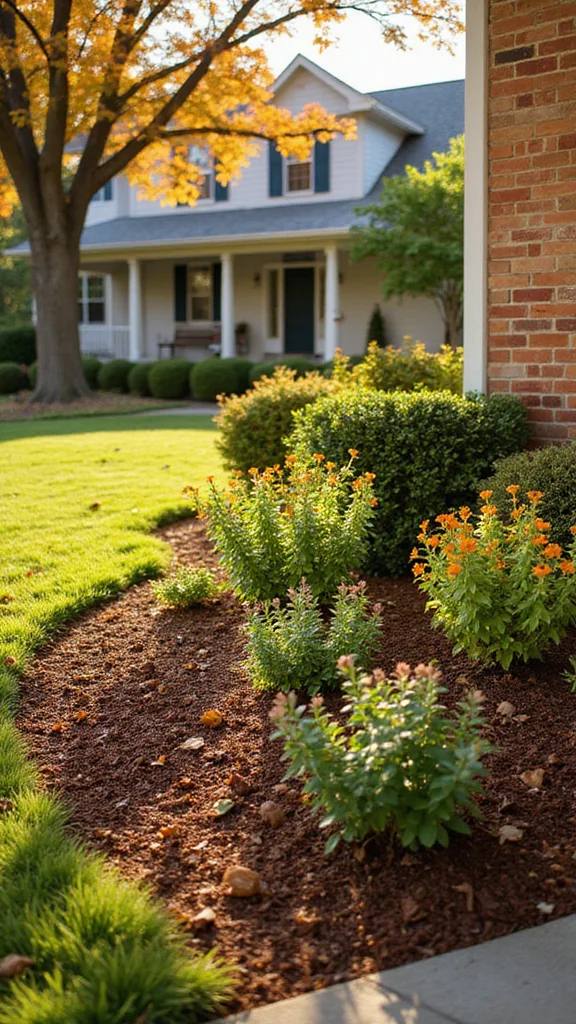
– Apply the Right Thickness: Aim for a mulch layer about 2 to 3 inches thick. This thickness helps retain moisture and suppress weeds without smothering your plants.
– Seasonal Considerations: Fall is an ideal time for mulching as it protects roots from freezing temperatures. It also helps to enrich the soil as organic mulches break down.
– Regular Maintenance is Key: Keep an eye on your mulch layer and replenish it as needed. This regular upkeep will maintain that clean look and support your plants effectively.
1. Choosing the Right Mulch for Your Front Garden
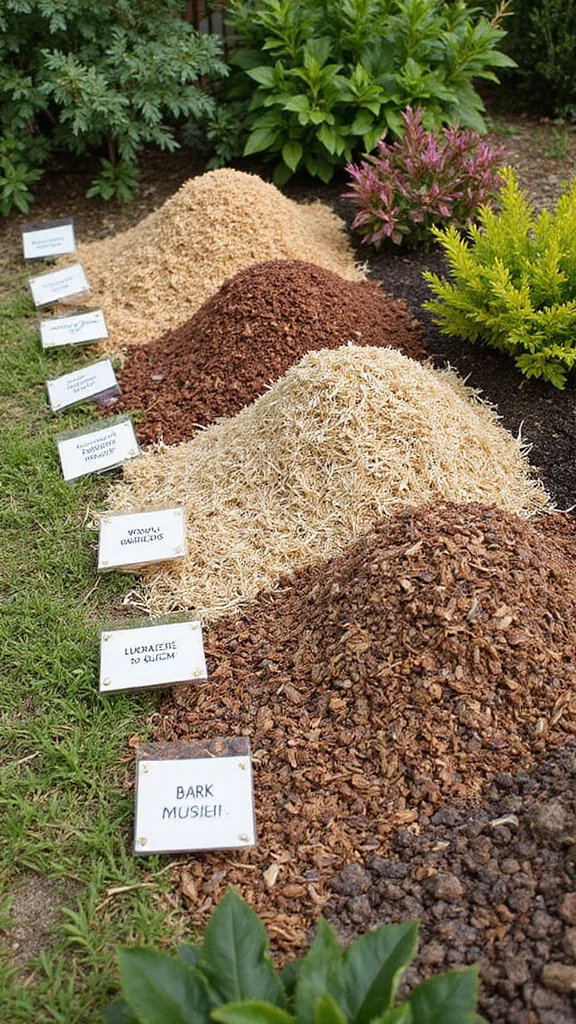
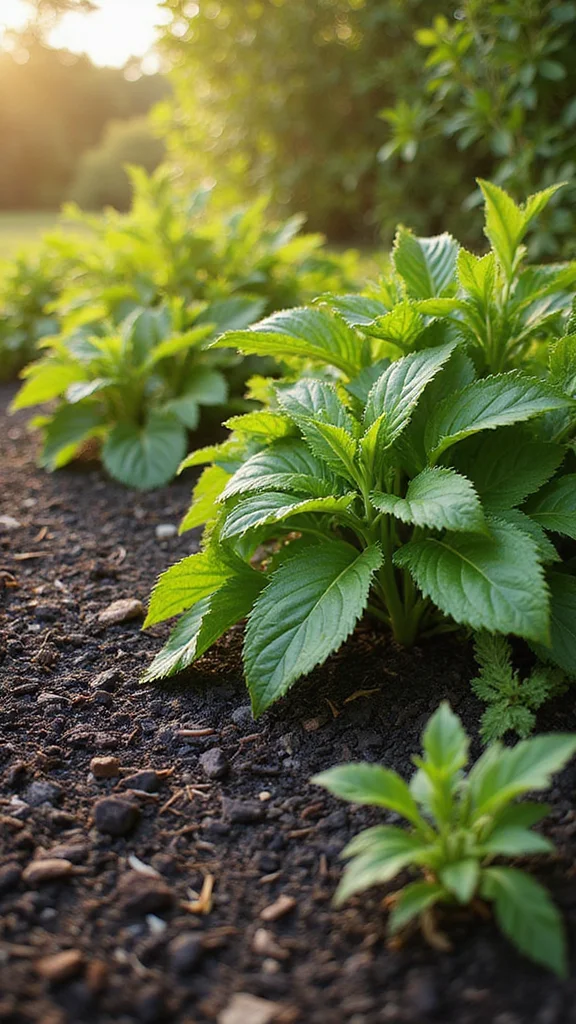
Finding the perfect mulch for your front garden is essential for both beauty and function. You have a variety of options, like wood chips, bark, straw, and even rubber, each bringing unique benefits to your garden. Selecting the right type can enhance your garden’s appearance while also meeting its specific needs. With so many colors and textures available, you can tailor your choice to fit your aesthetic goals perfectly.
Start by considering your garden’s climate and the types of plants you have. For instance, darker mulches like cedar or redwood not only provide a sophisticated look but also contrast beautifully with vibrant greenery. Take your time to explore different options to find what resonates with your vision.
Key mulch options to consider:
– Wood Chips: Ideal for moisture retention and visual appeal.
– Bark Mulch: Lasts longer and suppresses weeds effectively.
– Straw: Perfect for a budget-friendly, biodegradable choice.
– Rubber Mulch: Offers longevity and is great for high-traffic areas.
Choosing the right mulch can dramatically improve your garden’s look and health. A well-selected mulch not only enhances the beauty of your space but also supports your plants’ growth.
2. Preparing Your Garden Bed
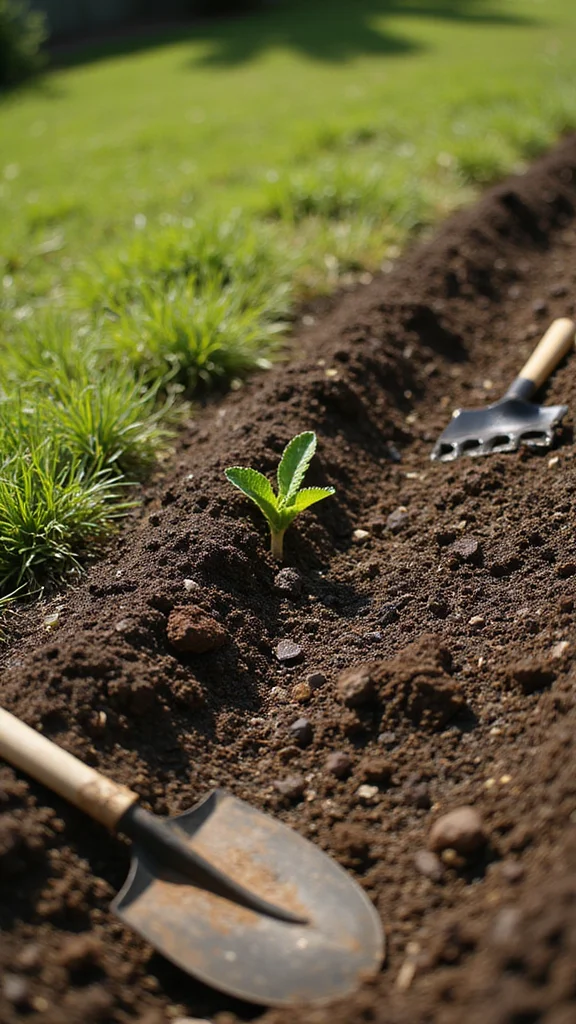
Getting your garden bed ready is a crucial step before mulching. Start by removing any weeds and dead plants to create a clean slate for your new mulch. This will help ensure that the fresh layer effectively suppresses future weeds and provides a great foundation for your plants.
Be thorough in your preparation by raking away any debris like leaves and twigs. If you encounter weeds, pull them out by hand or use a hoe to remove them at the roots. You might also want to test your soil’s pH and nutrient levels to create the healthiest environment for your plants.
Essential steps for preparing your garden bed:
– Clear Debris: Rake away all organic matter and trash.
– Weed Control: Remove weeds by hand or with a hoe.
– Soil Testing: Check pH levels and make necessary amendments.
Taking the time to prepare your garden bed ensures that your mulch layer will perform effectively. A well-prepared bed leads to healthier plants and a more beautiful garden.
3. Applying the Mulch: The Right Thickness
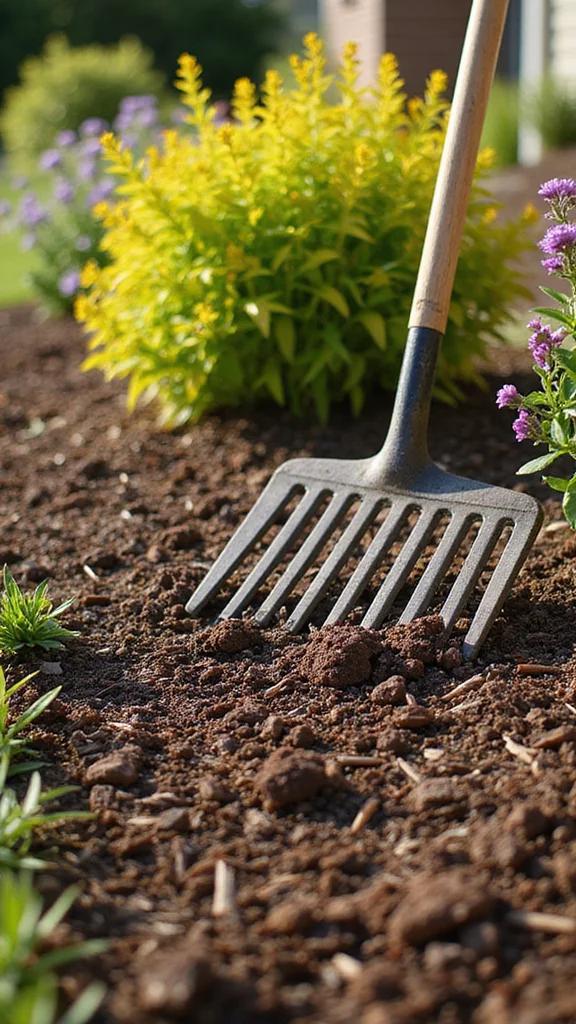
The thickness of your mulch layer is vital for its effectiveness. If it’s too deep, it can suffocate your plants, while too little won’t do much to stop weeds. Aim for a depth of about 2-4 inches for optimal results.
For newly planted areas, a depth of 2 inches is generally sufficient, while 3-4 inches works best for established beds. Be sure to keep the mulch a few inches away from plant stems and tree trunks to prevent rot. Using a rake to apply the mulch evenly will create a visually appealing and manageable surface.
Best practices for applying mulch:
– 2 Inches: Ideal for annuals or new plantings.
– 3-4 Inches: Best for established gardens to retain moisture.
– Keep Distance: Maintain space from plant stems to avoid rot.
Applying the right thickness of mulch ensures your plants thrive while providing a polished look. This attention to detail will make your garden stand out.
You Might Also Like
4. Seasonal Considerations for Mulching
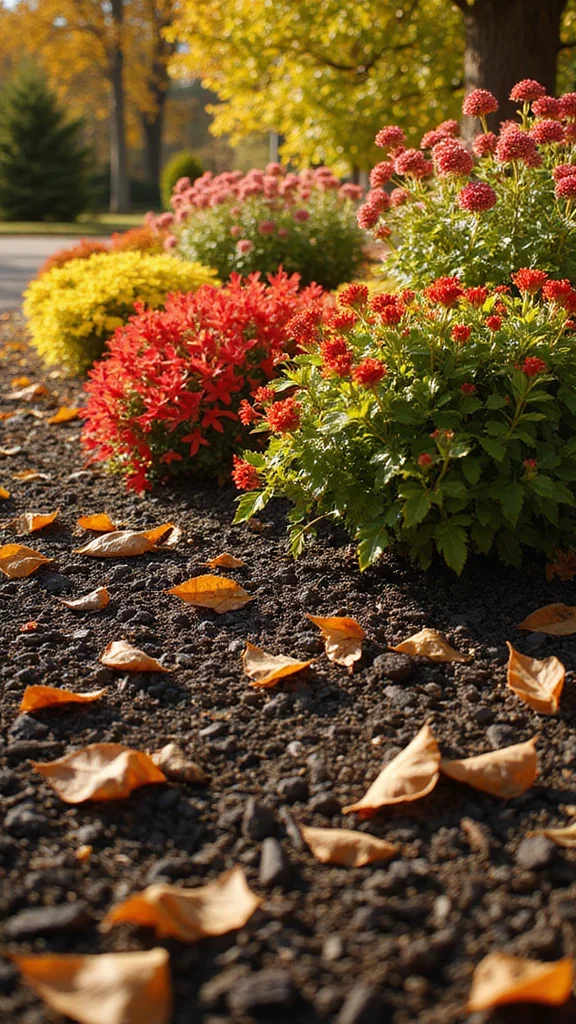
As fall approaches, mulching becomes even more essential. A proper mulch layer acts as an insulator, protecting plant roots from extreme temperature changes. It’s an important part of preparing your garden for winter.
Mulch helps retain soil warmth as temperatures drop, which is especially beneficial for young plants and perennials. Additionally, it minimizes evaporation, ensuring your garden stays hydrated during the colder months. Fresh mulch can also brighten your garden amid fading autumn leaves, maintaining a neat appearance.
Seasonal benefits of mulching:
– Warmth Retention: Keeps soil warmer for young plants.
– Moisture Preservation: Reduces evaporation during winter.
– Aesthetic Appeal: Brightens the garden as leaves fall.
Being mindful of seasonal changes and replenishing mulch when necessary will keep your garden healthy and attractive. A well-mulched garden not only looks good but also thrives year-round.
5. Mulching Techniques: The Donut Method
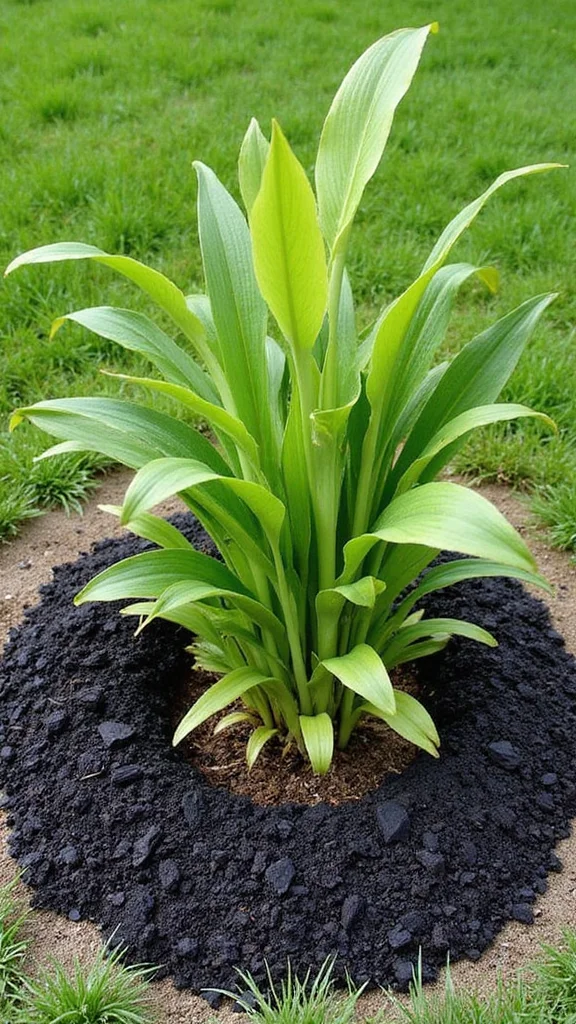
One effective technique for applying mulch is known as the donut method. This technique involves creating a ring of mulch around the base of your plants, rather than piling it directly against their stems. This helps prevent moisture buildup at the base, which can lead to rot.
To use this method, form a circle of mulch that is 3-6 inches away from the plant stem. Keep the mulch evenly distributed using a rake, which not only ensures proper coverage but also enhances the overall look of your garden.
Steps for the donut method:
– Create a Ring: Form a circle of mulch around plants.
– Maintain Shape: Use a rake for even distribution.
– Enhance Appearance: This method gives a polished finish.
Using this technique not only benefits your plants but also creates a professional appearance in your garden. A neat garden is more inviting and showcases your hard work.
You might also like
6. Edging for a Clean Finish
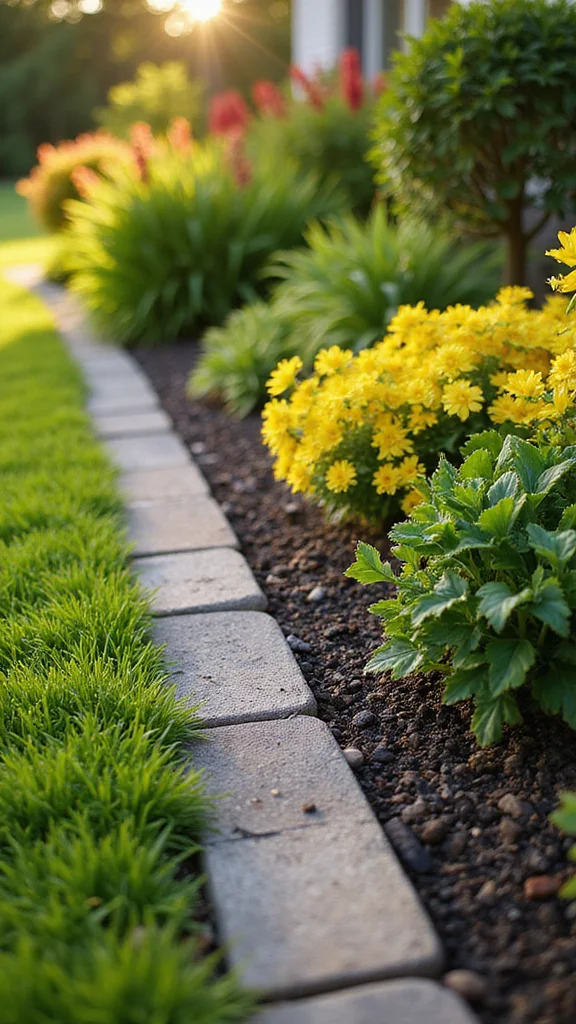
Edging your garden beds can significantly improve their appearance and highlight your mulching efforts. It creates a clear boundary between your garden and lawn, preventing mulch from spilling into grassy areas.
Consider using materials like brick, stone, or metal edging to define the space effectively. Install the edging before applying mulch to ensure everything stays in line. Regular maintenance is essential to keep the edging clear of weeds or overgrowth.
Key points for effective edging:
– Materials: Use brick, stone, or metal for a clean line.
– Application: Install before mulching for best results.
– Maintenance: Regularly check for weeds and overgrowth.
With well-defined edges, your garden beds will look professionally manicured. This attention to detail can make your entire outdoor space more inviting.
7. Timing Your Mulching for Best Results
Timing your mulching is crucial, especially in the fall. This season is ideal for applying mulch, as it helps your garden prepare for the winter months while protecting it from harsh weather.
As the leaves begin to fall, it’s the perfect time to spread your mulch. Not only does this complement the seasonal look, but it also fills in gaps left by fading flowers. Choose a dry day for application to ensure the mulch adheres well to the soil. After applying, give your newly mulched beds a good watering to help settle the mulch in place.
Timing tips for successful mulching:
– Falling Leaves: Apply mulch as leaves drop.
– Weather Conditions: Aim for a dry day for best adhesion.
– Post-Application Care: Water the mulch to settle it.
Getting your timing right means your garden will not only look fabulous but also stay healthy throughout the colder months. Proper timing maximizes the benefits of mulching.
8. The Importance of Regular Maintenance
Applying mulch is just the beginning; regular maintenance is key to keeping your garden looking its best. After a heavy rainfall, check the mulch to see if it has shifted or washed away, and address any erosion quickly.
If your mulch layer has thinned out, add more to maintain its effectiveness. Don’t forget to clean up any debris, leaves, or weeds that may have settled on top of the mulch to keep everything looking neat.
Maintenance tasks to keep in mind:
– Check for Erosion: Inspect after heavy rain for shifts.
– Top Off as Needed: Add more mulch if it’s thinned.
– Seasonal Cleanup: Remove debris and weeds regularly.
Staying on top of maintenance allows you to enjoy the fruits of your labor while ensuring your garden remains inviting and beautiful. A little upkeep goes a long way in keeping your front garden in top shape.
You Might Also Like
9. Eco-Friendly Mulching Options
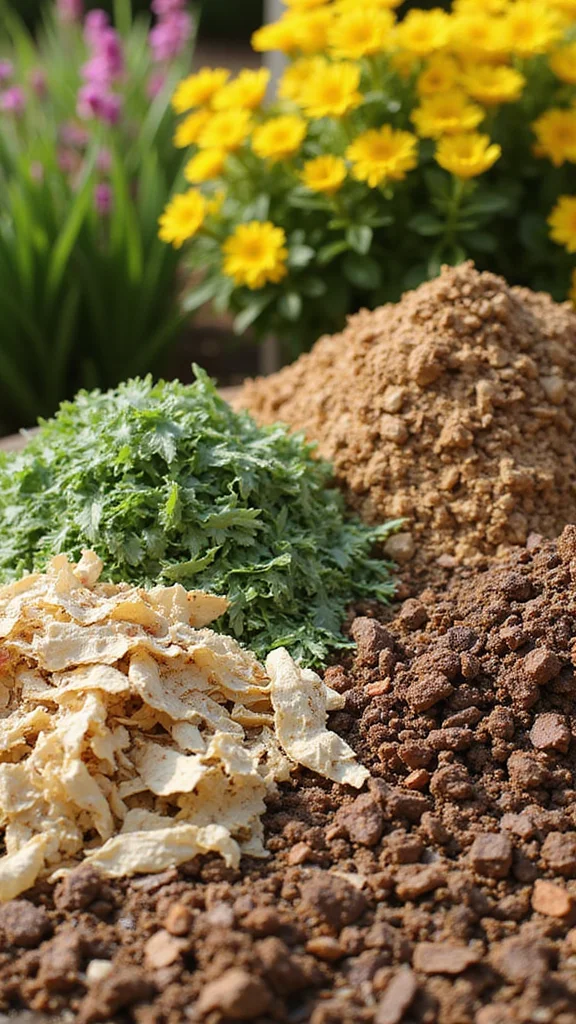
For the environmentally conscious gardener, exploring eco-friendly mulching options is a great step. Organic mulches made from natural materials not only enrich the soil as they decompose but also provide a beautiful finish to your garden.
Consider using compost for its nutrient-rich qualities, or grass clippings for an inexpensive option—just make sure to let them dry first. Shredded leaves can also serve as excellent organic mulch, benefiting your garden as they break down over time.
Eco-friendly mulching options to try:
– Compost: Nutrient-rich and weed-controlling.
– Grass Clippings: Quick and budget-friendly if dried first.
– Leaves: Shredded leaves enrich soil as they decompose.
Choosing sustainable options not only enhances your garden’s health but also reflects your commitment to eco-friendly practices. It’s a win-win for you and the environment.
How To Choose the Right Mulch for Your Front Garden
Choosing the right mulch for your front garden beds can make a big difference in the overall look and health of your plants. With so many options available, it can be overwhelming. Here’s a straightforward guide to help you select the best fall mulch for your garden.
1. Consider the Type of Mulch
There are various types of mulch, each with its unique benefits. Organic mulches like bark, straw, and wood chips break down over time, enriching the soil. Inorganic options like rubber or gravel are more durable and require less maintenance. Think about what will work best for your plants and garden aesthetic.
2. Think About Color
The color of your mulch can dramatically impact your garden’s appearance. Darker mulches can create a striking contrast with light-colored flowers, while lighter mulches offer a more subtle look. Choose a color that complements your front yard’s style and enhances the beauty of your plants.
3. Assess Your Budget
Mulch comes at various price points, so it’s essential to know your budget. Organic mulches, such as shredded leaves or straw, are generally more affordable and can even be sourced from your yard. In contrast, premium hardwood mulches may cost more but offer greater longevity. Determine how much you’re willing to spend before making a choice.
4. Evaluate Your Needs
Consider the specific needs of your garden. If you have plants that thrive in moist conditions, opt for organic mulch, as it helps retain moisture in the soil. For drought-resistant plants, a coarser mulch may work better. Assess your plants and their requirements before selecting the type of mulch.
5. Think About Local Climate
Your local climate plays a significant role in your mulch choice. In hotter regions, a thick layer of organic mulch can help keep the soil cool and retain moisture. In cooler areas, an inorganic choice may be more beneficial in preventing soil erosion during heavy rains. Research the best practices for mulching in your climate to ensure the best results.
6. Maintenance Considerations
Different mulches require varying levels of maintenance. Organic mulches need to be replenished regularly as they decompose, while inorganic options last longer but may need occasional cleaning. Think about how much time you want to devote to maintaining your garden bed when choosing your mulch.
Pro Tip: Always apply mulch after the soil has warmed up in the spring and before the first frost in the fall. This timing helps protect your plants and enhances their growth throughout the seasons.
With these tips in mind, you’re now equipped to choose the best fall mulch for your front garden beds. Make your selection based on the type, color, budget, needs, climate, and maintenance of your garden. Your front yard will not only look professional but also thrive with the right mulch. Happy gardening!
10. Enjoying the Results: A Garden to Be Proud Of
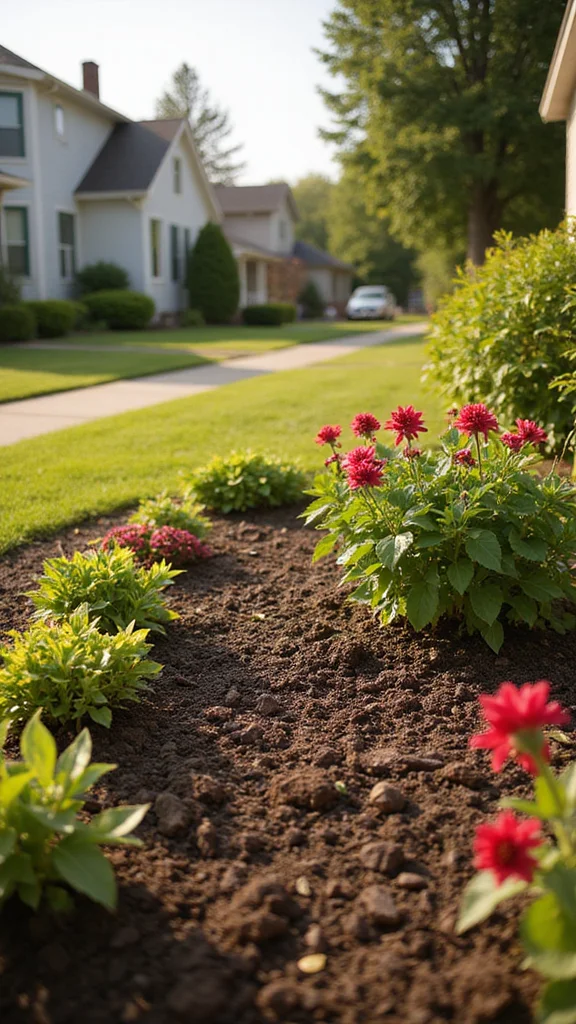
Once you’ve mulched your front garden beds, take a moment to step back and appreciate the transformation! A well-mulched garden not only looks polished but also creates a thriving environment for your plants.
With your new mulch layer, your front yard will have an inviting and fresh look. Properly mulched beds help retain moisture and suppress weeds, allowing your plants to flourish. Plus, a beautifully maintained garden raises the standard in your neighborhood, inspiring others to care for their outdoor spaces.
Benefits of enjoying your hard work:
– Enhanced Aesthetic: A fresh look for your front yard.
– Healthier Plants: Retains moisture and fights weeds effectively.
– Community Pride: Encourages others to maintain their gardens.
Taking the time to enjoy your handiwork can be rewarding, and sharing your beautiful garden on social media may inspire others. Celebrate your gardening achievements!
Conclusion
Mulching your front garden beds this fall is not just about looks; it’s about creating a thriving environment for your plants while elevating your home’s curb appeal. By following these steps, you can ensure a clean, professional finish that you can be proud of.
Don’t forget, consistency in seasonal care will keep your garden healthy and beautiful year-round. So grab your tools, get your mulch, and let’s make your front yard the envy of the neighborhood!
Frequently Asked Questions
What is the best mulch for fall mulch in front yard beds to achieve a clean, professional finish?
For fall mulch, choose natural options like shredded bark mulch, cedar, or pine straw. They give a clean, professional look and help with seasonal care by suppressing weeds and conserving moisture.
Apply a 2–3 inch layer, and keep a small gap around plant stems to prevent rot. Edge the beds for a crisp line and water after application so the mulch settles evenly. In a front yard, pick a mulch color that complements your house and beds for a polished finish.
How thick should a mulch layer be in front yard beds for fall mulch to suppress weeds and retain moisture?
Plan for a 2–3 inch layer. On slopes, you can go a touch deeper (up to about 4 inches), but never bury crowns or stems. Keep mulch at least 1 inch away from plant bases and maintain crisp bed edges. If the soil is dry, water lightly before applying to help mulch settle and avoid air pockets. This depth works well for the front yard and supports seasonal care through fall and winter.
When is the best time in fall to mulch your front garden beds for optimal moisture retention and weed suppression during seasonal care?
Mulch in fall after plants have finished actively growing and the soil has cooled, ideally in a dry spell. This timing helps with moisture retention and weed suppression through the season’s change. Avoid mulching on very wet or muddy days; wait for a window with calm weather and an edge-free bed. A timely fall mulch gives your front yard a tidy, professional look and supports seasonal care into spring.
How should I prep front garden beds before applying mulch to ensure a polished, professional finish?
Prep is half the job. Start by clearing weeds and old mulch, trim back edging so the mulch sits flush, and rake the bed smooth. If needed, amend with a thin layer of compost to feed plants. Water the bed lightly before applying mulch so the soil isn’t dusty. Then spread the mulch to the target depth, keeping lines neat and reaching the bed edges for a truly polished finish.
What common mistakes should I avoid when mulching your front yard to maintain a neat, seasonal look?
Avoid piling mulch against stems—leave at least 1 inch clearance and keep mulch away from forming volcanoes around trunks. Don’t guess the depth—too thick (>4 inches) or too thin undermines weed suppression and moisture control. Steer clear of dyed mulch that fades quickly and can stain planting areas. Check irrigation lines and foundations to prevent accidental coverage in the front yard, and choose a color/texture that fits your seasonal care goals.

John Smith is the founder and CEO of Karaoke Machines Guru. He is a karaoke tutor and karaoke enthusiast and has been passionate about karaoke since he was a child. He also writes about karaoke-related tips, guides, and product reviews on this website.
He overlooks the whole website and makes sure that everything is running smoothly. Learn more!