
Let's be completely honest: most people pick outdoor pots based entirely on aesthetics, and that is exactly why their patio plants look half-dead by July. I have spent years running a container garden on a blistering concrete patio, and I have killed more expensive specimen plants than I care to admit simply by putting them in the wrong vessels. A pot is not just a decoration; it is a fully functioning ecosystem that dictates soil temperature, moisture retention, and root respiration.
Choosing the right planter requires balancing your specific regional climate with the biological needs of your plants. This guide bypasses the generic design advice and focuses on the concrete mechanics of pot sizing, material behavior, and non-negotiable drainage setups that keep roots healthy and productive.
Quick Tips Before You Start
Size Up Early
Always buy a pot that leaves at least two to three inches of breathing room around the existing root ball.
Check the Bottom
Never buy a container without a pre-drilled drainage hole unless you have a diamond-tipped drill bit ready.
Weight Matters
Use heavy materials like stone or ceramic for top-heavy plants to prevent tipping during summer storms.
1. Unglazed Terracotta for Root Respiration
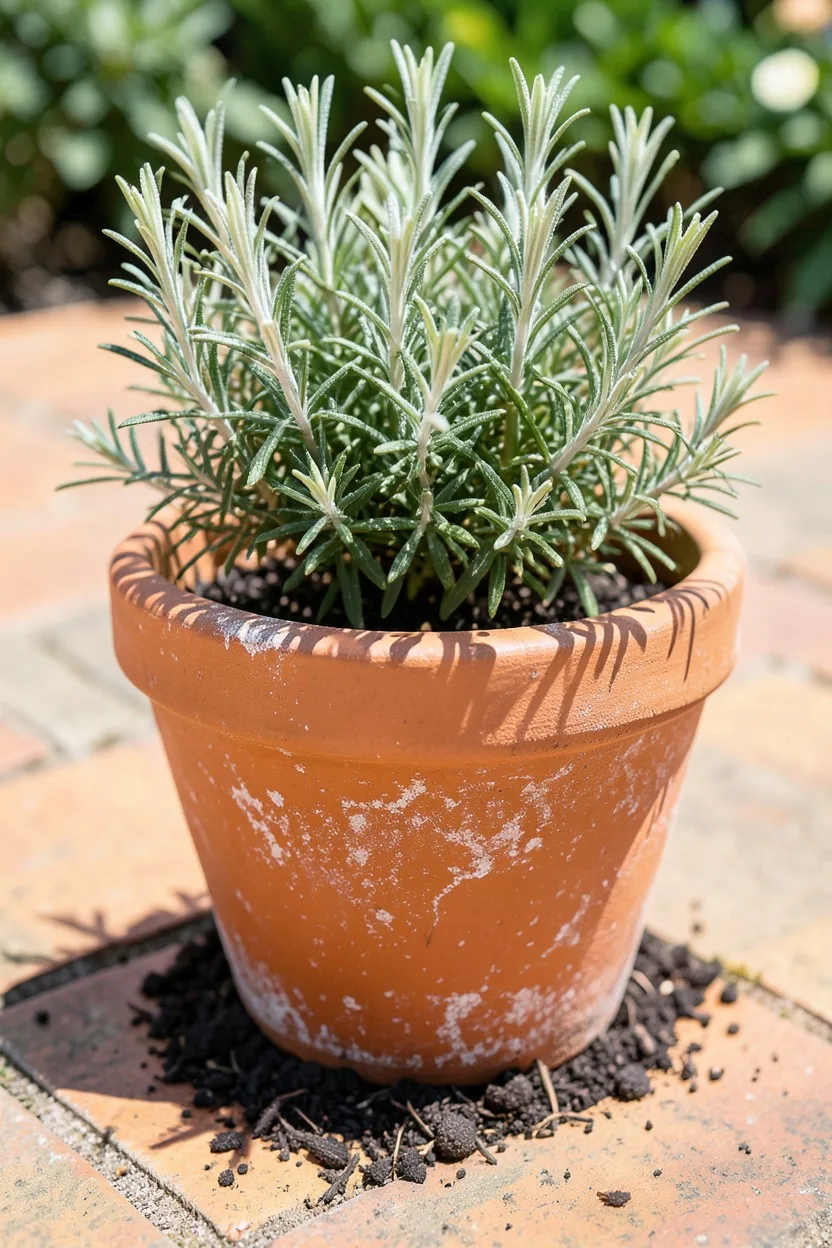
Everyone tells you to buy terracotta because it looks classic, but the real magic is the porous nature of the clay. It literally breathes. This breathability allows oxygen to reach the root zone while letting excess moisture wick out through the sides of the pot. If you tend to overwater your plants, unglazed terracotta is your absolute best insurance policy.
Here is the catch: that constant evaporation means the soil dries out incredibly fast in hot weather. I use Italian unglazed terracotta specifically for drought-tolerant Mediterranean herbs like common thyme, rosemary, and trailing oregano. Avoid using cheap, thin clay pots from big-box stores; they crack during the first winter freeze. Look for thick-walled, pale-orange German or Italian clay instead.
Terracotta Pots — At a Glance
🌡️ Best Climate
Humid / Rainy areas
🌱 Ideal Plants
Herbs, Succulents
⚖️ Weight
Heavy / Sturdy
💧 Moisture Loss
High / Rapid
Superpower
Prevents root rot by allowing water to evaporate through the container walls.
2. Thick Resin Planters for Moisture Retention
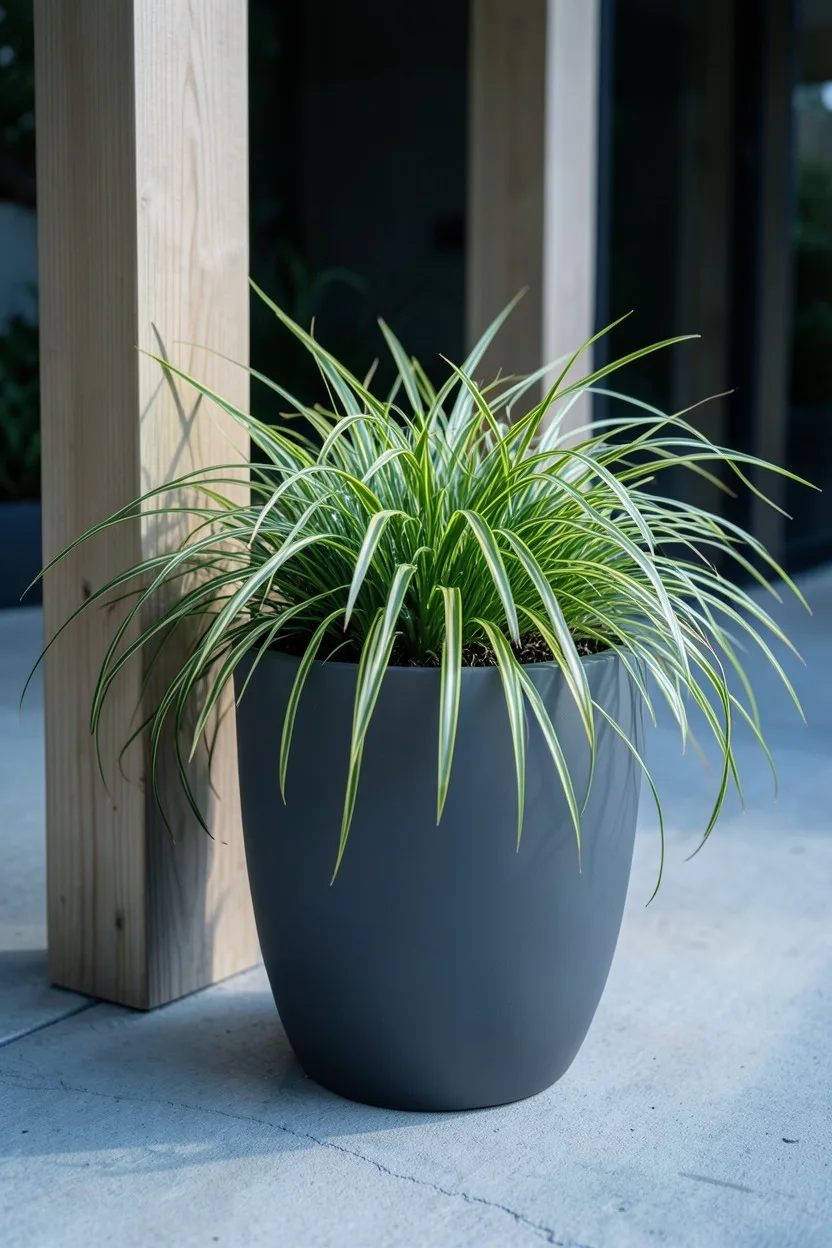
If you are growing moisture-loving plants like Japanese forest grass, hydrangeas, or native ferns, unglazed clay is a death sentence. You need a material that locks moisture in. Heavy-duty injection-molded resin or double-walled plastic is the solution here. These non-porous walls stop evaporation completely, keeping the potting mix consistently damp between waterings.
Do not buy the paper-thin plastic nursery pots that degrade under UV light within six months. Choose high-density polyethylene (HDPE) or resin planters from brands like Veradek or Mayne. They mimic the look of stone or heavy wood but weigh a fraction of the amount, making them easy to move when you need to adjust your patio layout.
3. Glazed Ceramic Pots for Cold Climates
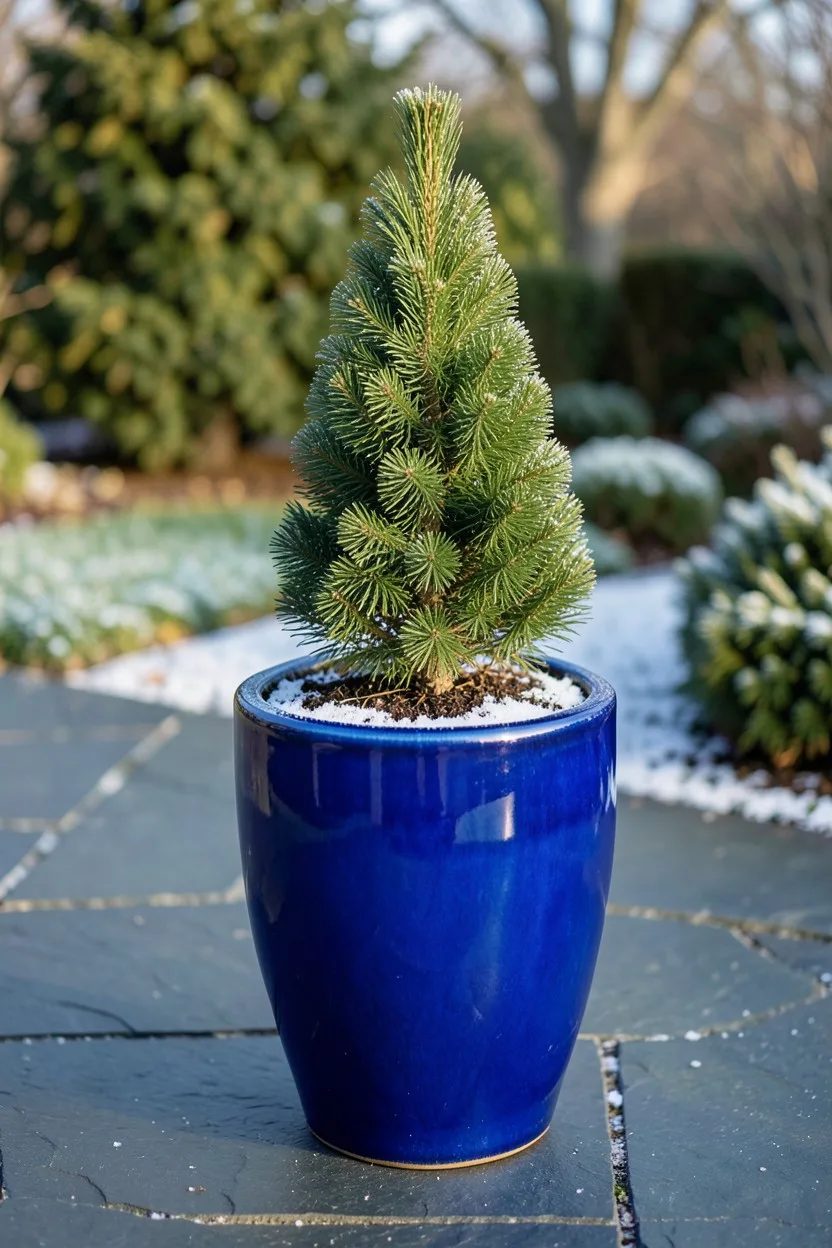
Glazed ceramic combines the weight and insulation of clay with the moisture retention of plastic. The exterior glaze seals the outer surface, preventing water from escaping through the walls. This makes them fantastic for high-wind areas where light pots blow over instantly, and for holding thirstier structural plants like dwarf conifers or canna lilies.
You must check the frost-rating before leaving these outside all winter. Standard ceramic pots absorb water through their unglazed bottom rims; when that water freezes, the pot shatters. Look specifically for pots labeled frost-proof or high-fired ceramic. These are baked at much higher temperatures, making the clay completely vitrified and impervious to frost damage.
⚠️ COMMON MISTAKE
The Fake Drainage Layer Disaster
Stop putting gravel, packing peanuts, or broken pot shards in the bottom of your containers. Science shows this raises the perched water table inside the pot, forcing water closer to the roots and causing the exact rot you are trying to avoid. Fill the entire pot with uniform potting soil.
4. Fabric Grow Bags for Air Pruning
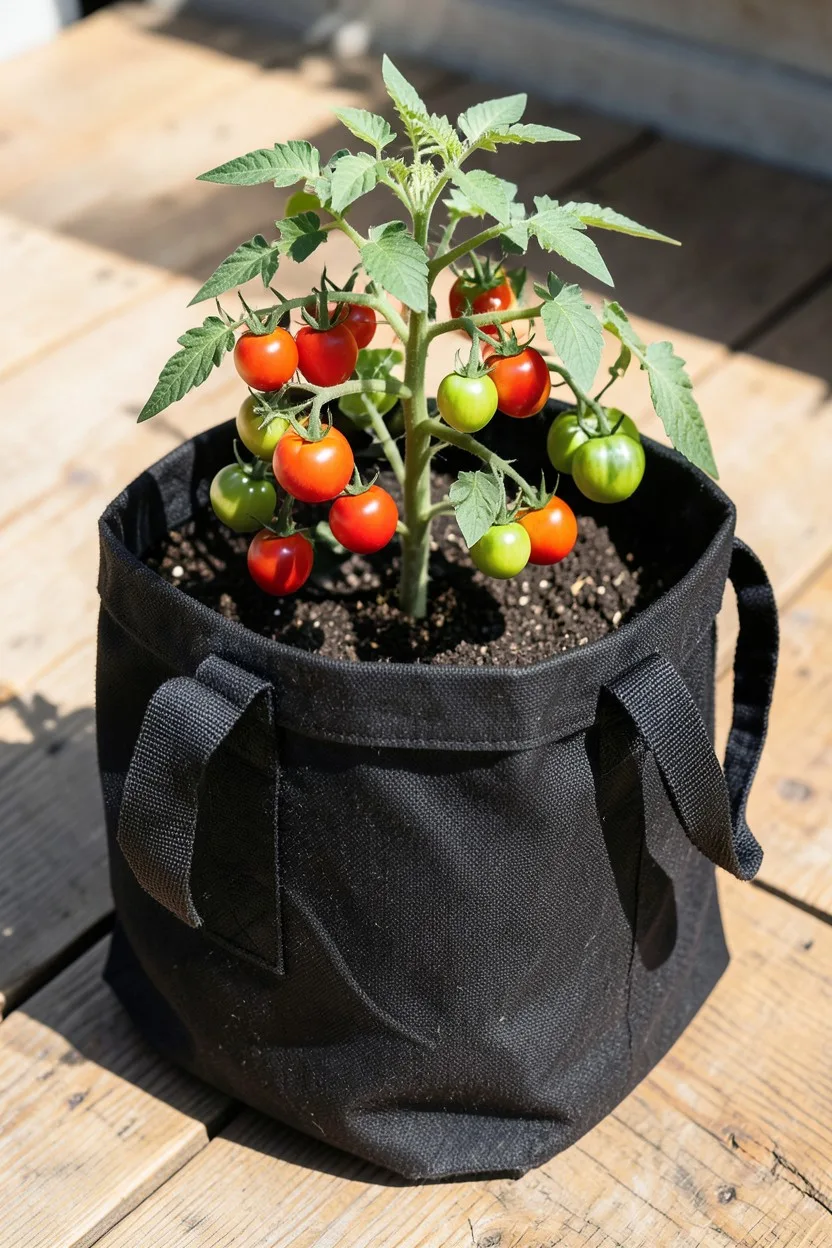
Traditional hard-sided pots cause roots to circle the perimeter, eventually choking the plant out. Fabric grow bags completely fix this issue. When a root reaches the breathable fabric edge, it meets air and stops growing. This process, called air pruning, forces the plant to continuously generate a highly branched, fibrous root system that absorbs nutrients with extreme efficiency.
I grow all my patio beefsteak tomatoes and fingerling potatoes in 10-gallon or 15-gallon Smart Pots. The black fabric absorbs early spring heat, warming up the root zone weeks faster than in-ground soil. Just be prepared to water them daily during peak August heat because the entire surface area allows evaporation.
5. Concrete Pots for High-Wind Zones
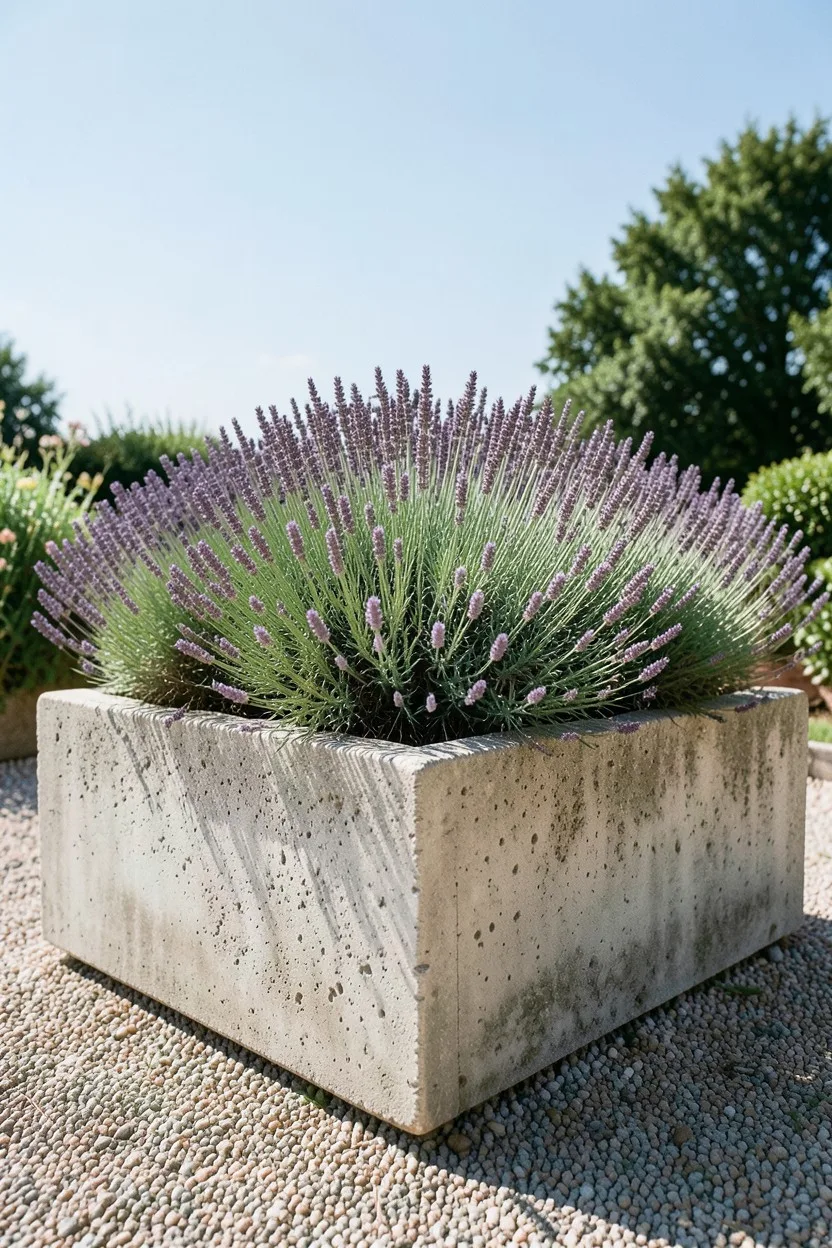
If you live on a high-floor balcony or a windy coastal hillside, lightweight plastic containers will spin across your deck like tumbleweeds. Heavy cast concrete pots stay exactly where you put them. They also possess incredible insulating properties, shielding delicate root structures from wild ambient temperature swings during heatwaves or sudden autumn cold snaps.
The major issue with brand-new concrete is lime leaching. Raw concrete is highly alkaline; when rainwater washes over it, it can raise your soil pH to toxic levels for acid-loving plants. Thoroughly rinse a new concrete planter with a garden hose several times before planting, or stick to alkaline-tolerant specimens like lavender, clematis, or ornamental sages.
Concrete Containers Best For
6. Metal Planters and Heat Management
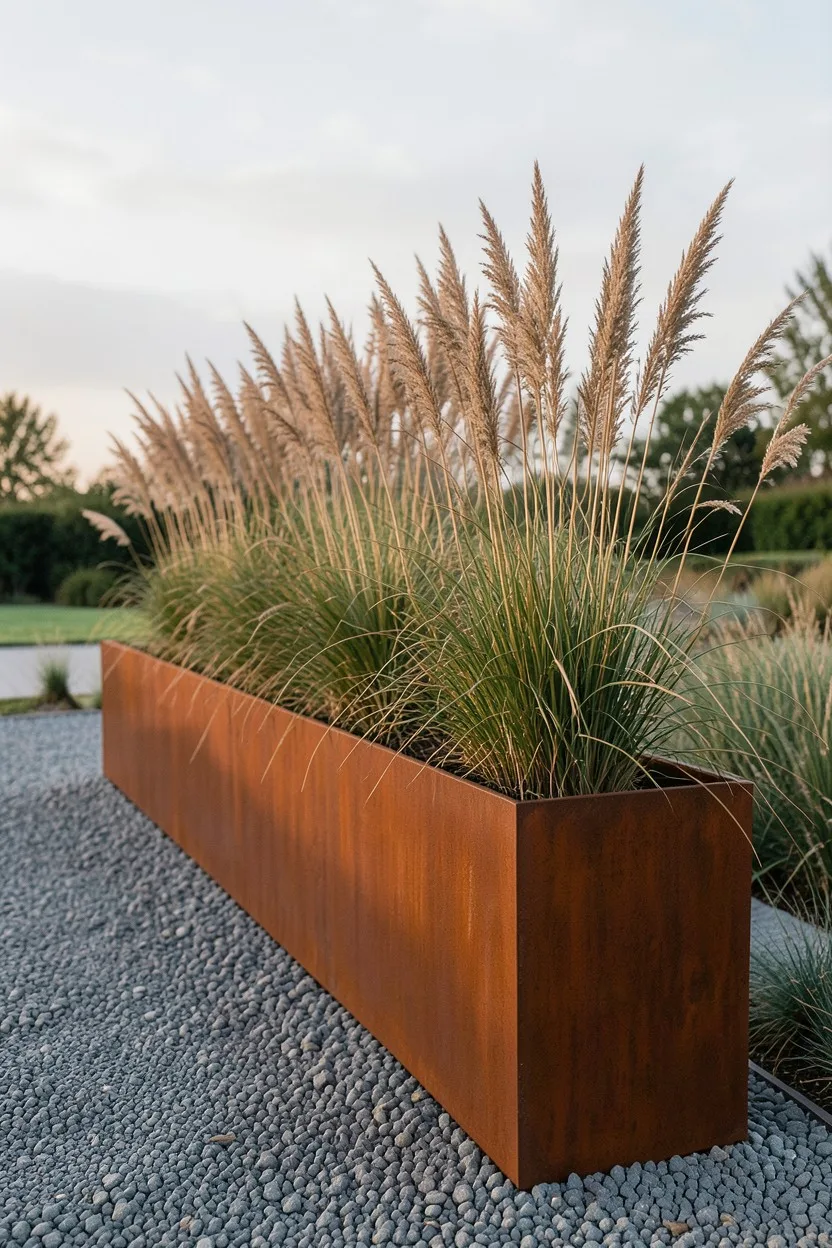
Galvanized stock tanks and corten steel troughs look incredible in modern landscape designs. They are durable, rust-resistant, and won't crack if dropped. However, metal conduct heat with brutal efficiency. If you place a raw steel pot in full afternoon sun in a hot climate like Austin or Phoenix, the soil temperature will soar past 100 degrees, frying the outer roots instantly.
To use metal safely, locate these pots where they get afternoon shade, or line the interior walls with half-inch thick sheets of rigid foam insulation before adding soil. This simple barrier keeps the potting mix cool. Use corten steel for structural ornamental grasses like Karl Foerster feather reed grass, which handles the industrial aesthetic beautifully.
7. The 10-Inch Pot for Single Herbs
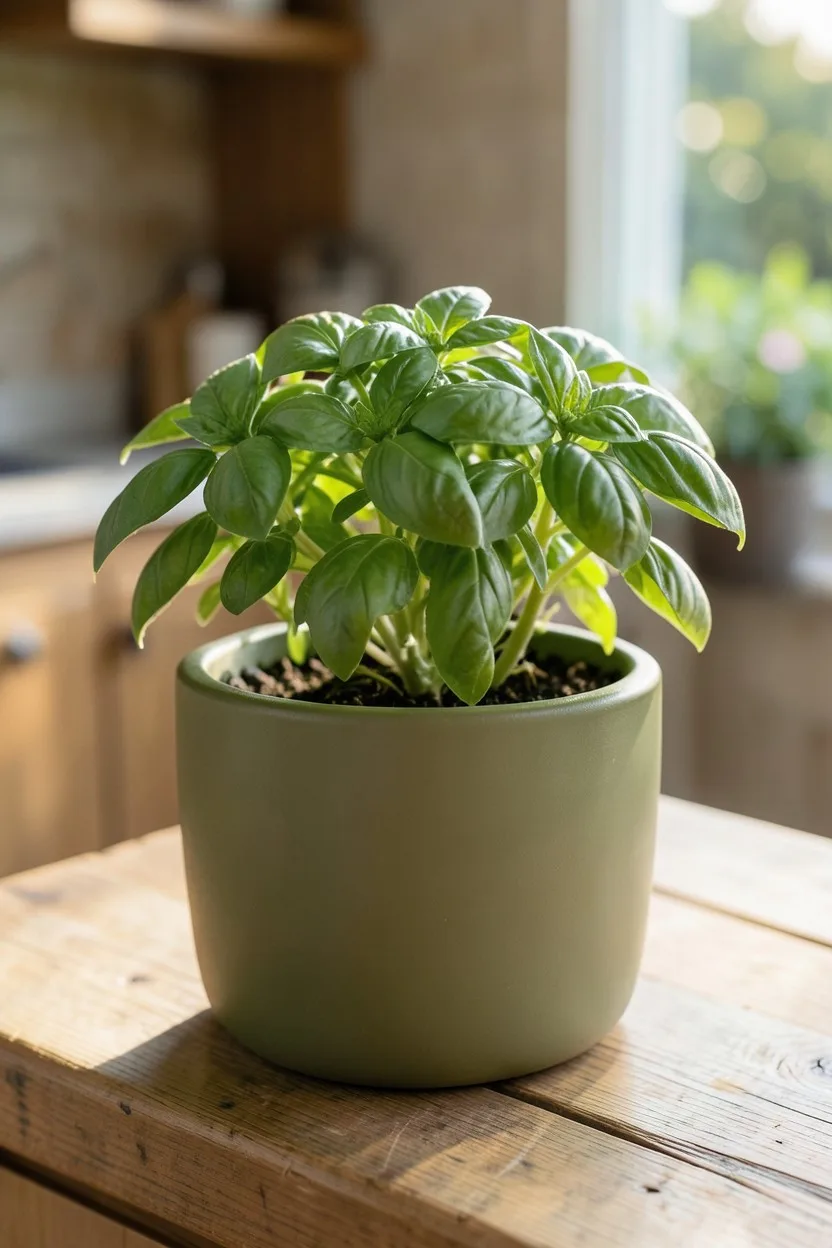
When it comes to sizing, a 10-inch diameter pot is the absolute minimum size for functional outdoor gardening. Anything smaller dries out within hours and stunts root growth instantly. A 10-inch container holds roughly 2.5 gallons of soil mix, providing a stable home for a single productive culinary herb or a tight cluster of annual flowers.
Do not try to crowd multiple plants into this footprint. Dedicate one 10-inch pot to a single Genovese basil plant, a single trailing nasturtium, or a small grouping of French marigolds. It provides just enough volume to keep the root mass cool through mid-summer without requiring you to water twice a day.
8. The 14-Inch Pot for Patio Peppers
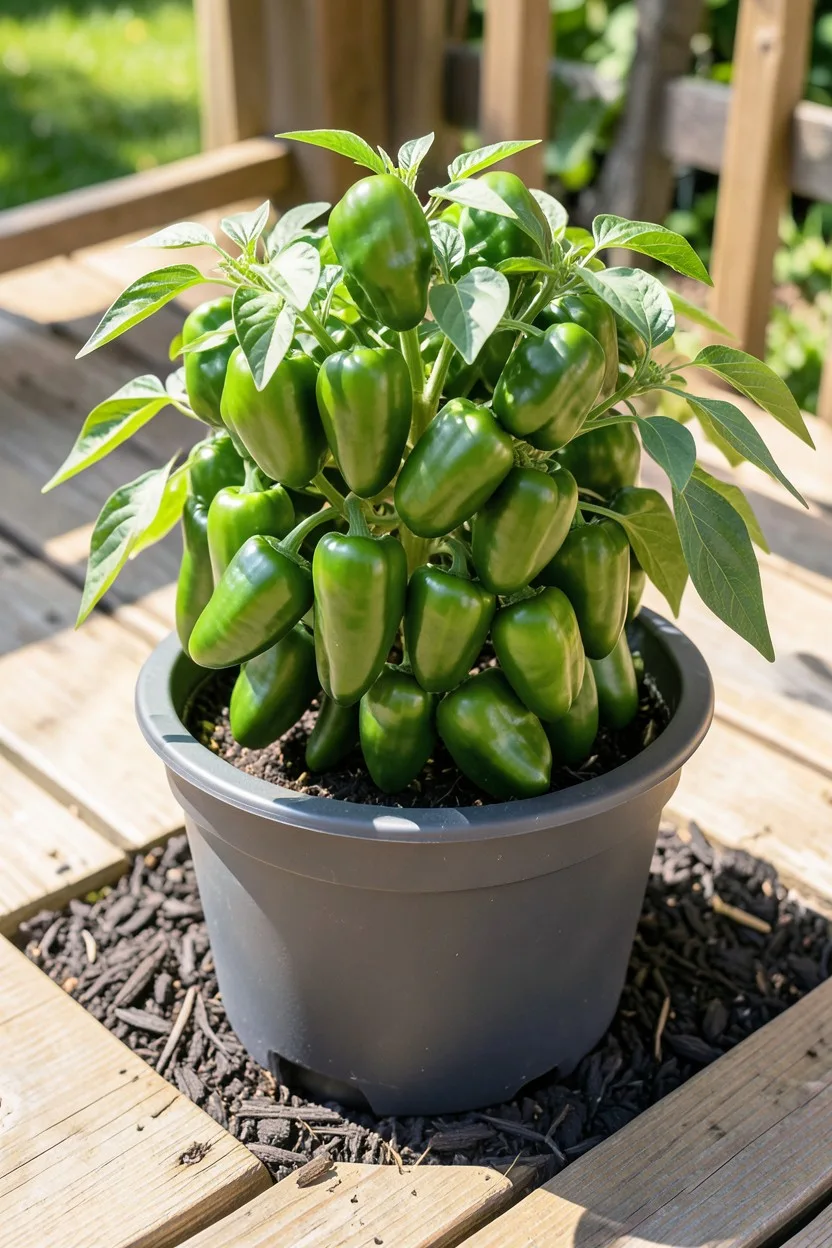
A 14-inch container is the true sweet spot for small-scale vegetable gardening. Holding approximately 5 to 6 gallons of soil, this volume gives deep-rooted crops the structural support they need to produce heavy yields without tipping over when fully loaded with fruit.
This is the exact size you need for growing productive bell peppers, hot jalapeños, or eggplant varieties like Fairy Tale. It also works brilliantly for a dense herb collection—you can easily plant parsley, chives, and thyme together in one 14-inch bowl without them competing for root space. Choose a deep model rather than a shallow bowl to maximize root depth.
🌱 GROWING TIP
Match Soil to Pot Material
Adjust your soil mix based on your container type. If you are using non-porous plastic or resin, add 20% more coarse perlite or pumice to the standard potting mix to improve drainage. For porous terracotta, add extra compost or vermiculite to help hold moisture.
9. The 20-Inch Pot for Heavy Feeders

When you move up to a 20-inch planter, you are managing roughly 15 to 20 gallons of soil. This massive volume creates a highly stable environment that mimics in-ground growing conditions, buffering the plants against dry spells and intense heatwaves. It is a heavy setup, so position the empty pot exactly where you want it before adding soil.
This is the non-negotiable size for full-sized indeterminate tomatoes, dwarf fruit trees like a Calamondin orange, or large structural shrubs like a compact panicle hydrangea. The immense root mass needs this specific volume to support heavy foliage and constant fruit production throughout the entire season.
10. Self-Watering Sub-Irrigated Planters
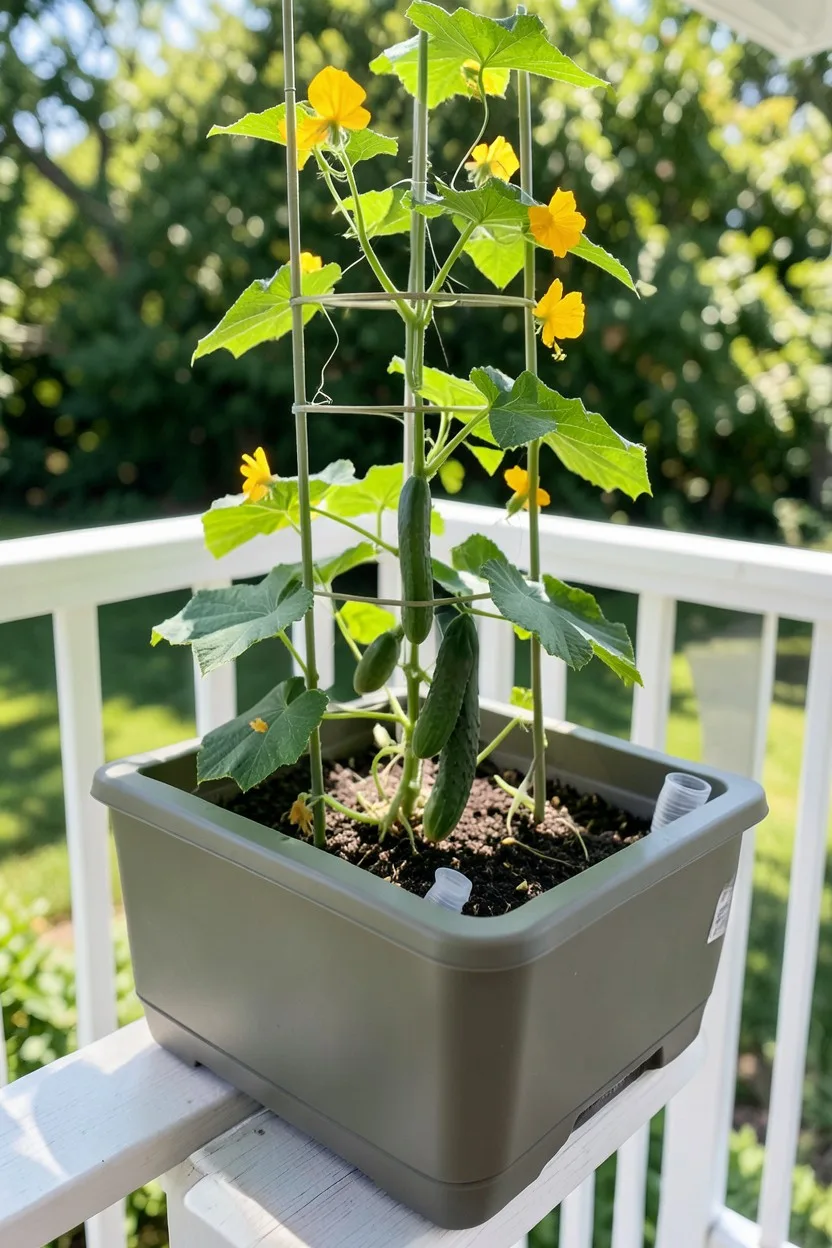
If you travel frequently or work long hours, standard pots will fail you. Sub-irrigated planters (SIPs) feature a built-in water reservoir underneath the soil column. The water wicks upward into the root zone via capillary action, delivering a constant, predictable level of moisture without ever waterlogging the upper roots.
Brands like EarthBox or Lechuza are excellent choices here. They completely eliminate the guesswork of watering. Use them for heavy drinkers like cucumbers, sweet potatoes, or continuous-blooming annual displays. Ensure you only fill the reservoir through the dedicated fill tube; pouring water directly onto the soil defeats the design entirely.
11. Modifying Pots with Custom Drainage Holes
Many beautiful decorative planters are sold with no drainage holes, or with just a tiny single punch-out plug that is wholly inadequate. Do not trust them. You must modify these pots yourself to protect your plants from root rot. A standard drill with the correct bit makes this an easy five-minute project.
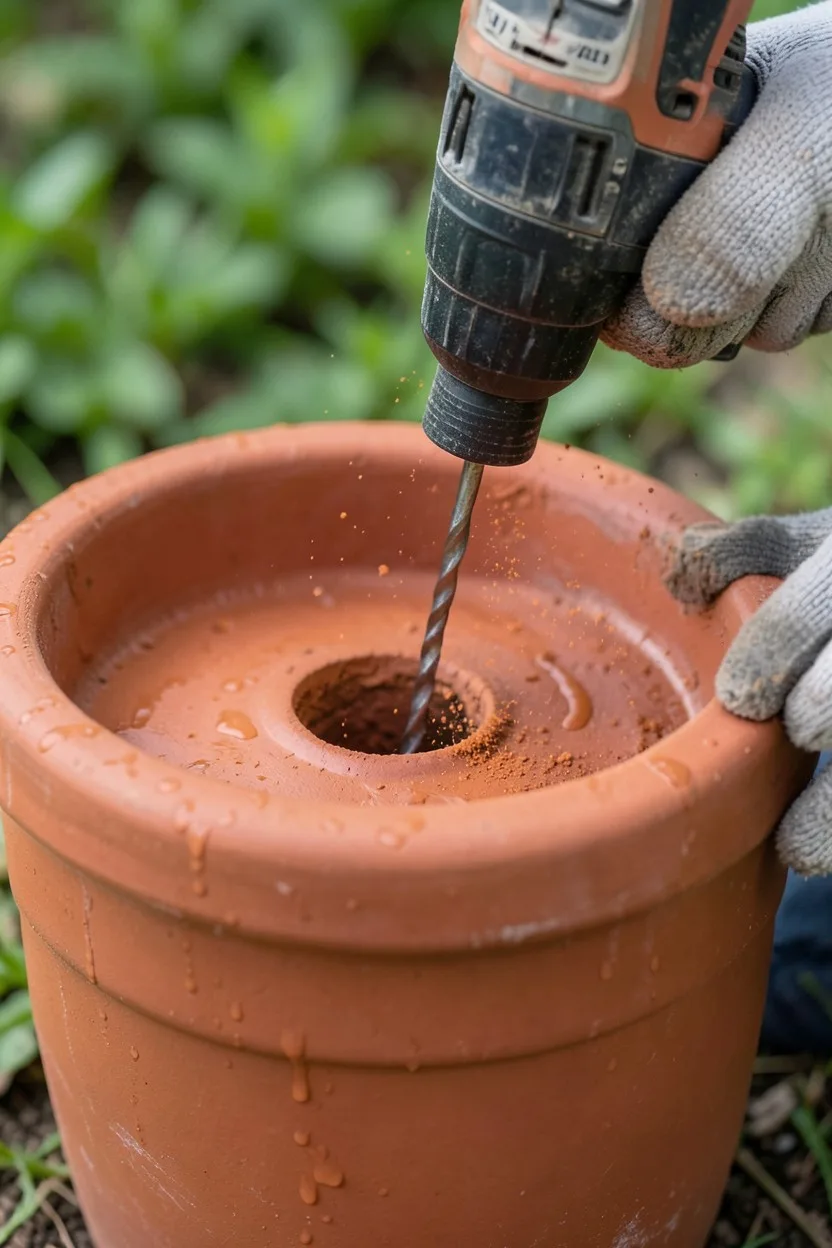
For ceramic, stone, or terracotta pots, buy a diamond-tipped masonry hole saw bit and drill at a slow speed while keeping the surface wet with cold water to prevent cracking. For plastic, resin, or wood, a standard titanium twist bit works perfectly. Aim for at least one half-inch drainage hole for every six inches of pot diameter.
⚙️ How to Properly Drill Pot Drainage
Select the Bit
Choose a diamond-tipped masonry bit for ceramic or a titanium twist bit for plastic containers.
Wet the Surface
Pour a small amount of cold water over the drilling zone to lubricate the bit and cool the clay.
Drill at Slow Speed
Apply light, steady downward pressure while running the drill at a low RPM to prevent cracking.
Clear the Dust
Rinse away the residual clay paste or plastic shavings to verify the clean edge of the hole.
12. Elevating Pots for Air Drainage
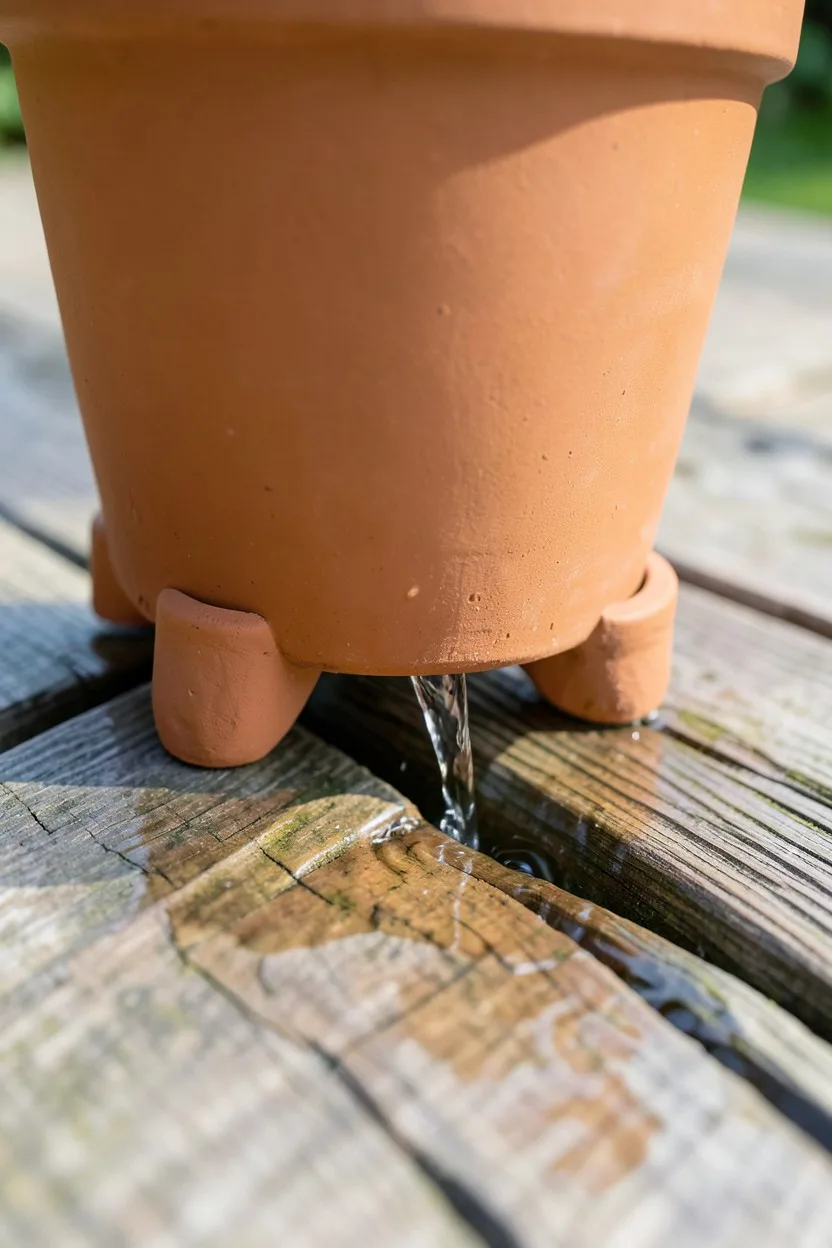
Even if your pot has great drainage holes, setting it completely flat on a smooth wooden deck or concrete patio creates a tight seal that traps water underneath. The water cannot escape the container, causing the bottom two inches of soil to become a stagnant, oxygen-deprived bog.
Elevate every single pot using ceramic pot feet, heavy-duty rubber risers, or dedicated rolling plant dollies. Elevating the pot just half an inch clears the exit hole, allows water to flow away freely, and prevents ugly water stains on your patio surface. It also prevents destructive pests like slugs and pillbugs from nesting underneath the container.
13. Wooden Planter Boxes for Traditional Style
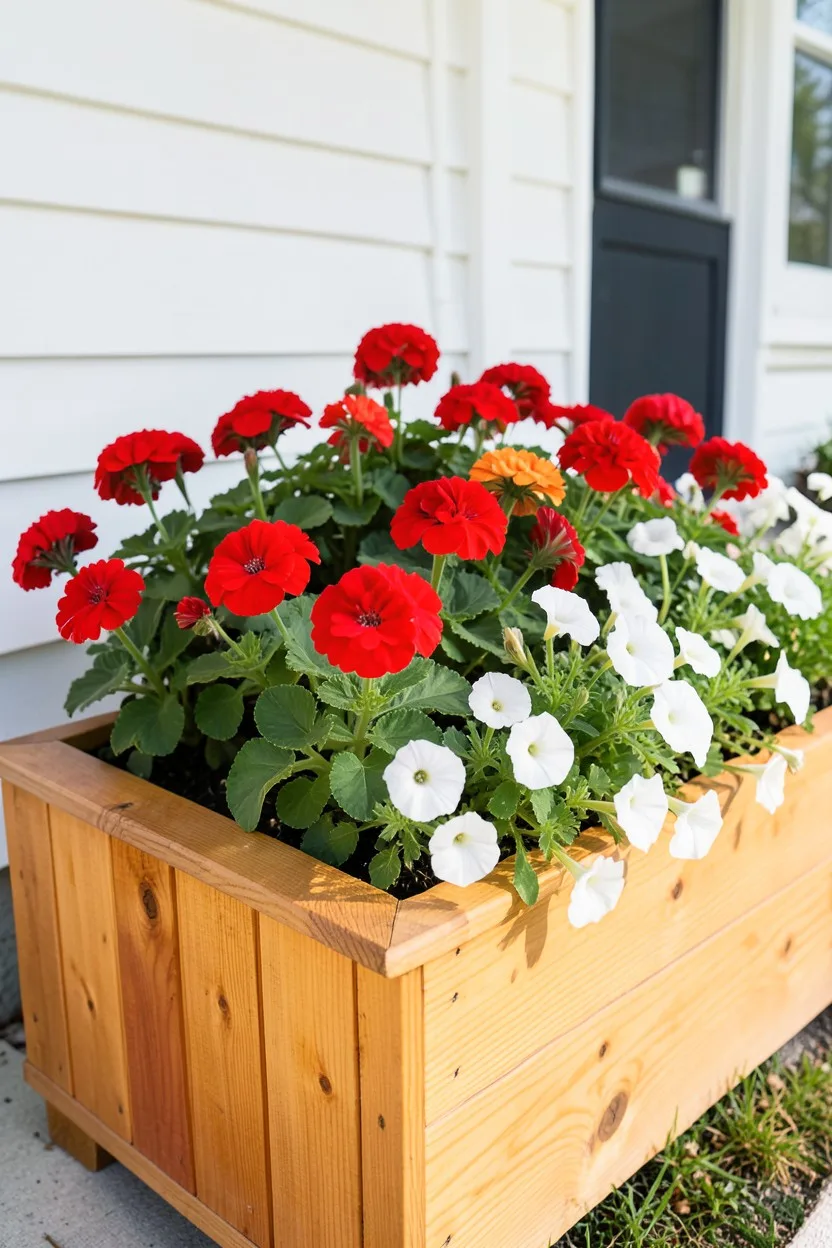
Cedar and redwood planter boxes offer superb natural insulation for plant roots, keeping soil cool in summer and warm in winter. The wood is naturally rot-resistant and ages to a beautiful silver-gray patina over time. They look spectacular in traditional cottage gardens or lining a formal front porch entry.
Never use cheap, chemically treated pallet wood for edible crops; those preservatives leach directly into your soil. Stick to untreated western red cedar. To maximize the life of a wooden planter, line the interior with heavy-duty plastic landscape fabric before planting to keep wet soil from touching the wood continuously, but ensure you cut matching slits in the fabric where the bottom drainage slots are located.
14. Using Mesh Screens Over Drainage Holes
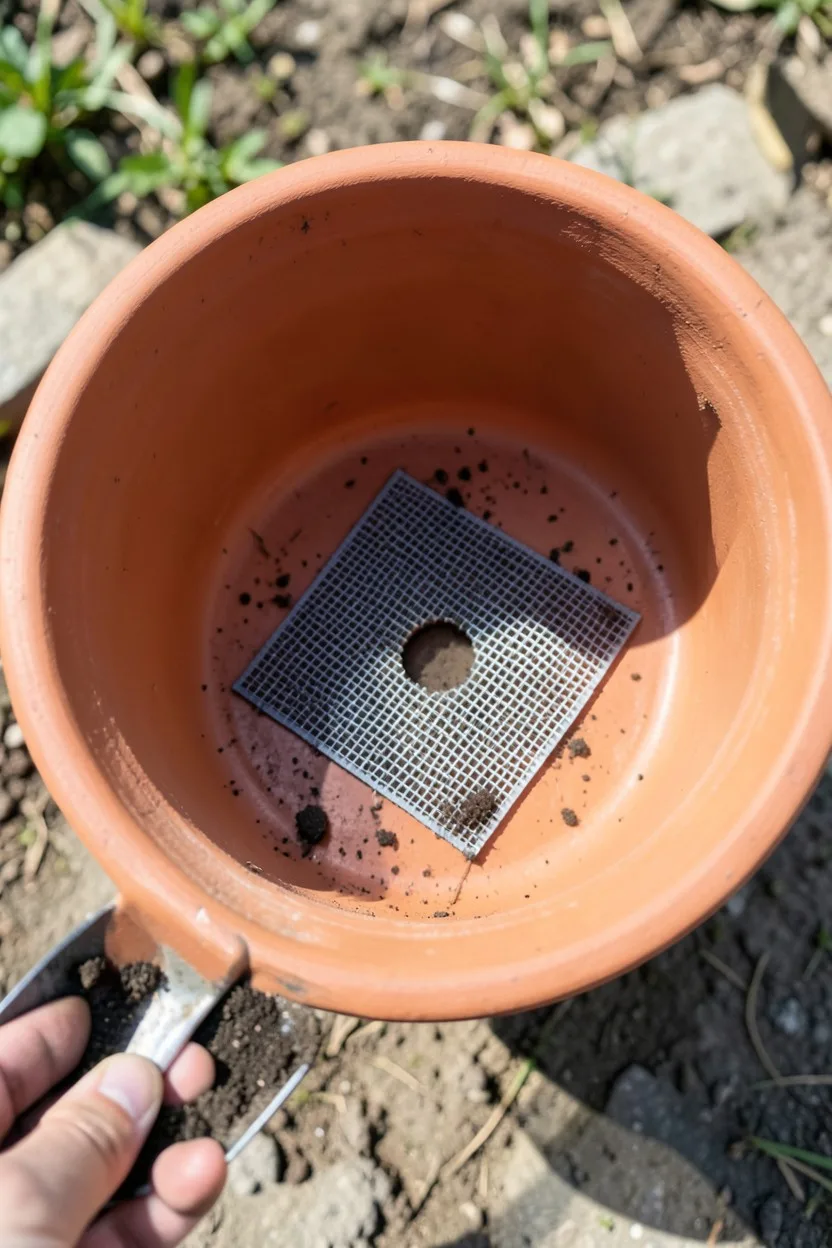
Once you have large drainage holes, the next issue is losing your expensive potting soil every time you water. Soil washes out the bottom, leaving hollow pockets inside the container and creating a muddy mess across your patio floors. The solution is simple and incredibly cheap.
Cut a small two-inch square of plastic window screening or drywall joint tape and lay it directly over the drainage hole before filling the pot with soil. The mesh allows water to flow out instantly while holding every grain of potting mix inside. Do not use landscape fabric for this; it eventually clogs with fine particles and seals the hole completely shut.
15. Double-Potting for Aesthetic Versatility
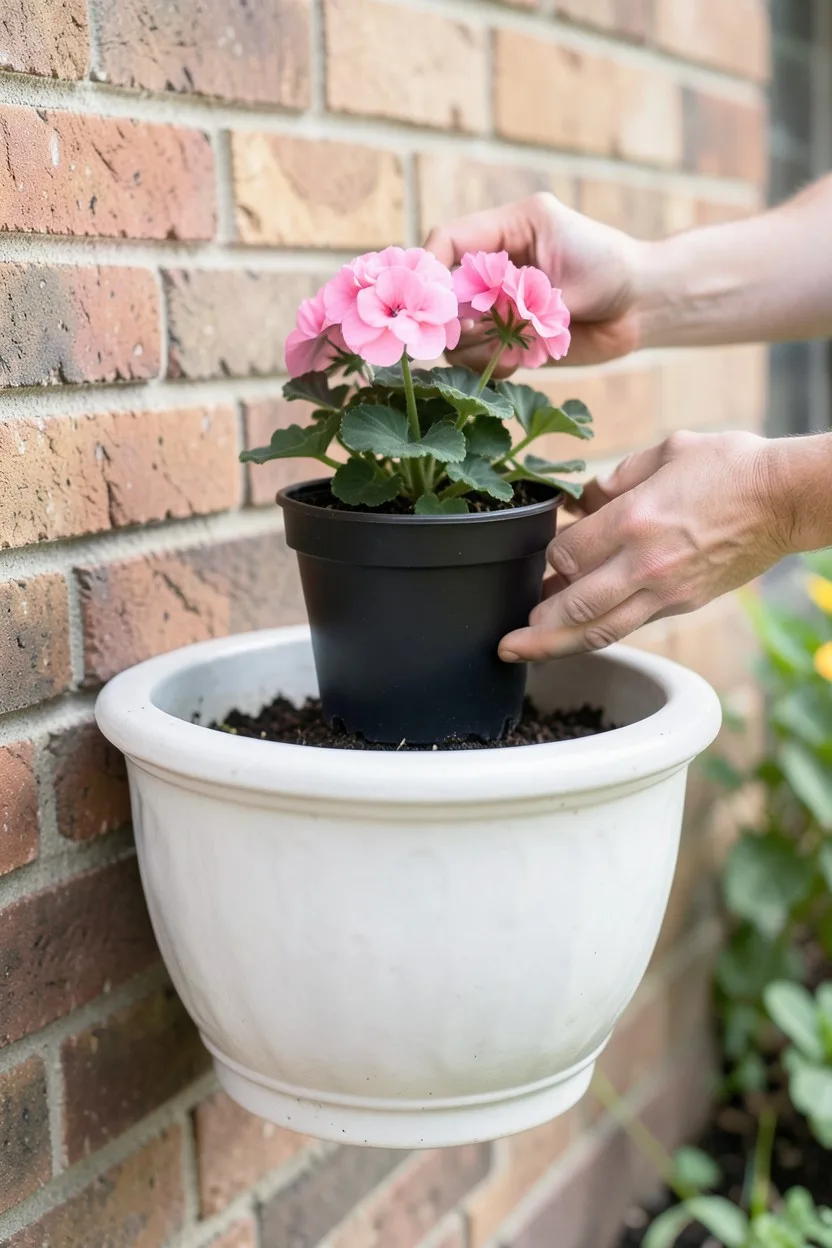
Double-potting, or the 'cachepot' system, is an elite design technique that saves endless maintenance time. Instead of planting directly into a massive, heavy decorative planter, leave your plant inside its standard plastic nursery pot. Slip that plastic pot directly inside the larger, beautiful decorative outer vessel.
This configuration offers huge benefits. The air gap between the two pots acts as a thermal barrier, protecting roots from extreme heat. It also makes changing your seasonal displays remarkably easy. When your spring bulbs fade, simply lift the plastic liner out and drop a fresh pot of summer zinnias right into the same decorative container without digging up a thing.
Pot Selection Strategy
Porative Clay & Fabric
- Maximum oxygen flow to root structures
- Prevents soil waterlogging and rot
- Ideal for drought-tolerant crops
- Heavy weight prevents wind tipping
Non-Porous Resin & Plastic
- Locks in moisture for thirsty varieties
- Lightweight and easy to move around
- Will not shatter during hard winter freezes
- Requires extra perlite for air flow
Frequently Asked Questions
Can I reuse potting soil in my containers next year?
Never reuse old potting soil directly for heavy feeders like tomatoes or peppers. It becomes compacted, loses its structure, and can harbor overwintering diseases. Empty the old soil into your in-ground garden beds and start your outdoor containers with fresh, sterile potting mix every spring.
How do I know if my container plant needs water?
Don't just trust the dry surface soil. Push your index finger two full inches deep into the potting mix. If it feels dry at that depth, water the container thoroughly until liquid flows freely out of the bottom drainage holes.
Do black pots get too hot in the sun?
Yes, solid black plastic or metal containers in full sun can heat up past 105°F, which cooks delicate feeder roots. If you use black containers, position them where they receive afternoon shade, or paint the exterior walls a lighter color to reflect intense sunlight.
What happens if a pot doesn't have drainage?
Without drainage, excess water pools at the bottom of the container, filling all the tiny air pockets in the soil. This drowns the root system, leading to anaerobic conditions and lethal root rot within days.
Final Thoughts
If you only change one thing about your container setup this season, make it the drainage configuration. Stop settling for containers with single tiny holes, get your pots lifted up onto risers, and select materials that actually match the moisture preferences of your plants. Your patio garden will reward you with stronger growth, richer green foliage, and far less mid-summer wilting.
Upgrade Your Pots Today
Grab a diamond masonry bit or a pack of heavy-duty pot risers to completely transform your container health before summer hits.

John Smith is the founder and CEO of Karaoke Machines Guru. He is a karaoke tutor and karaoke enthusiast and has been passionate about karaoke since he was a child. He also writes about karaoke-related tips, guides, and product reviews on this website.
He overlooks the whole website and makes sure that everything is running smoothly. Learn more!