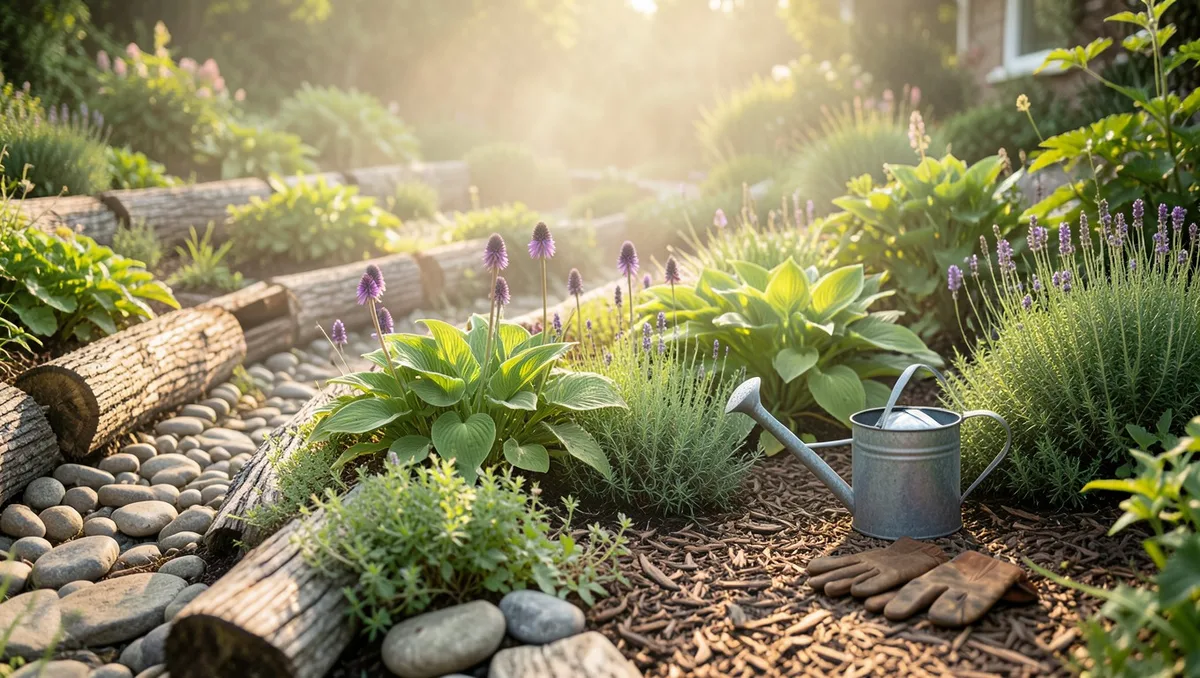
Every single year, homeowners hand over thousands of dollars to garden centers for premium mulch, pristine stone borders, and nursery-grown plants. Meanwhile, back behind their garages and at the edges of their driveways, the exact same materials are sitting in the dirt for free. I spent years buying into the myth that a beautiful landscape requires a heavy credit card lift, until a massive storm dropped an oak tree on my property and forced me to get creative with logs, branches, and leaf litter. That accidental budget experiment changed how I view my entire yard.
This is not about making your yard look like a junkyard; it is about using the natural assets your property already produces to create a clean, intentional, and high-functioning landscape. We are talking about turning cardboard boxes into pristine weed barriers, reshaping lawn edges with nothing but a sharp spade, and propogating a single store-bought perennial into a dozen free plants. Grab your work gloves and stop spending money on things your yard is already giving you for free.
Quick Tips Before You Start
Audit Your Yard
Walk your property lines to hunt for buried rocks, fallen limbs, and hidden pockets of leaf mold before buying anything.
Save All Cardboard
Strip off any plastic packing tape and glossy labels from shipping boxes to build up your weed-smothering cache.
Sanitize Your Tools
Wipe your pruners down with rubbing alcohol before taking any cuttings to prevent spreading diseases between plants.
1. The Victorian Spade-Cut Lawn Edge
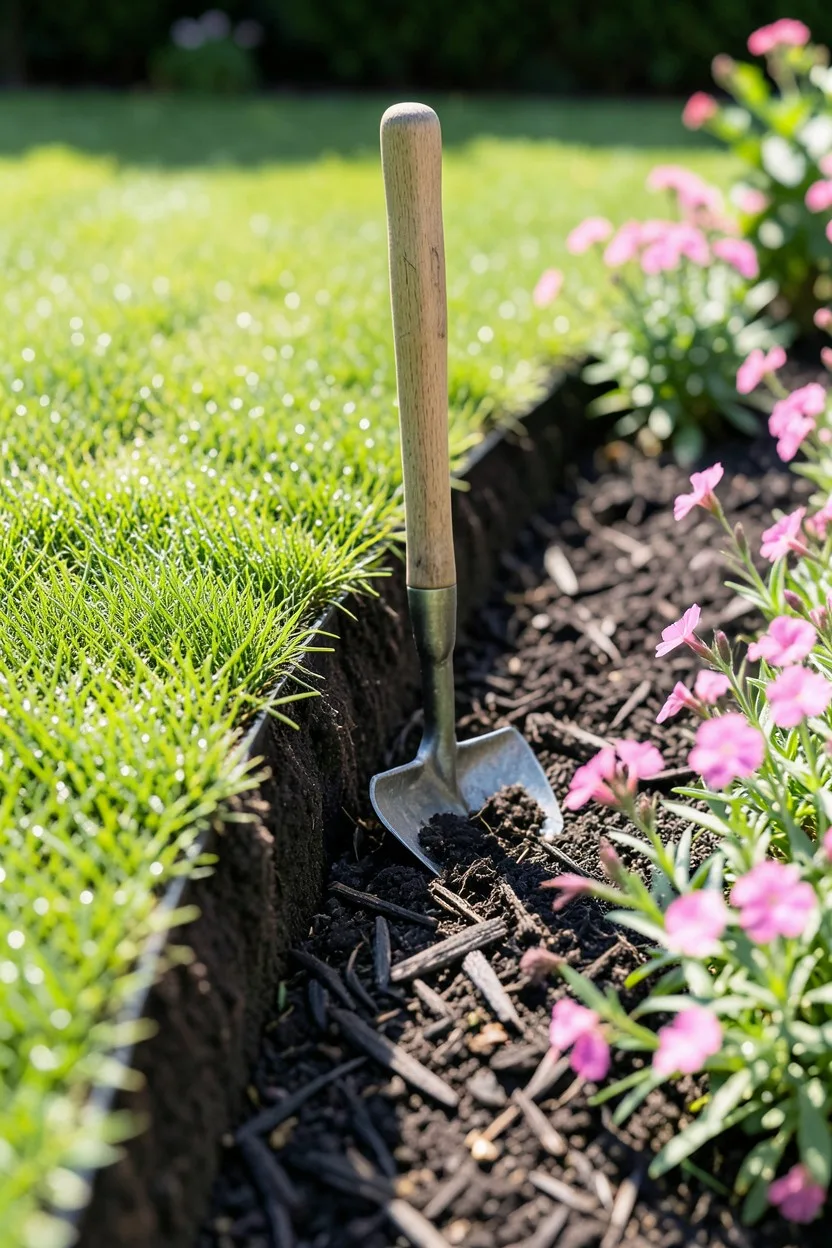
Everyone tells you to run to the home improvement center for plastic strip edging or concrete pavers. Honestly? Those plastic strips warp in the sun, heave out of the frozen ground in winter, and look cheap within a year. Instead, look at how old English estates manage their turf lines. They use a completely free technique called the spade cut, which relies entirely on physics and a sharp tool.
Take a standard flat-edged transfer shovel or a traditional half-moon edger. Plunge the blade vertically four inches deep straight down into the turf along your bed line, then make a second angled cut at forty-five degrees from inside the garden bed to meet the bottom of your first cut. Pull out the wedge-shaped ribbon of sod and toss it into your compost pile. You are left with a clean, sharp, professional trench that completely stops grass roots from creeping into your flower beds.
Maintain this edge twice a year—once in spring and once in late autumn. The deep shadow line creates a visual boundary that tricks the eye into seeing a highly manicured landscape, and it costs absolutely nothing but twenty minutes of muscle.
2. Inverted Wine Bottle Garden Borders
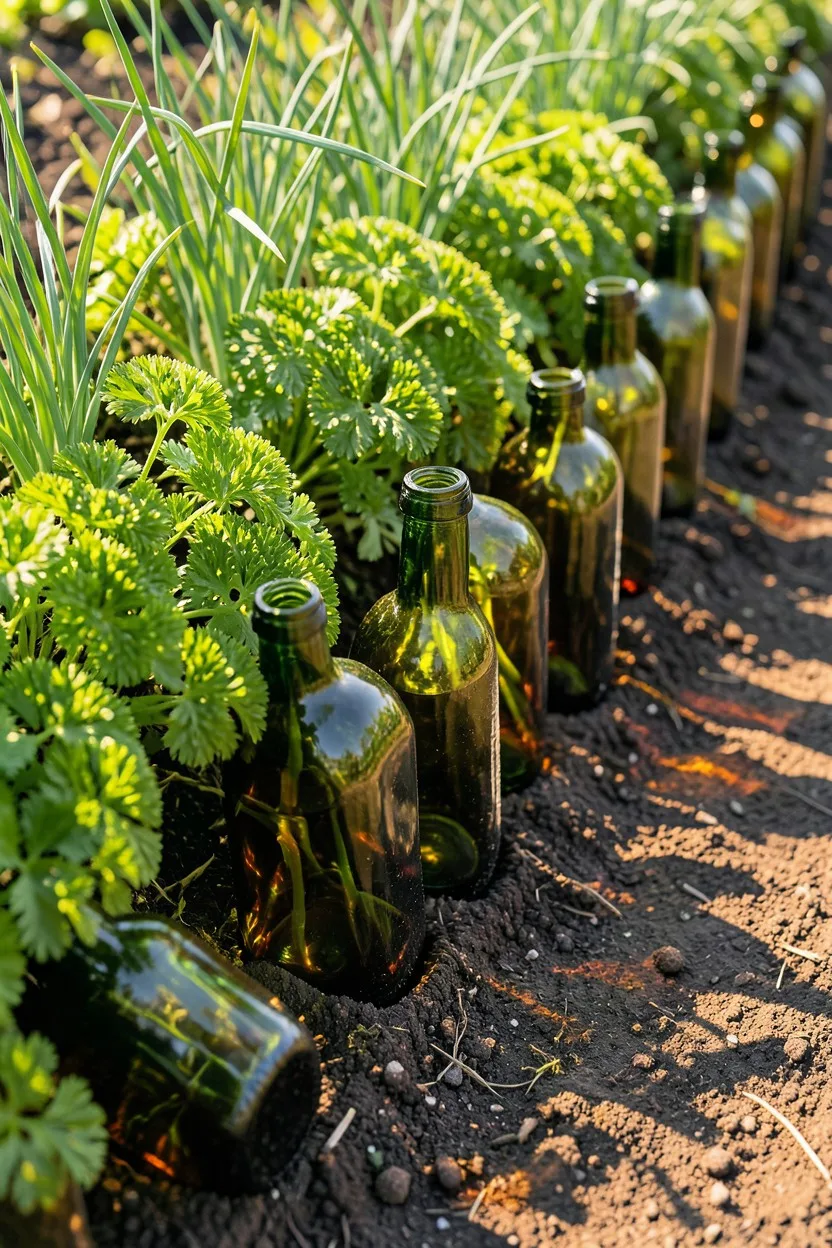
You know what nobody tells you about building stone borders? Unless you have a natural quarry on your property, buying uniform landscape stone gets incredibly expensive, and plastic alternatives look terrible. If you want a quirky, durable, and highly functional border for a kitchen garden or herb bed, start saving your glass wine or beer bottles.
Dig a narrow trench six inches deep along your garden bed. Insert the bottles upside down, neck first, packing the soil tightly around them as you go. Line them up shoulder-to-shoulder so they wedge against one another. When you finish, you have a uniform, rot-proof border that sits roughly four to five inches above the soil line.
Green and brown glass bottles look incredibly grounding when the sun catches them, mimicking premium glass mosaic details. They hold back the soil perfectly, prevent soil erosion during heavy thunderstorms, and survive winter freezes without cracking as long as you bury them deep enough to resist frost heaving.
3. Sheet Mulching with Free Cardboard Boxes
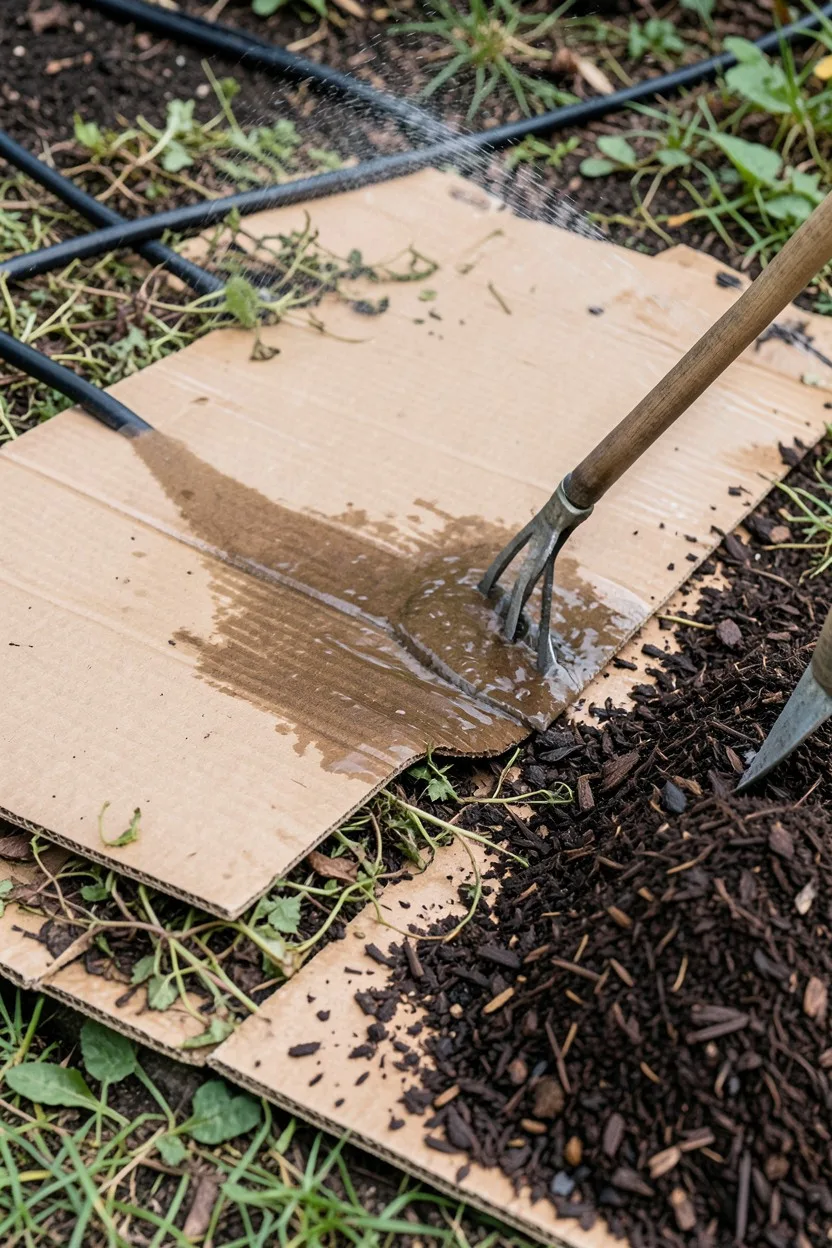
Stop buying rolls of plastic landscape fabric. It is a massive mistake. Weed seeds simply land on top of the mulch, grow their roots straight through the plastic mesh, and become almost impossible to pull out without tearing up the entire system. Plus, it suffocates the earthworms and beneficial microbes beneath your feet.
Collect every shipping box that arrives at your house. Strip off the plastic packing tape and shiny shipping labels, then lay the plain corrugated cardboard directly over your existing weeds or lawn where you want to build a new garden bed. Overlap the edges by at least six inches so stubborn weeds like dandelions cannot find a seam of light.
Wet the cardboard down thoroughly with a garden hose until it is completely saturated and pliable, then cover it with three inches of leaves, grass clippings, or wood chips. Within a single growing season, the cardboard smothers the grass below, breaks down into rich organic matter, and invites earthworms to loosen your soil for free.
⚠️ COMMON MISTAKE
Skip Glossy or Waxed Cardboard
Never use glossy, brightly inked, or wax-coated cereal and appliance boxes for sheet mulching. These coatings contain synthetic polymers and heavy metals that will leach into your soil and harm your earthworms.
4. Tree Limb Hugelkultur Raised Mounds
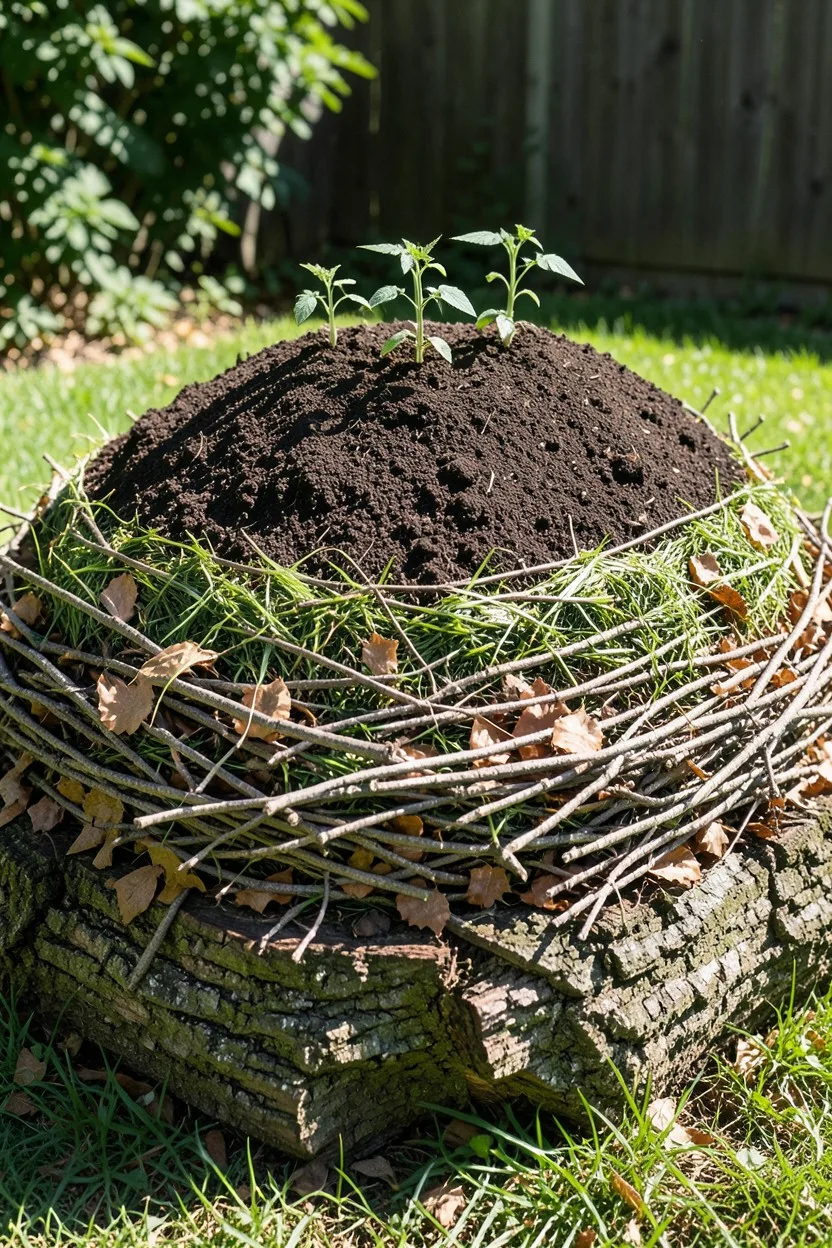
If you have fallen branches, rotting logs, or pruned limbs from your backyard trees, do not haul them to the curb for the city to take away. You are throwing away an exceptional moisture sponge. Hugelkultur is a centuries-old German gardening method where you build a growing bed directly on top of rotting wood.
Stack your thickest logs on the ground in a three-foot-wide rectangle, then layer smaller branches on top, followed by a thick layer of autumn leaves or lawn clippings. Pack the gaps with whatever garden soil you have on hand. Finish the mound with a two-inch layer of finished compost or topsoil, shaping it into a long, rounded hill about two feet high.
As the buried logs slowly decay over the next decade, they act like an underground sponge, storing rainwater and releasing it slowly to your plants from below. I built one of these mounds during a dry summer in Nashville, and my squash plants grew beautifully without a single drop of supplemental water from my garden hose.
5. Woven Twig and Branch Wattle Edging
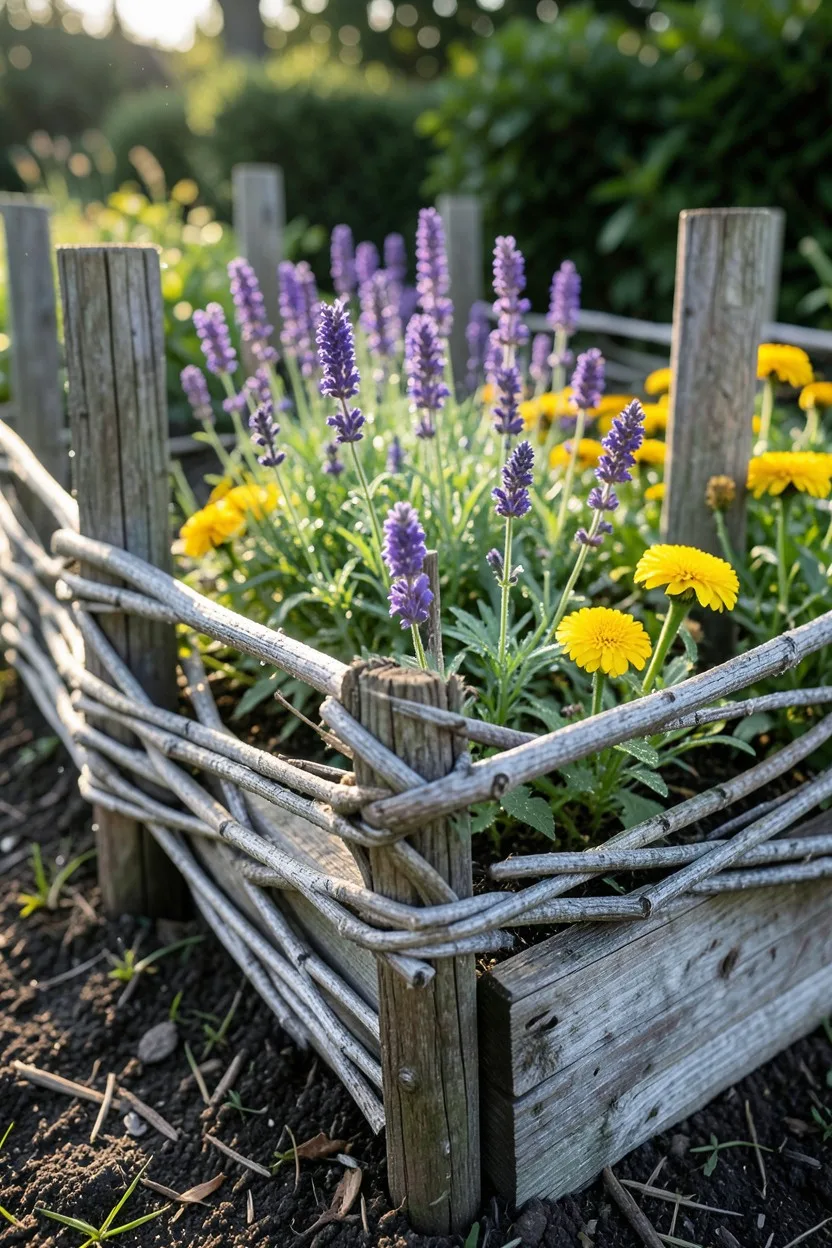
When you prune your fruit trees, willows, or dogwoods in the early spring, you are left with bundles of flexible, whip-like branches. Do not throw them in the brush pile. You can weave them into traditional wattle fencing to create gorgeous, rustic retaining borders for your raised beds.
Drive thick, straight tree branches roughly two inches wide into the ground every twelve inches along your bed line to serve as support stakes. Take your long, flexible trimmings and weave them horizontally in and out of the stakes, alternating sides with each new layer. Push the woven branches down firmly as you go to eliminate gaps.
This creating a sturdy, natural wall that holds back soil and gives your garden an instant English cottage aesthetic. It will eventually break down after three to five years, but by then, you will have a whole new batch of spring prunings ready to replace it for free.
🪵 How to Weave a Wattle Border
Cut Support Stakes
Cut sturdy branches into 18-inch stakes and sharpen the bottoms.
Drive Into Earth
Hammer the stakes 6 inches deep into the soil, spacing them 12 inches apart.
Weave the Base
Take your longest flexible branch and weave it in an over-under pattern through the stakes.
Stack and Pack
Continue weaving upward, alternating the pattern and pushing the branches down firmly.
Trim the Excess
Snip the protruding ends of the woven whips with hand pruners for a clean look.
6. Free Wood Chip Mulch via Arborists
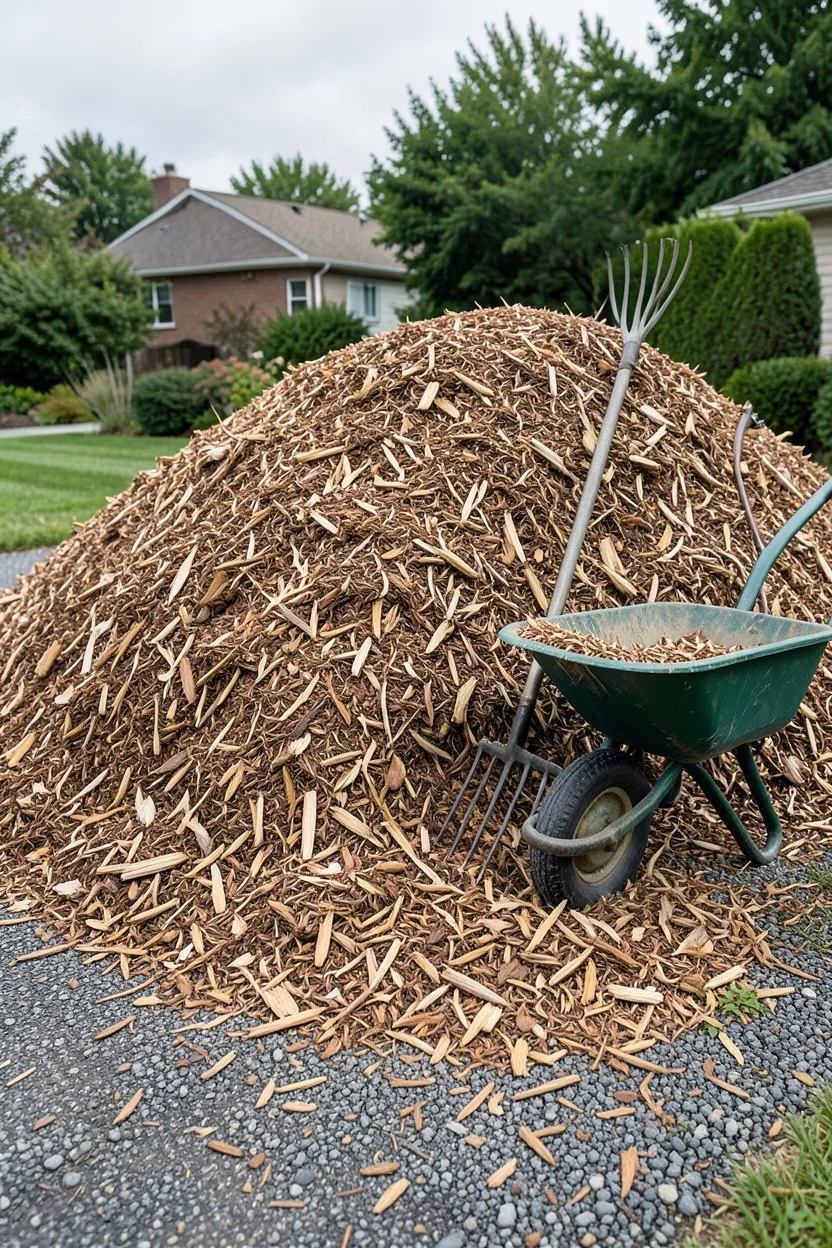
Stop buying those plastic bags of dyed red or black mulch from the garden center. Not only do they look completely unnatural, but they also drain your wallet if you have large areas to cover. Local tree trimming crews are constantly looking for places to dump their shredded tree waste to avoid paying landfill fees.
Flag down a local tree service crew working in your neighborhood, or sign up for a free online service like ChipDrop. Request a drop of clean wood chips. You will often wake up to a massive, steaming mountain of fresh, aromatic wood chips dumped right in your driveway at no cost.
Spread this mulch four inches deep around your mature trees, along your garden pathways, and over wide utility areas. It suppresses weeds beautifully, smells like a fresh pine forest, and adds incredible amounts of organic nutrients back into your soil as it decomposes over the winter.
7. Scavenged Fieldstone Pathways and Accents
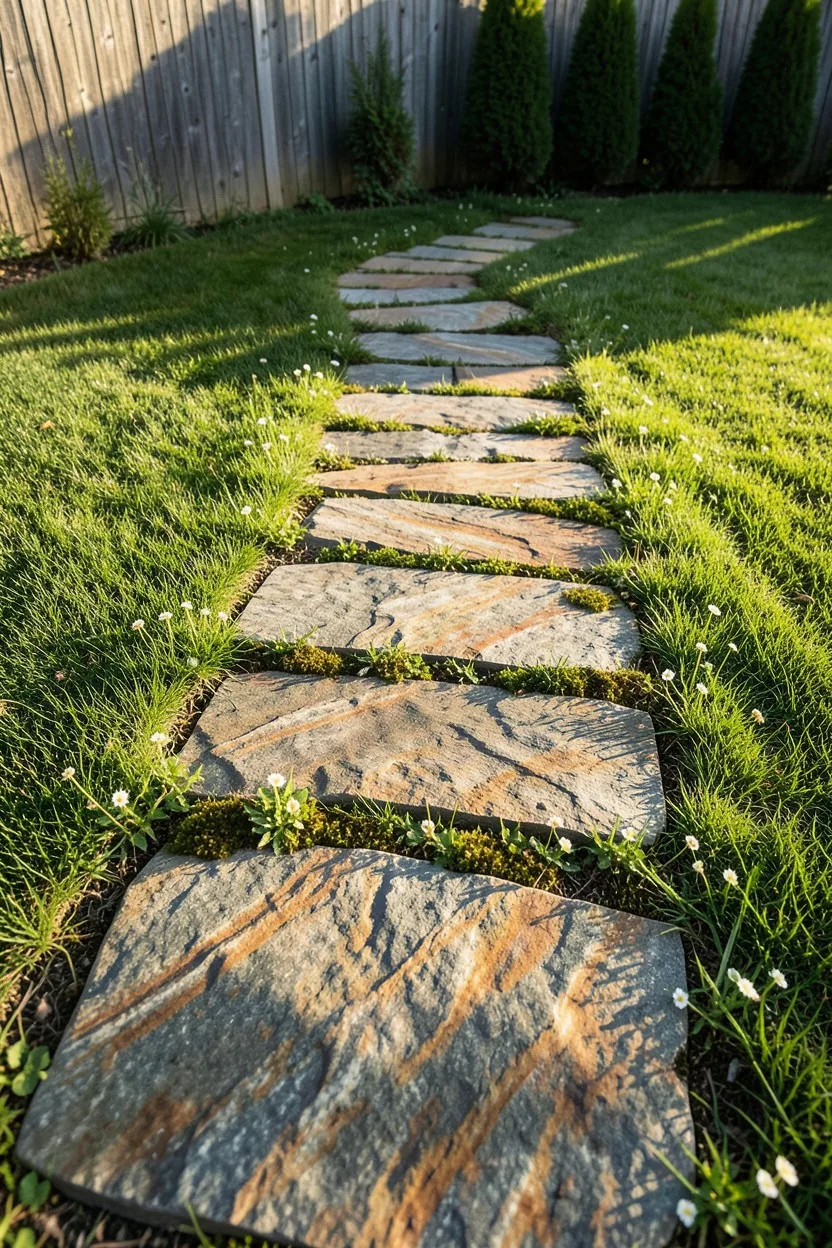
If you live in an area with rocky soil, you know that every winter frost heaves a fresh crop of stones right up to the surface of your yard. Instead of cursing them when your lawnmower blades hit them, view them as building blocks. I have built entire stepping-stone paths without spending a single penny.
Collect every stone larger than a baseball that you find during your regular yard maintenance. Sort them by shape, keeping the flattest specimens for walking surfaces and the rounded, bulky ones for bed borders. Dig a shallow indentation for each flat stone along your path so it sits perfectly flush with the surrounding soil level.
By sinking the stones flush with the ground, you can run your lawnmower right over the top of them without hitting the blades. The natural color variations in native stone look infinitely better than pre-cast concrete pavers from a big-box store, anchoring your landscape to its specific local geography.
Best For Scavenged Stones
8. Division of Existing Mature Perennials
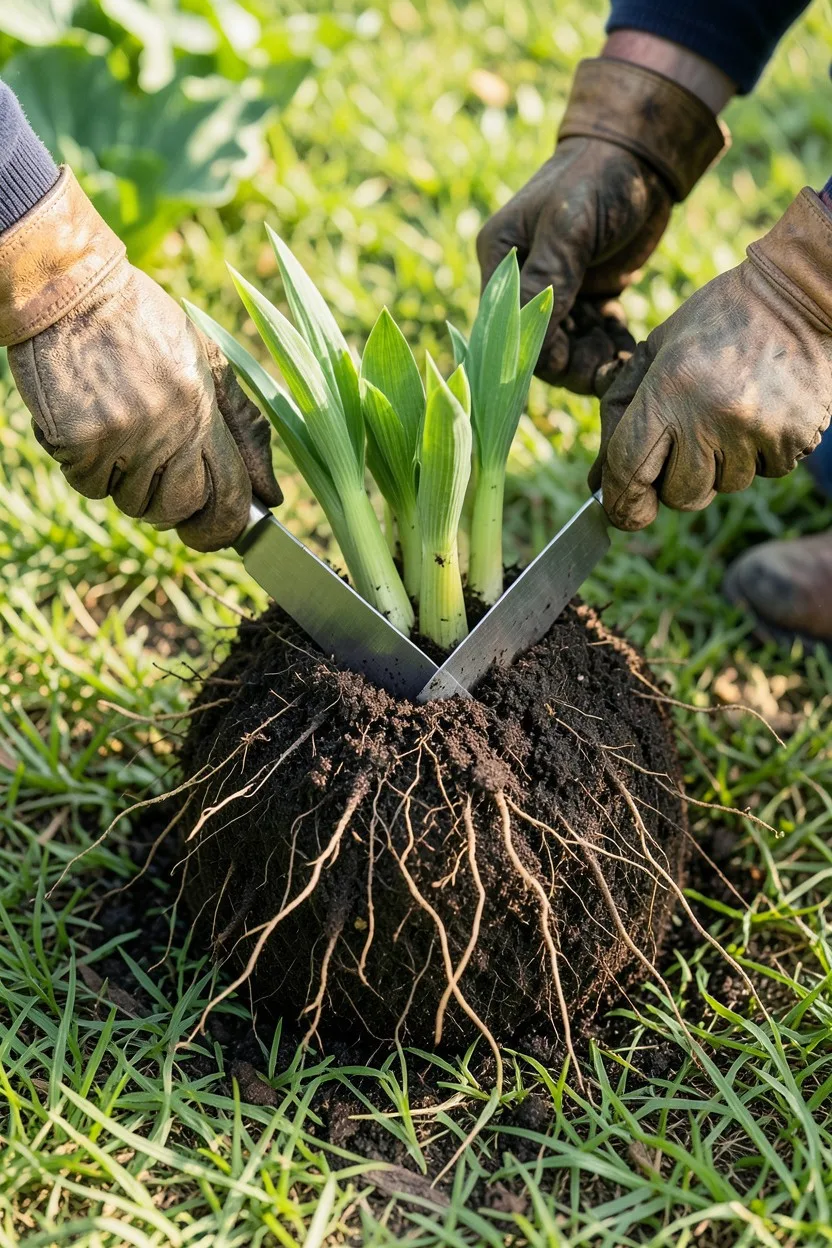
You do not need to buy twenty individual hostas or daylilies to fill a long, bare border along your foundation. If you have just three or four mature perennial clumps on your property, you can easily turn them into forty separate plants using a sharp spade and a little bravery.
In the early spring when new green shoots are just peering out of the ground, dig up an entire mature hosta, sedum, or ornamental grass root ball. Take your spade and slice directly down through the center of the crown, splitting the root mass into halves or quarters. Ensure each new piece has at least three healthy green shoots and a robust set of roots attached.
Replant the divided pieces immediately into your new garden beds and water them thoroughly. They will experience a brief moment of shock, but within two months, they will fill out into full-sized, independent plants. It is the ultimate horticultural magic trick for multiplying your landscape value instantly.
9. Hardwood Cuttings from Native Shrubs
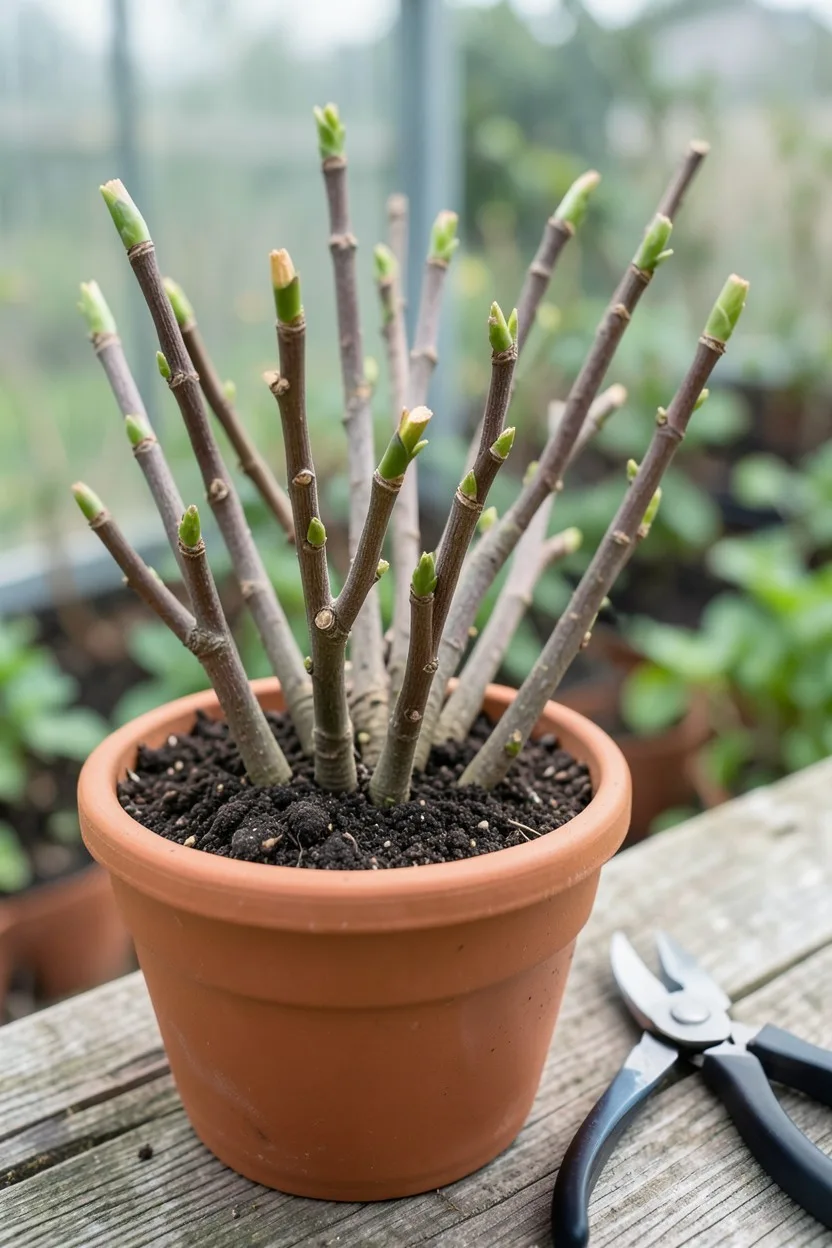
Buying mature shrubs like hydrangeas, dogwoods, or elderberries can run you fifty dollars a pop at a commercial nursery. You can bypass that cost entirely by propagating your own hardwood cuttings during the late winter when the plants are completely dormant and leafless.
Locate a healthy native shrub on your property and snip off a straight, pencil-thick branch from the past year's growth. Cut it into eight-inch segments, ensuring each piece has a bud near the top and another near the bottom. Make your bottom cut at a sharp angle right below a node, and the top cut flat.
Dip the angled bottom into water, push it halfway into a pot filled with garden soil mixed with a bit of sand, and keep it moist in a sheltered outdoor spot. By the time spring arrives, the buried nodes will push out fresh roots, and the top buds will leaf out. You have just grown a brand-new shrub from literal trimmings.
🌱 GROWING TIP
Keep the Cuttings Oriented Right Side Up
Always make your top cut flat and your bottom cut angled. It is incredibly easy to accidentally stick dormant cuttings into the soil upside down, which prevents them from pulling up moisture and guarantees they will rot.
10. Repurposed Fallen Log Terrace Steps
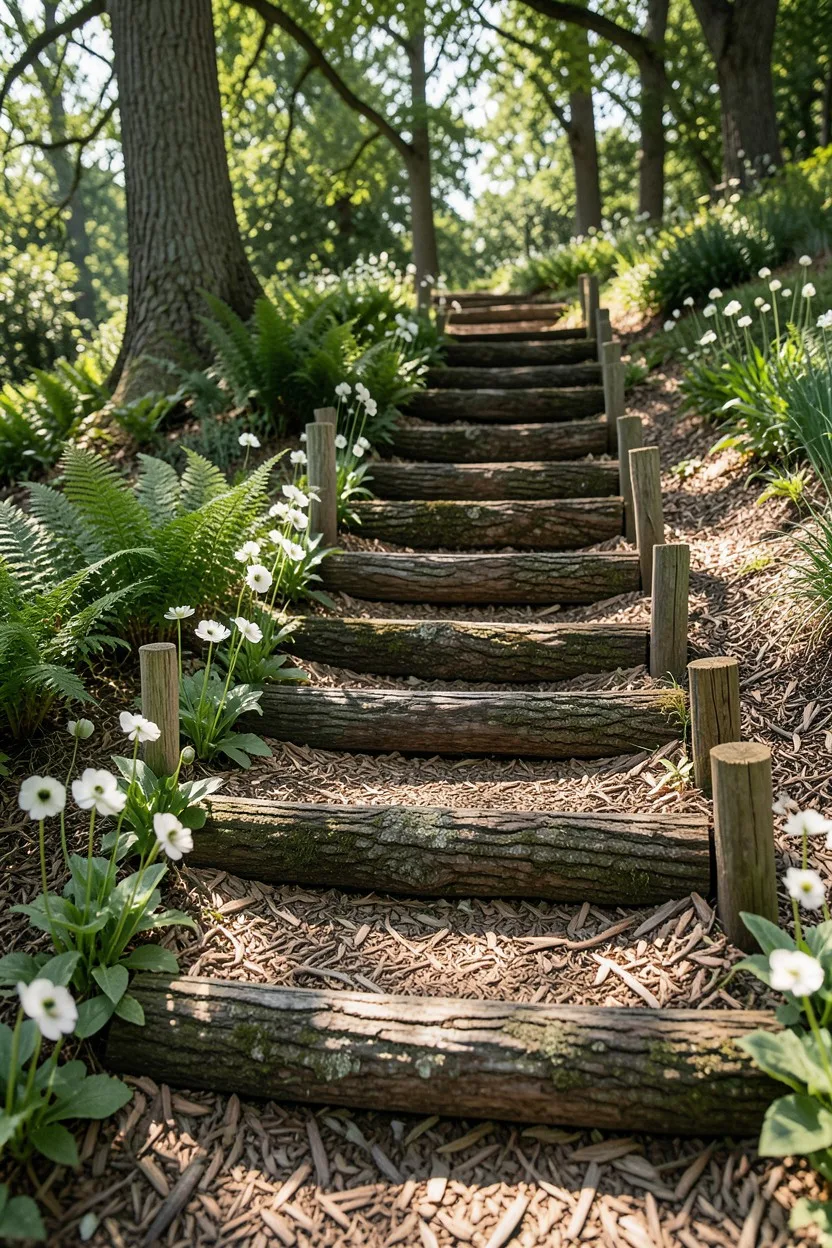
If your property has a sloped lawn or a steep hillside, you know how incredibly difficult it is to prevent soil erosion and grow a decent turf. Instead of investing thousands in a terraced stone retaining wall, look to your local woods for fallen logs that are at least six to eight inches in diameter.
Cut the fallen logs into uniform lengths that match the width of your desired path or slope. Excavate a flat trench across the slope where you want the step to sit, drop the log horizontally into the trench, and secure it by driving two thick wooden rebar or branch stakes directly in front of it.
Backfill behind the log with your native soil until it is perfectly level with the top of the wood. Repeat this process up the hillside to create a stable, beautiful, and completely free rustic staircase. The rough bark provides excellent natural traction when wet, and the organic look blends beautifully with woodland gardens.
11. Free Leaf Mold Soil Conditioner
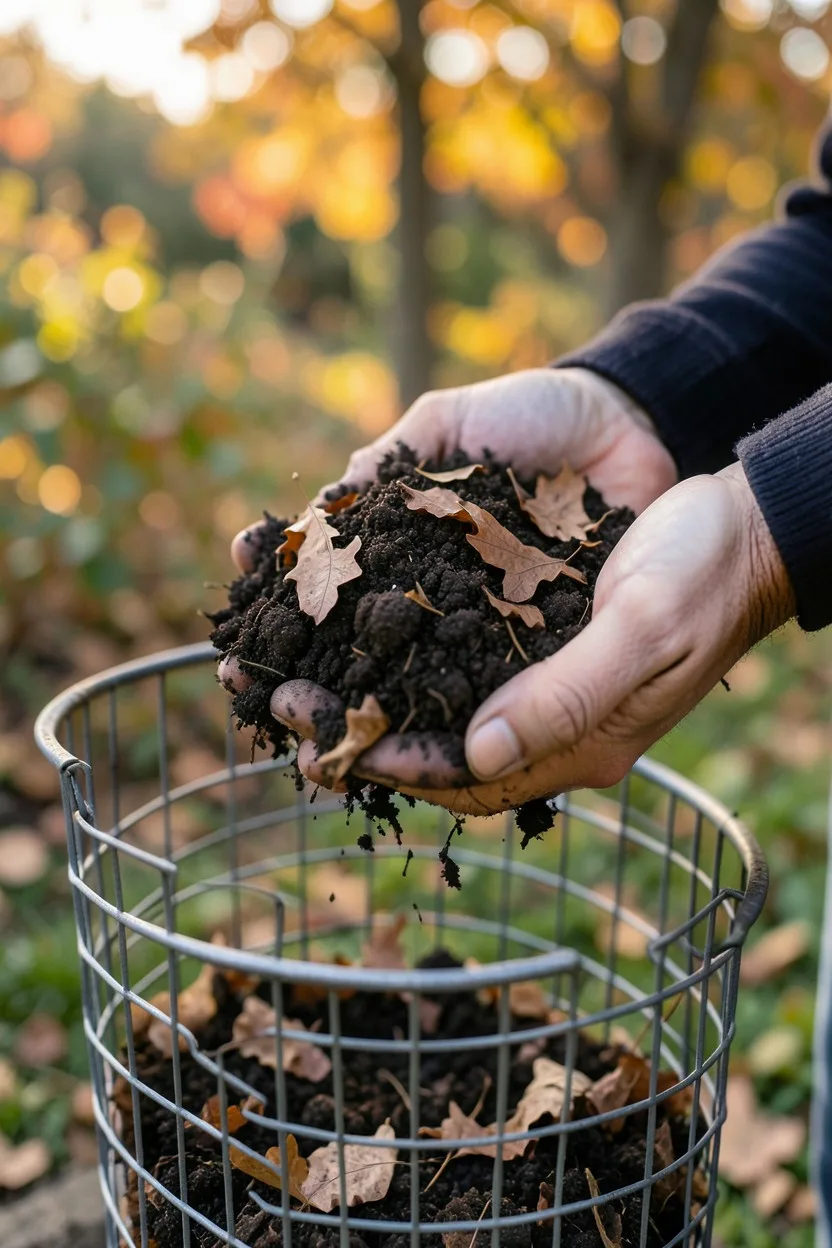
Every autumn, suburban neighborhoods engage in a bizarre ritual: they rake up thousands of pounds of free organic nutrients, pack them into paper bags, and leave them on the curb for the city to haul away. Then, the very next spring, those same homeowners buy bags of commercial peat moss and compost.
Break this cycle by bagging your own leaves, or drive around your neighborhood the night before trash pickup to collect your neighbors' discarded leaf bags. Dump the leaves into a simple four-foot wire mesh enclosure in a hidden corner of your yard, wet the pile down thoroughly, and leave it alone for a year.
The leaves will break down via fungal action into a dark, crumbly, sweet-smelling substance called leaf mold. It does not have high fertilizer value, but it holds up to four times its weight in water. Work it into your vegetable beds or container pots to dramatically improve your soil structure for zero dollars.
Leaf Mold vs. Commercial Peat Moss
Free Leaf Mold
- 100% free from your own yard
- Improves local soil biology
- Completely sustainable production
- Highly absorbent composition
Commercial Peat Moss
- Costs $15–$25 per large bale
- Mined from fragile peat bogs
- Requires shipping and packaging
- Can resist water when totally dry
12. Seed Harvesting from Kitchen Scraps

You can stock an entire annual flower bed and vegetable patch using the seeds you normally wash down the garbage disposal. Store-bought heirloom produce is an exceptional source of free genetics if you know how to process the seeds correctly.
Next time you slice open an heirloom tomato, an organic bell pepper, or a winter squash from the grocery store, scrape the seeds onto a plain paper towel. Let them dry thoroughly in a single layer in a warm, dark room for two weeks until they are completely brittle and no longer sticky.
Store them in old paper envelopes until the following spring, then direct sow them into your garden beds after your local frost-free date. I have raised massive rows of bright orange pie pumpkins and sweet bell peppers using nothing but seeds pulled directly from my autumn cooking scraps.
13. The Five-Gallon Bucket Compost Tea System
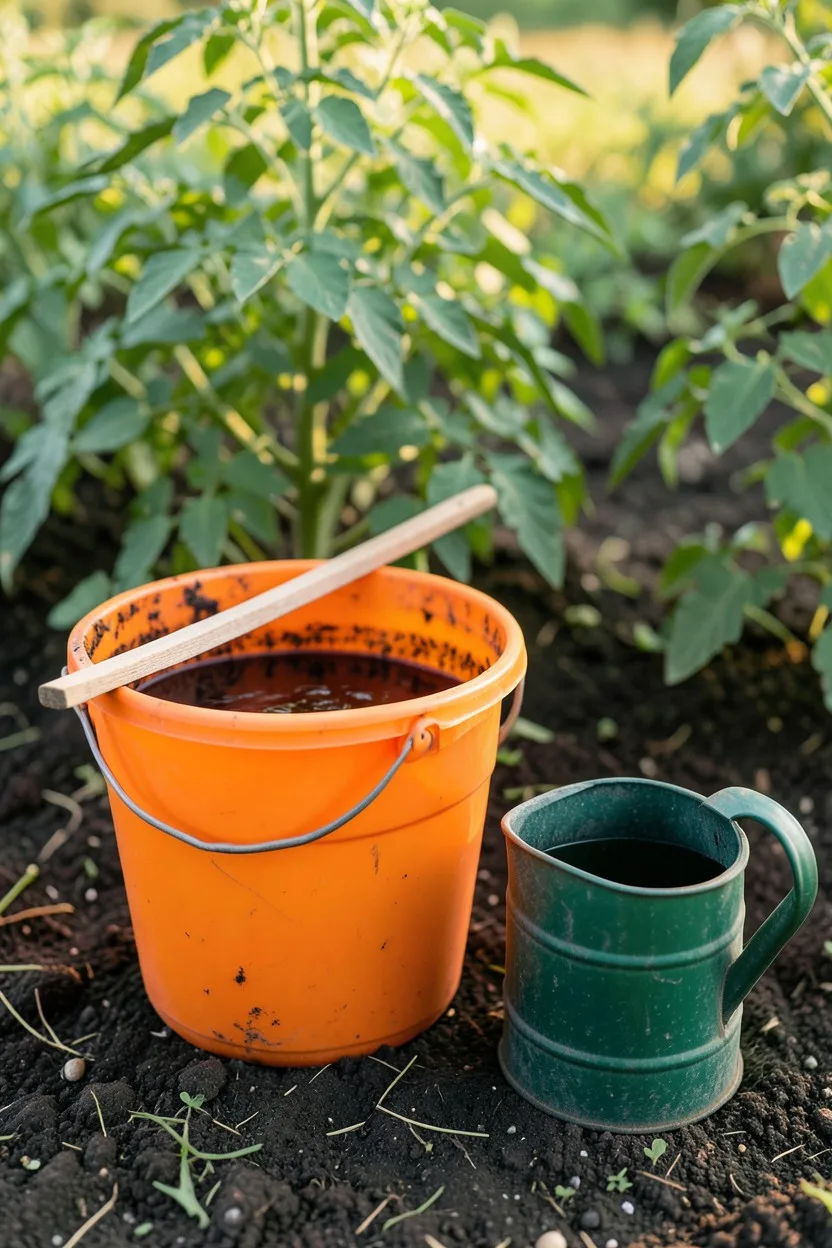
Instead of buying expensive liquid synthetic fertilizers that can easily burn your plants' roots and wash away into the local groundwater during heavy rains, brew your own high-potency organic liquid plant food using things you already have in your garden.
Stuff a standard five-gallon plastic bucket one-third full with finished compost, well-rotted leaf mold, or even fresh pulled weeds like stinging nettle and comfrey, which are deep-rooted dynamic accumulators. Fill the rest of the bucket with rainwater or dechlorinated tap water and let it sit for three to five days.
Stir the mixture once a day with a scrap stick to introduce oxygen into the water. Strain the dark, tea-colored liquid through an old pillowcase or fine mesh strainer, dilute it with water until it looks like weak amber tea, and pour it directly over the root zones of your heavy-feeding tomatoes, peppers, and roses.
14. Discarded Wooden Pallet Composting Bins
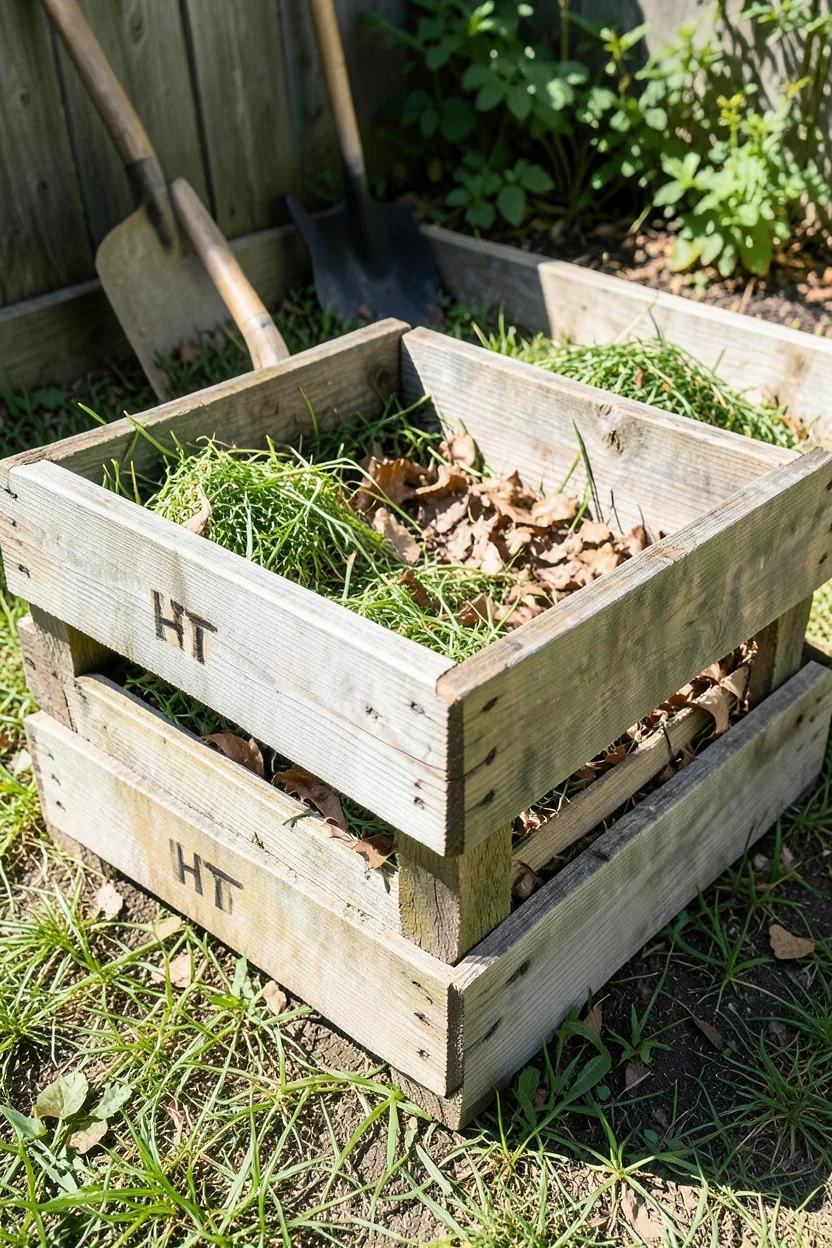
A healthy landscape relies completely on a steady supply of rich compost, but commercial plastic compost tumblers are small, prone to breaking, and cost a fortune. You can construct a massive, highly effective three-bin composting system using discarded shipping pallets.
Drive past local industrial parks, construction sites, or small businesses and look for clean, unpainted wooden pallets stacked near the dumpsters. Always check for a small stamped 'HT' logo, which indicates the wood was heat-treated rather than chemically fumigated with harmful pesticides.
Stand three pallets on edge to form a U-shape, and secure the corners together using scrap wire or long deck screws. This creates a perfect three-foot-square bin that allows excellent airflow through the side slats, keeping your organic matter well-oxygenated and cooking down efficiently into black gold.
Avoid These Budget Landscaping Mistakes
Frequently Asked Questions
Will using free arborist wood chips bring pests or diseases to my yard?
It is highly unlikely. Most wood-boring pests prefer weak, living trees rather than chipped, dying wood. If you are concerned about specific fungal pathogens like oak wilt, simply ask the tree crew what type of tree they just cut down before accepting the delivery.
How long does a spade-cut lawn edge actually last?
A proper four-inch deep spade-cut edge lasts roughly six months. You will need to clean out the debris and redefine the edge twice a year—once during your spring cleanup and once in late autumn before the ground freezes solid.
Can I use any type of leaves to make free leaf mold?
Almost any deciduous leaves work beautifully, especially maple, oak, and birch. Avoid using large quantities of black walnut leaves, as they contain a natural herbicide called juglone that can inhibit the growth of sensitive plants like tomatoes.
Will wine bottle borders smash when hit by a lawnmower or string trimmer?
Glass wine bottles are incredibly thick and sturdy when buried shoulder-to-shoulder, but a direct hit from a lawnmower blade will shatter them. Keep them tucked well inside garden beds away from regular mower paths, and use caution when trimming edges.
Final Thoughts
If you only add one technique from this list to your routine this weekend, make it the Victorian spade-cut lawn edge. It requires zero materials, uses a tool you already own, and provides an instant, high-contrast transformation that makes your entire yard look like you hired a professional landscaping crew. Stop letting the garden centers convince you that beauty comes in a plastic bag. Walk your property lines, reclaim the materials that nature is already dropping at your feet, and build a garden that relies on clever resourcefulness instead of a massive budget.

John Smith is the founder and CEO of Karaoke Machines Guru. He is a karaoke tutor and karaoke enthusiast and has been passionate about karaoke since he was a child. He also writes about karaoke-related tips, guides, and product reviews on this website.
He overlooks the whole website and makes sure that everything is running smoothly. Learn more!