Every fence company that rolls into your driveway is going to quote you five figures for a basic perimeter. It is enough to make you give up on your gardening dreams entirely. Over my years of turning patch-of-dirt yards into productive kitchen gardens, I have learned that building an expensive professional cedar run is rarely worth the financial strain. You can absolutely build a functional, gorgeous barrier that stops the neighbors dog and keeps deer off your sweet peas without wiping out your savings account.
The trick to avoiding that sad, flimsy DIY look is using inexpensive raw utility materials but treating them with high-end installation techniques. This list covers real-world boundaries that cost a fraction of traditional vinyl or privacy panels but look completely intentional. We are focusing on thick timbers, proper spacing, and hidden structural tricks that turn basic hardware store staples into high-design features.
Quick Tips Before You Start
Check Property Lines
Never guess your boundary; hire a surveyor or find your iron pins before digging.
Dig Below Frost Line
Set your posts at least one-third of their total height into the ground for stability.
Treat Ground Contact
Only use pressure-treated lumber rated for ground burial for your structural vertical posts.
Manage Water Runoff
Slope the concrete footings away from the wood posts to prevent premature rot.
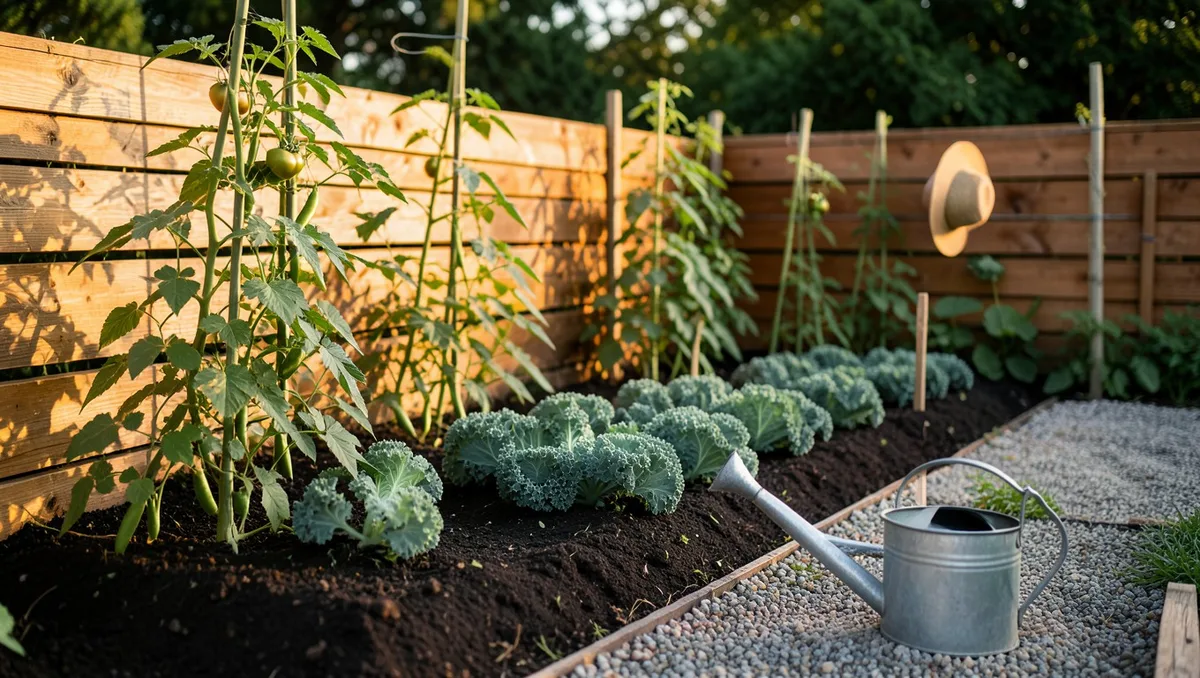
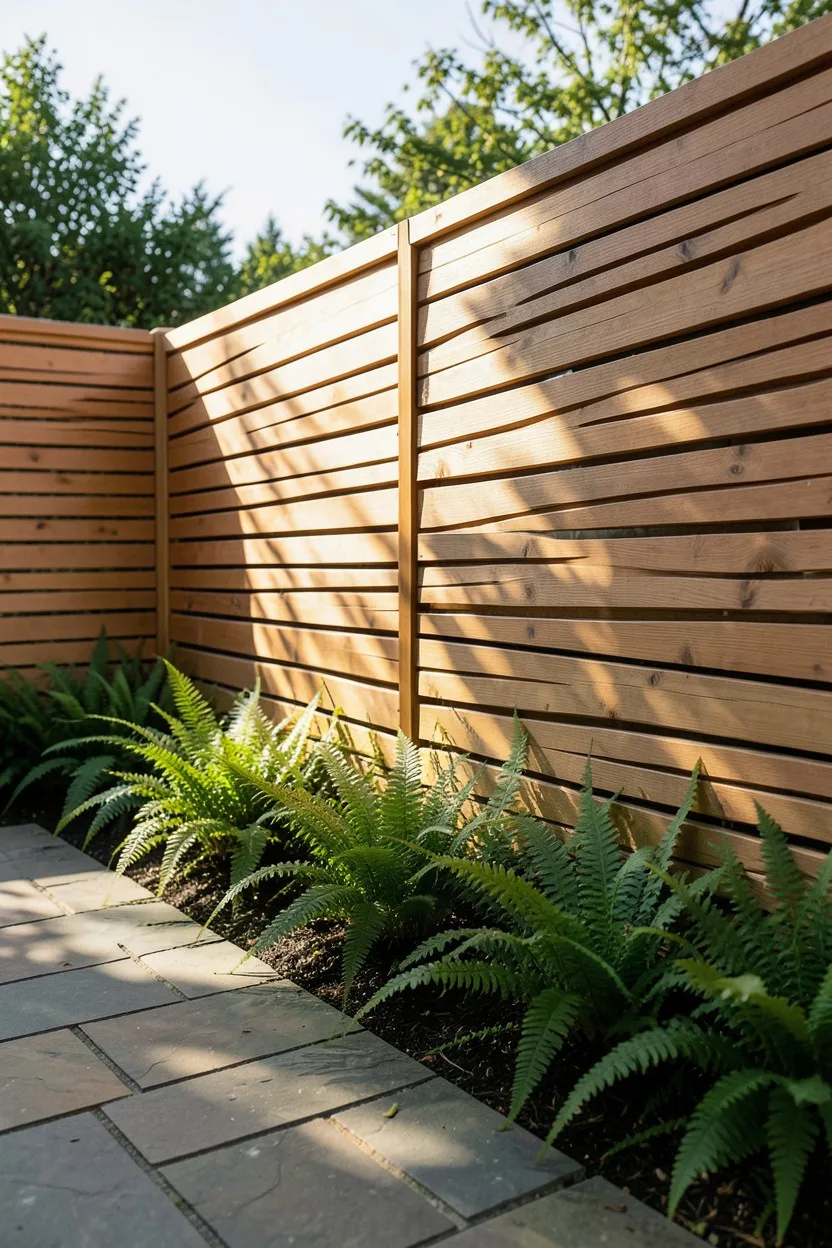
1. Horizontal Pressure-Treated Pine Slats
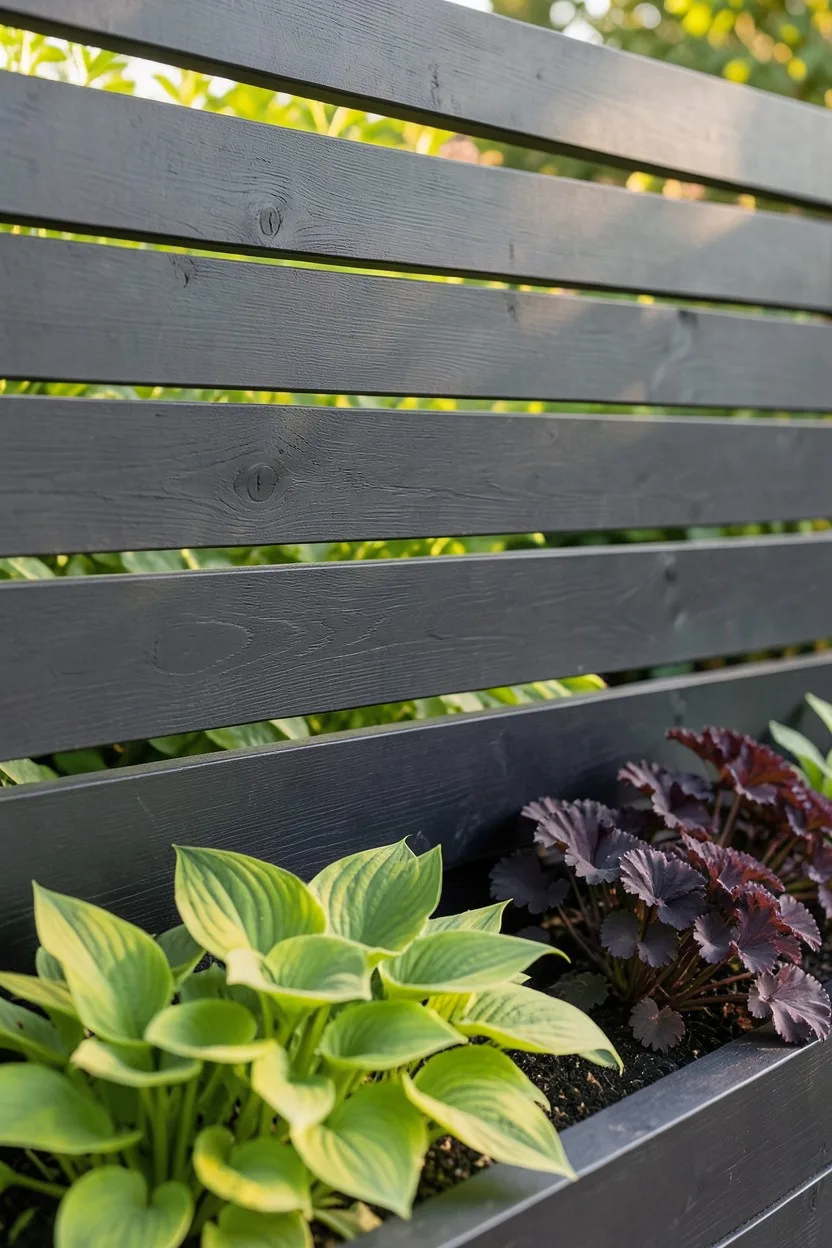
Everyone tells you to build vertical dog-ear fences because the boards are cheap. Honestly? That look is tired and screams builder-grade. Instead, buy standard 1×4 pressure-treated pine boards and mount them horizontally across your 4×4 posts.
Horizontal lines trick the eye into thinking a small gardening space is significantly wider than it is. Space the boards exactly one-half inch apart using a piece of plywood scrap as a spacer. This gap lets air flow through so wind storms won't knock the line down, but still blocks the direct view into your yard. Coat the pine with a rich, dark charcoal stain like Cabot's Black Solid Stain immediately after the wood dries out.
💡 Tip: Face the smooth side of the boards outward to give your curb appeal a massive upgrade.
2. Heavy Duty Wire Cattle Panels in Timber Frames
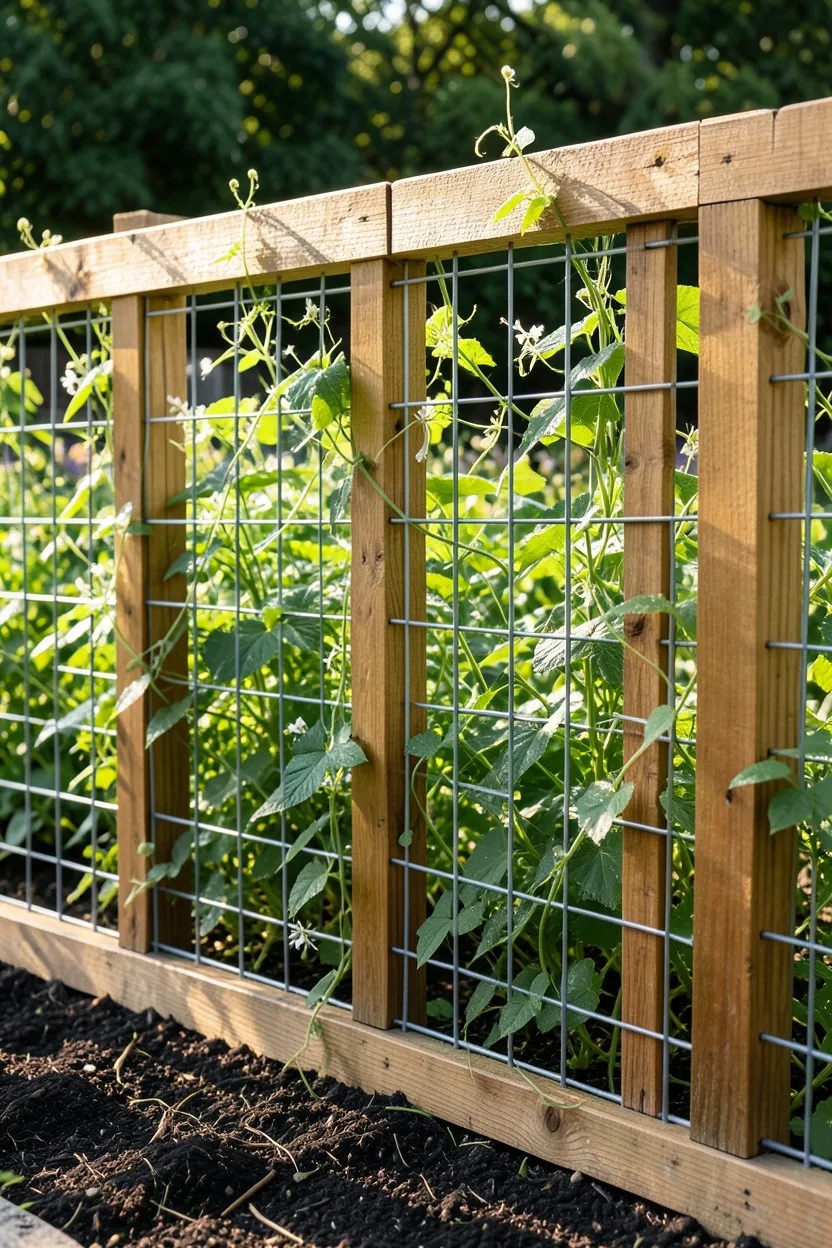
Cattle panels are the ultimate secret weapon for an open, airy perimeter that stops large pests. Do not just staple these 4-gauge galvanized wire sheets to raw posts, or your yard will look like a commercial feedlot. Build a sturdy frame using 2×4 pressure-treated lumber on the top, bottom, and sides, then sandwich the wire panel between the frame pieces.
This gives you a rigid, architectural grid that looks like expensive custom metalwork. It keeps your gardening space completely visible while providing an indestructible trellis for climbing crops like sugar snap peas or heavy pole beans. I used this method back in my early gardening days to secure an allotment bed, and the structural integrity held up against massive summer storms without sagging an inch.
3. Corrugated Galvanized Metal Panels
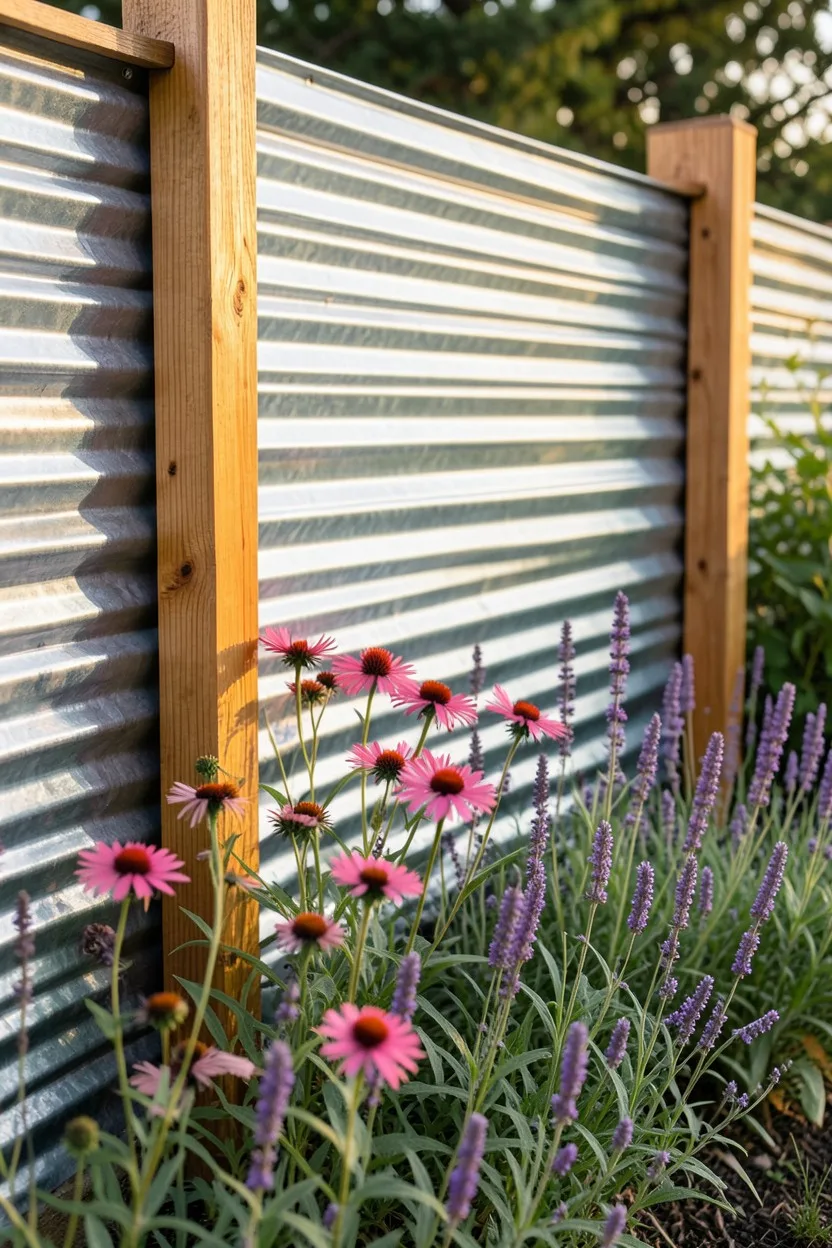
You know what nobody tells you about corrugated roofing sheets? They make incredible, industrial privacy screens that never rot or require staining. Buy 8-foot utility sheets of galvanized metal from the roofing aisle and set them horizontally between thick 4×4 cedar posts.
To make this look expensive, wrap the top and bottom of the metal sheets with horizontal 2×4 pine caps painted in a deep contrasting color like forest green or navy. The corrugated ridges create beautiful, shifting shadows throughout the day as the sun moves across your gardening plot. It also acts as an excellent windbreak for delicate flowering perennials that tend to snap in high gusts.
⚠️ COMMON MISTAKE
Watch the Heat Reflection
Galvanized metal panels can reflect intense summer heat. Do not plant delicate cool-season greens like spinach or butterhead lettuce within two feet of the metal surface during peak summer months.
4. Woven Willow Hurdles
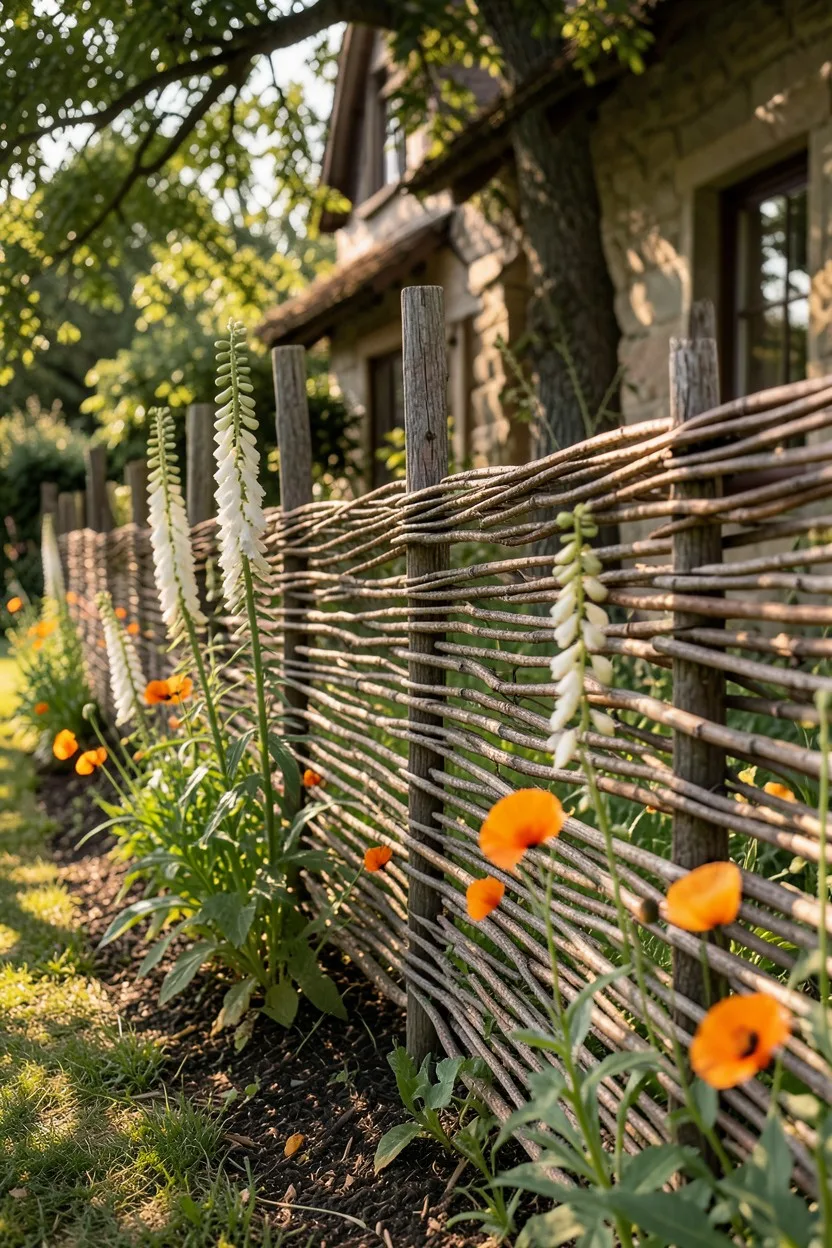
Woven hurdles are one of those options that make you feel like an old-world estate gardener in the best way. Instead of buying premade panels, source flexible willow or hazel whips from local brush clearings or specialty agricultural suppliers. Drive thick 2-inch hazel stakes into the dirt every 18 inches, then weave the thinner whips in and out of the vertical supports.
This technique creates a rustic, organic screen that fits perfectly into cottage gardens or wild permaculture patches. It blocks the wind while allowing just enough air movement to prevent fungal diseases on your nearby tomato foliage. Expect a hand-woven hurdle structure to last roughly five to seven years before needing repair, which is plenty of time for a permanent perimeter hedge to grow in its place.
5. Pallet Wood Shadowbox Privacy Run
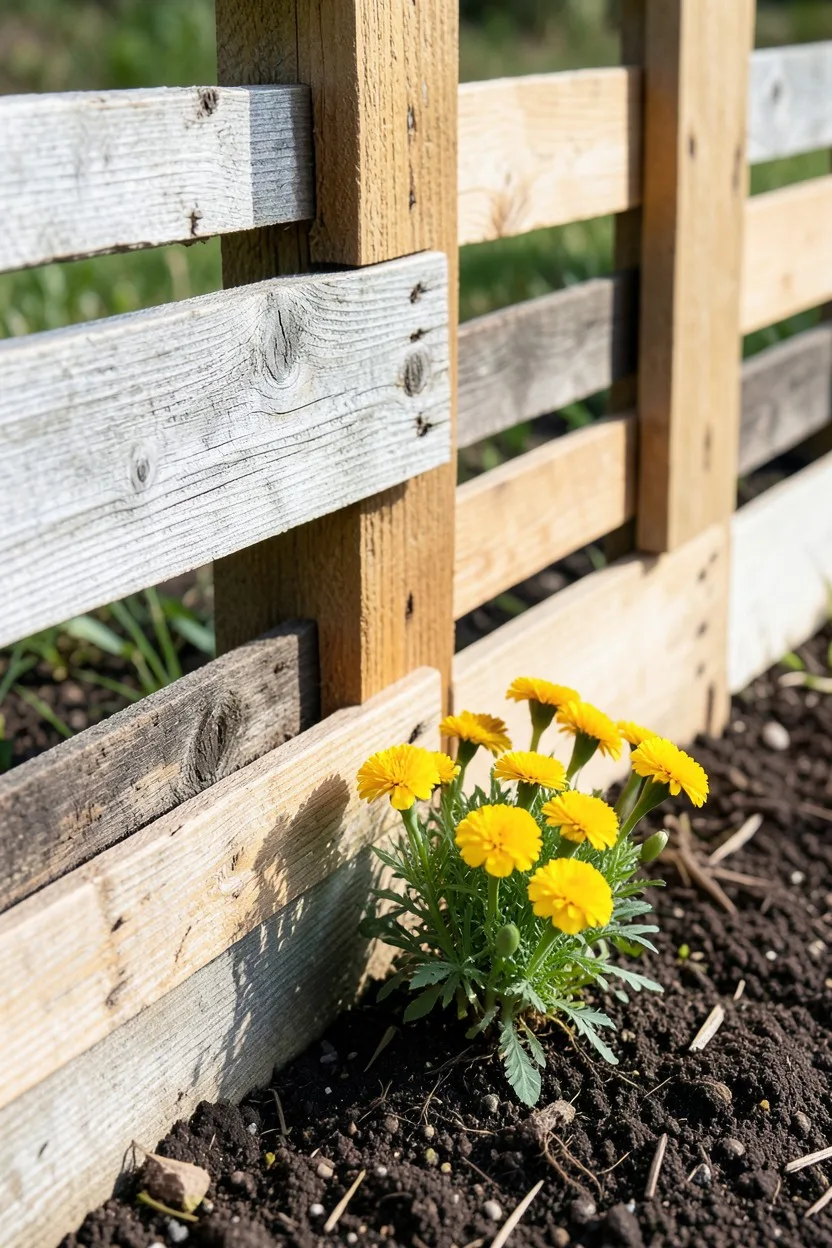
Most pallet construction looks terrible because people just slap whole pallets together on the ground. Step away from that lazy approach. Break the pallets down completely using a pry bar, pull the nails, and use the individual weathered oak and pine slats to construct a shadowbox layout.
A shadowbox pattern alternates boards on the front and back sides of your horizontal rails. This means you get a fence that looks identical from both sides, which keeps your neighbors happy. The variation in wood species from different pallets gives the finished line a stunning, multi-toned character that mimics expensive reclaimed barn wood. Sand the slats lightly with 80-grit paper to remove splinters before nailing them up.
6. Black Chain Link with Living Screens
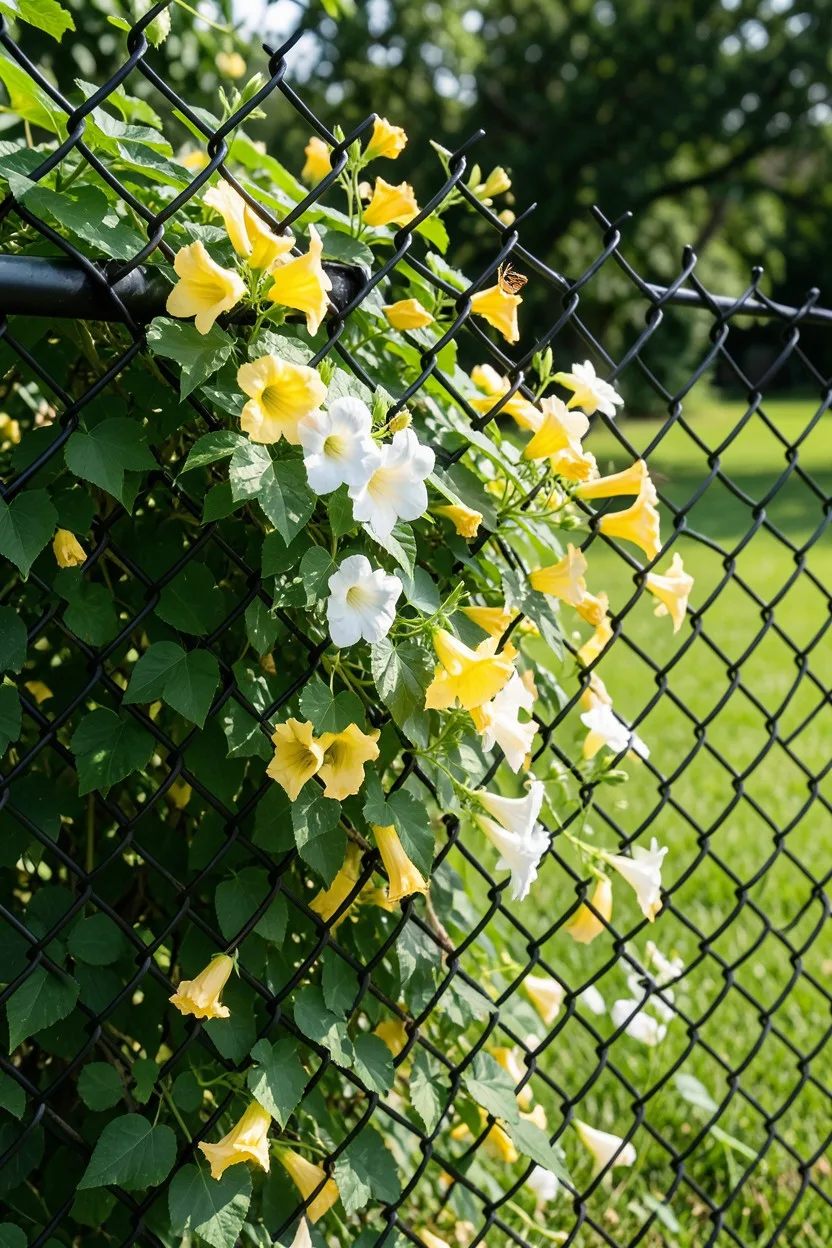
Silver chain link is a visual disaster for any residential landscape. But vinyl-coated black chain link completely disappears against a green gardening backdrop. Install a budget-friendly black chain-link run, then immediately treat it as a massive framework for fast-growing climbing perennials.
Plant vigorous varieties like autumn clematis, native honeysuckle, or passionflower at the base of the mesh every three feet. Within two growing seasons, the metal diamonds will be completely buried under a thick wall of fragrant blooms and dark green leaves. You get the absolute security of steel mesh for containing pets alongside the soft, lush look of an estate hedgerow.
Best Vines for Chain Link
7. Vertical Bamboo Roll Privacy Shields
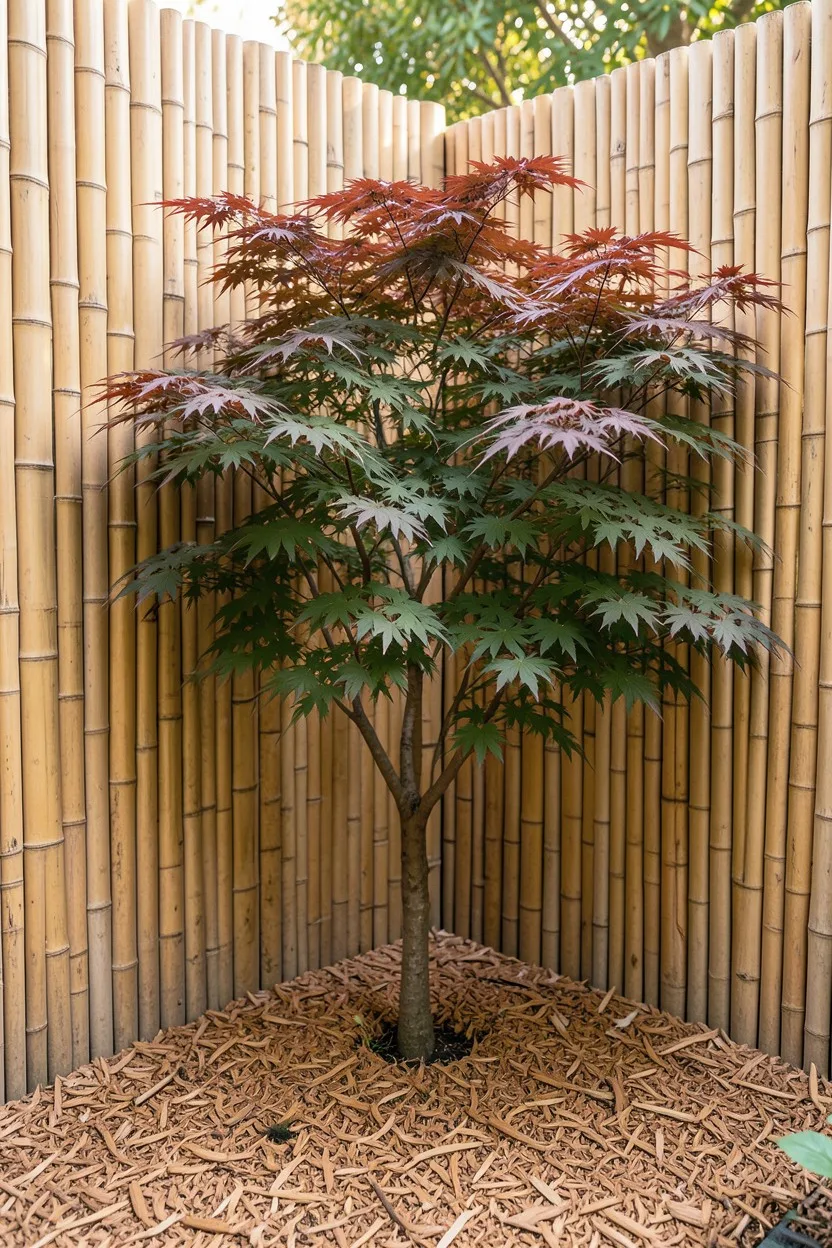
If you already have an ugly wire or chain link divider and need instant privacy, do not rip it out. Buy rolls of whole-stalk vertical bamboo fencing linked together with galvanized wire. Unroll the bamboo directly against your existing structure and secure it tightly every twelve inches using heavy-duty black zip ties.
To prevent the bamboo from rotting from ground moisture, mount the bottom of the roll exactly two inches above the soil line. Frame the top with a stained 2×4 cap rail to tie the look together and make it look like an intentional architectural choice. The clean, vertical texture provides an incredible oriental backdrop that makes bright green Japanese maples or broad-leafed hostas pop beautifully.
🌱 GROWING TIP
Seal the Bamboo Tops
Bamboo stalks are naturally hollow. Use an exterior clear coat or polyurethane spray over the top cut ends of the bamboo roll to seal the chambers and stop water from freezing inside and splitting the stalks during winter.
8. Split-Rail with Hidden Welded Wire Mesh
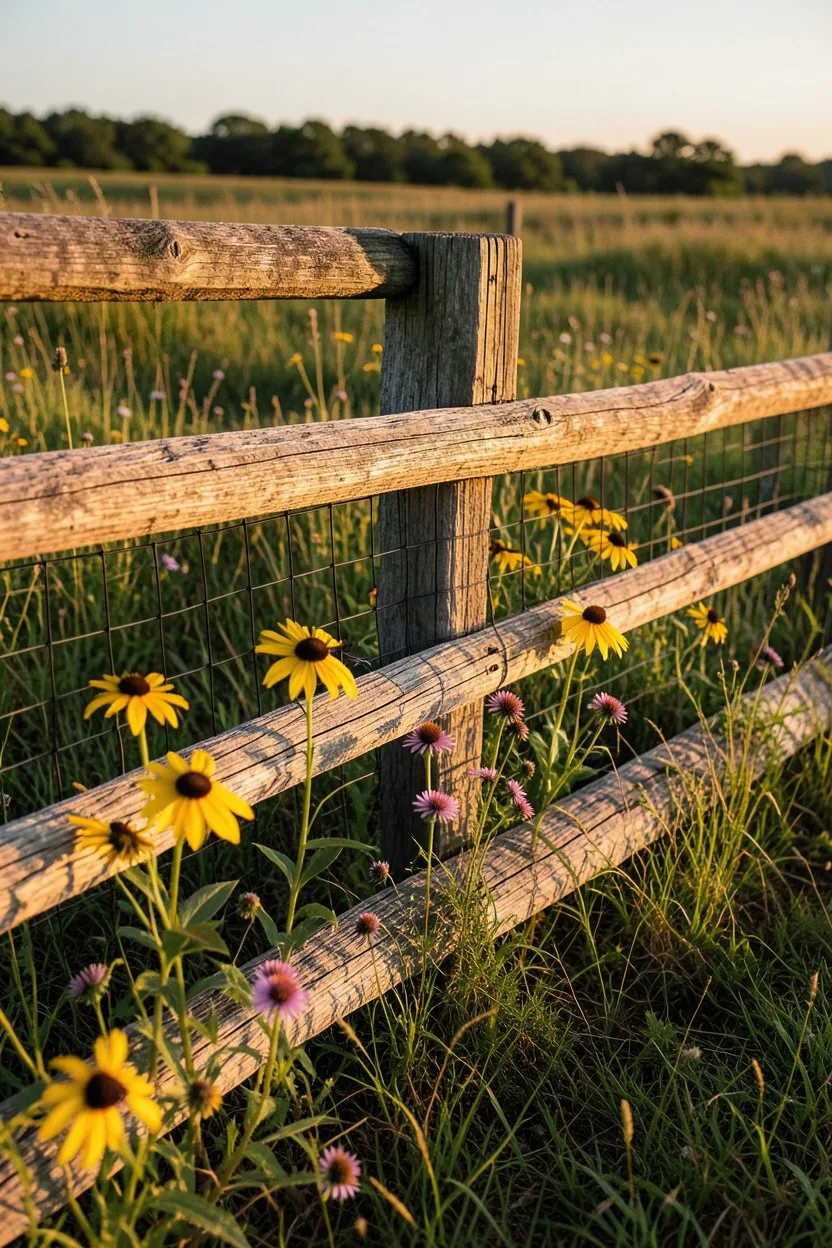
A traditional two-rail or three-rail split fence gives you that beautiful, expansive country pasture aesthetic for very little investment. The problem is that your small dogs can walk right under it, and rabbits will treat your vegetable patch like an open buffet. Fix this by rolling out 2×4-inch black welded wire mesh along the inside face of the rails.
Attach the wire tightly to the rustic timbers using heavy galvanized fence staples. From twenty feet away, the thin black wire mesh completely vanishes from sight, leaving you with the rustic charm of open split-rails while retaining full pest security. It keeps the open feel of your landscape intact without sacrificing utility.
9. Board-and-Batten Modern Picket Arrays
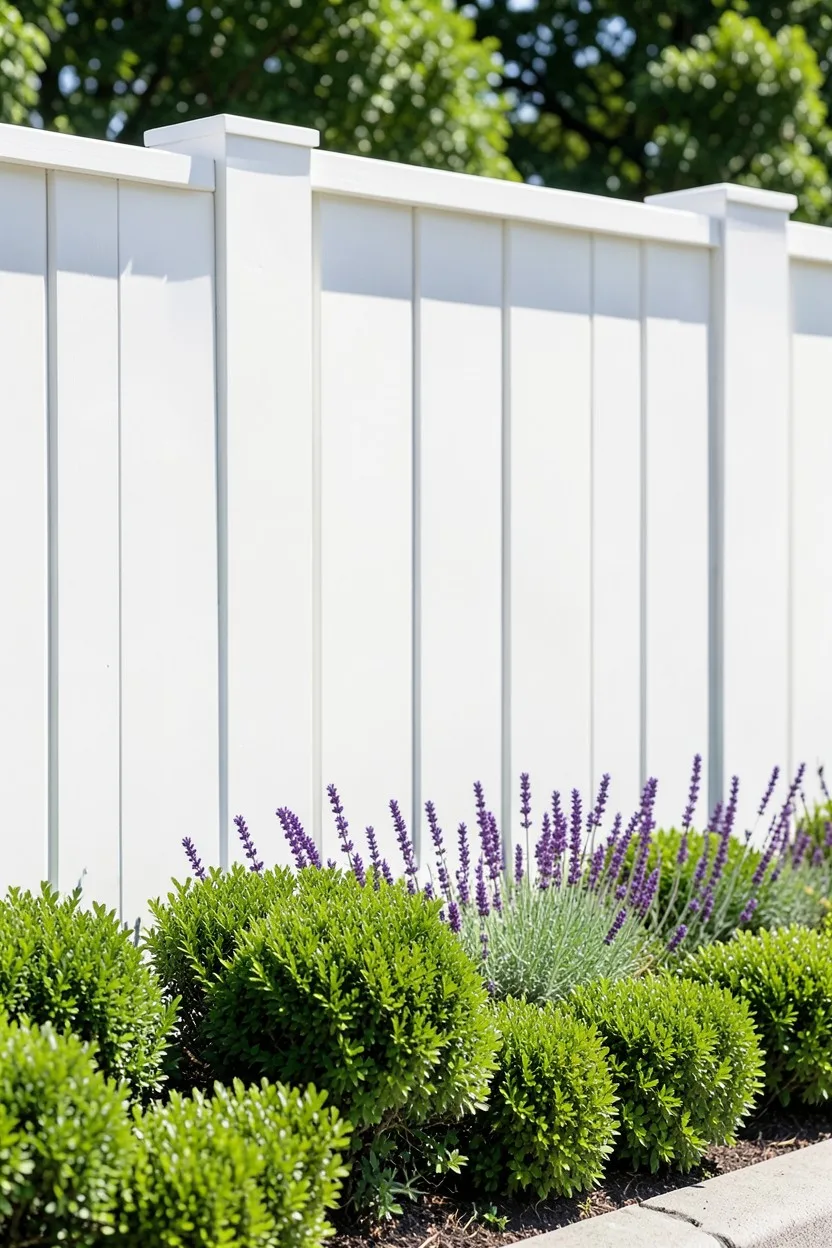
Traditional pointed pickets look cheap and dated. To modernize the look, buy inexpensive 1×3 and 1×2 pine furring strips from the lumberyard. Install the thick 1×3 boards vertically with a precise 2-inch gap between them, then mount the thinner 1×2 strips over the horizontal frame rails directly in the spaces.
This creates an architectural board-and-batten look that feels heavy, custom, and exceptionally crisp. Paint the entire run a clean, modern satin white or an ultra-flat dark olive green. The deep relief of the overlapping vertical battens creates high-end visual dimension that elevates the overall look of a standard backyard layout.
10. Louvered Angled Privacy Screens
When you have a deck or patio close to the property line, you need total privacy from a specific angle but don't want to feel boxed into a dark cage. Build a louvered perimeter. Mount standard 1×6 fencing slats at a fixed 45-degree angle inside your main structural timber frame.
This creates a blind system that completely blocks the view from the neighbor's high windows while allowing cool breezes and ambient sunlight to filter straight down into your flower beds. It requires a few more angled cuts during construction, but the dramatic architectural style looks like something from an expensive architectural catalog.
11. Upcycled Shutter and Door Run
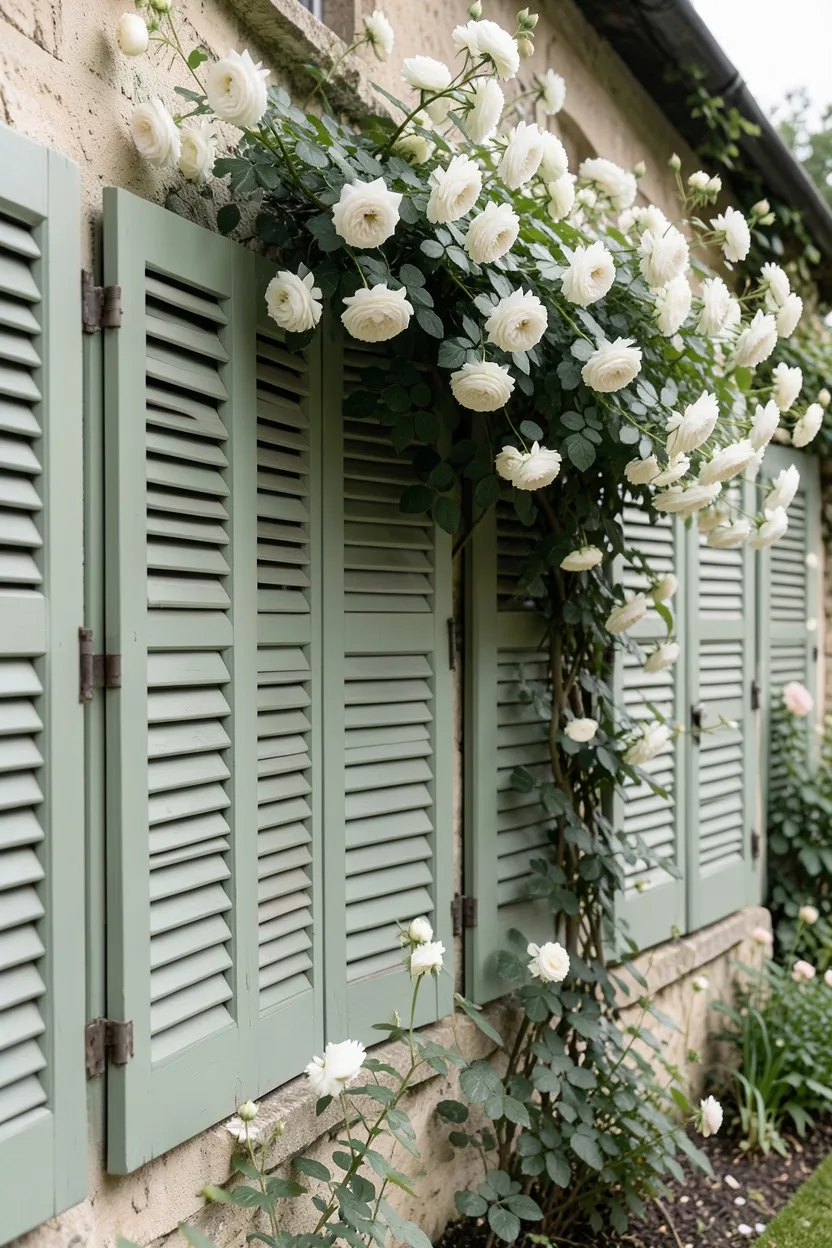
Opinion confession: I used to despise salvage-style barriers because they usually look like a chaotic pile of garbage. My mind changed entirely when I saw a line built exclusively from solid-wood exterior window shutters sourced from architectural reuse centers. The key is uniformity.
Collect shutters that are the exact same height, line them up horizontally between your structural 4×4 posts, and bolt them securely into place. Paint the entire run one solid color—like an understated matte sage green or historic slate gray. The uniform color unifies the different shutter textures and louvers, creating an incredibly charming bohemian cottage barrier that costs pennies.
12. Trellis Top Modification on Standard Line
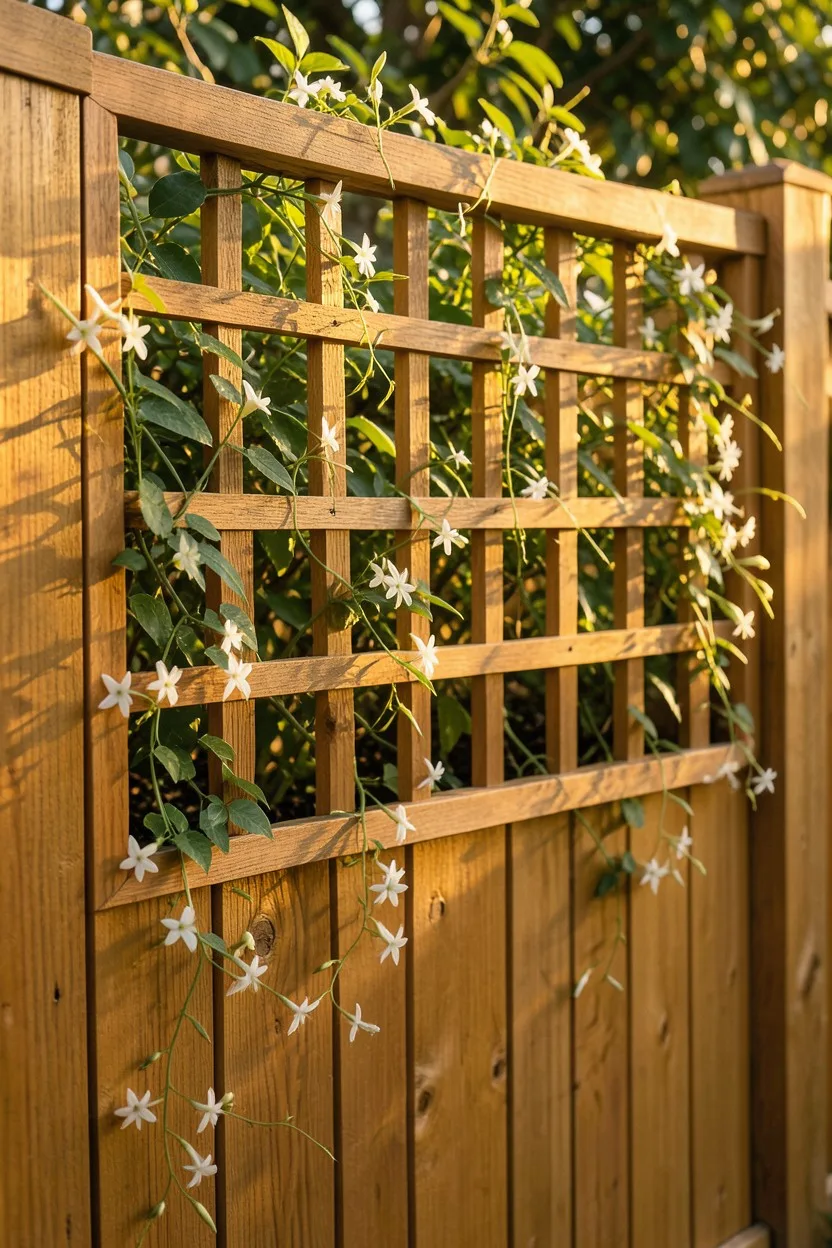
If your current budget-friendly solid wood privacy fence looks boring and oppressive, do not replace it. Cut down the top 12 inches of the vertical solid boards and replace that section with a sturdy square-grid wooden privacy trellis cap. This immediately opens up the upper sightline of your yard.
The open grid lets late-day sunlight stream into your yard instead of casting deep, cold shadows over your valuable gardening plots. It also provides the perfect built-in anchor point for weaving fragrant flowering vines like star jasmine or climbing clematis across the very top of your perimeter run.
13. Hedge-and-Wire Living Framework
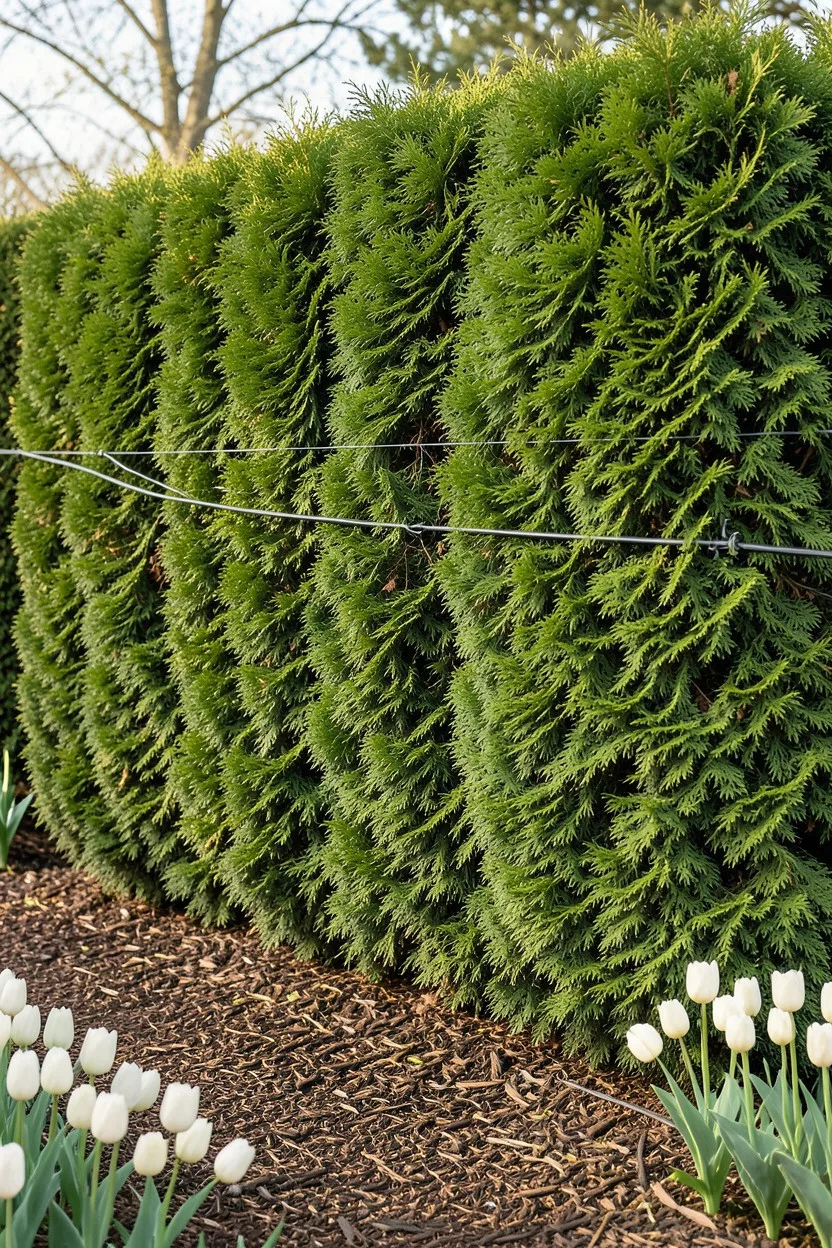
This is a classic European technique that works beautifully for patient gardeners. Build the cheapest possible wire field fence using T-posts and 14-gauge woven wire mesh to secure the line immediately. Then, plant a dense row of fast-growing evergreen shrubs like Hicks Yew or Green Giant Arborvitae directly against the wire.
As the shrubs mature, grow their branches directly through the wire grid and shear the front face flat. Within four seasons, the inexpensive metal mesh becomes completely embedded inside a living, sound-dampening evergreen wall. You get total security from day one, followed by a permanent, high-end living privacy line that never requires a coat of paint.
14. Corrugated Cordwood Stack Boundaries
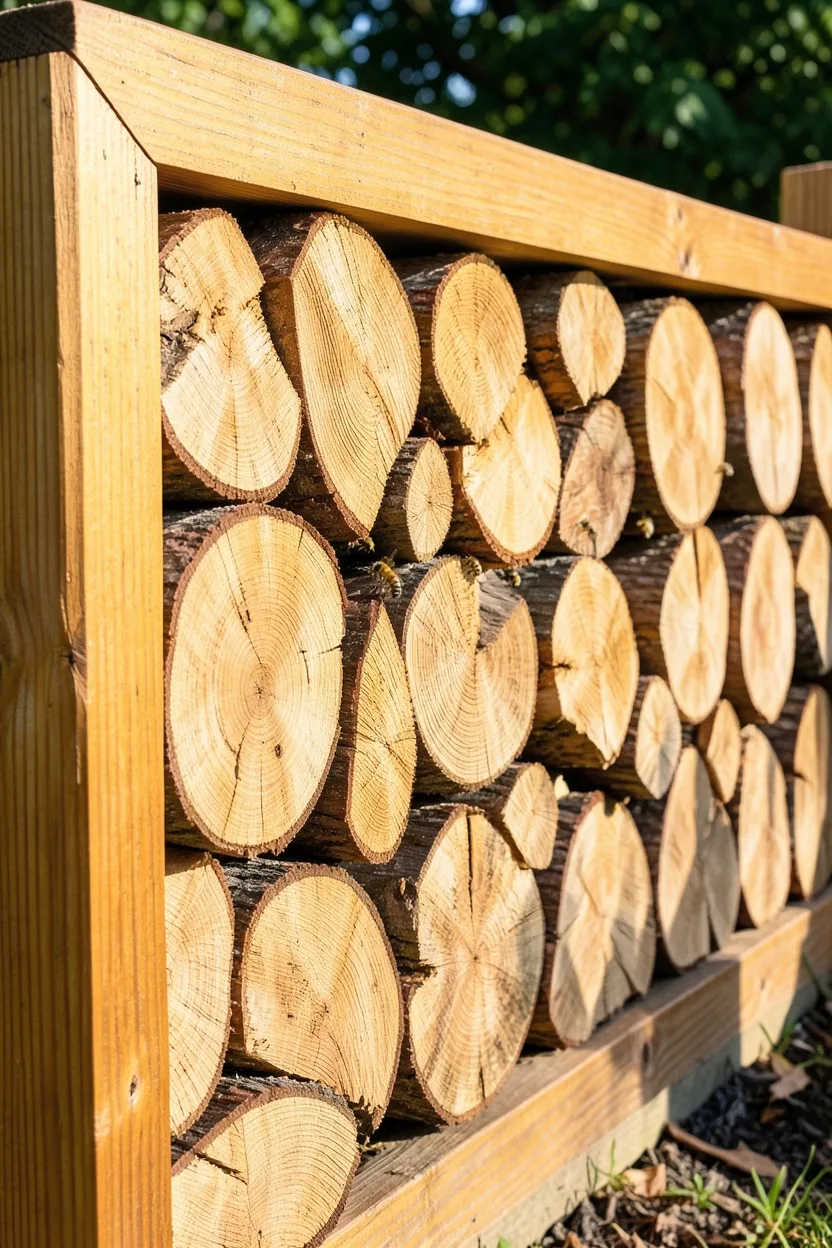
If you live near a rural area or have access to cheap bulk firewood logs, building a cordwood boundary wall is an incredible, structural option. Build a heavy frame using thick 4×4 timbers spaced 6 feet apart, then stack split oak or cedar firewood logs tightly between the uprights like building blocks.
The exposed circular end grains of the cut logs create a stunning, heavy-textured wall that looks like an expensive organic sculpture. It provides unparalleled acoustic insulation from noisy neighbors or nearby streets. Plus, the microscopic gaps between the logs create invaluable nesting habitats for beneficial native pollinators like mason bees.
🪵 Step-by-Step Budget Fence Build
Set the Corner Posts
Dig 3-foot deep holes at the corners, set your treated 4×4 posts in concrete, and let them cure for 48 hours.
Run a Mason Line
Tie a high-visibility string tightly between the corner posts to establish a perfectly straight layout line across your yard.
Dig and Set Line Posts
Space your remaining post holes exactly 6 or 8 feet apart along the string line and fill them with fast-setting concrete.
Install Horizontal Support Rails
Run three horizontal rows of 2×4 framing rails across the posts using heavy structural wood screws.
Mount the Decorative Infill
Attach your chosen cheap slats, wire panels, or corrugated sheets to the rails using consistent spacer blocks.
Apply Long-Term Sealant
Spray or roll a premium exterior oil stain or metal clear coat across the entire structure to protect against weathering.
DIY Wood Slats vs. Utility Cattle Panels
Horizontal Wood Slats
- Provides excellent solid privacy from neighbors.
- Easy to paint or stain to match home exterior.
- Creates a beautiful modern, sleek backdrop.
- Blocks heavy wind gusts effectively.
Cattle Panel Frames
- Preserves open scenic views and sunlight.
- Functions as a built-in heavy-duty vine trellis.
- Extremely fast to assemble between posts.
- Virtually zero maintenance required over ten years.
Avoid These Common Budget Mistakes
Frequently Asked Questions
What is the cheapest material to build a long privacy fence with?
Pressure-treated pine slating or vertical bamboo rolls attached to existing structures are the absolute cheapest options per linear foot. Both options provide solid sight barriers while using affordable bulk raw building supplies.
Do I need a building permit for a DIY backyard fence?
In most municipalities, any structure under 6 feet tall does not require a formal building permit. However, you must verify your local residential zoning rules and Homeowners Association bylaws before purchasing materials.
How can I make a basic wire fence look expensive?
The secret is framing the wire inside thick, clean lumber borders. Enclosing industrial mesh or cattle panels inside finished 2×4 or 4×4 timber frames instantly transforms utility metal into high-end architectural design.
How long will an inexpensive pine fence last before rotting?
If you keep the wood from touching the soil and apply a high-quality exterior oil stain every three years, a standard pressure-treated pine perimeter will easily last 15 to 20 years without structural failure.
Final Thoughts
If you only add one concept from this breakdown to your design plans, make it the heavy timber framing trick. Wrapping cheap infill like corrugated metal or wire panels with clean, thick structural borders is the single easiest way to fake a high-end designer look on a bare-bones budget. It proves you do not need a massive bank account to frame your gardening space with polished, intentional style.

John Smith is the founder and CEO of Karaoke Machines Guru. He is a karaoke tutor and karaoke enthusiast and has been passionate about karaoke since he was a child. He also writes about karaoke-related tips, guides, and product reviews on this website.
He overlooks the whole website and makes sure that everything is running smoothly. Learn more!