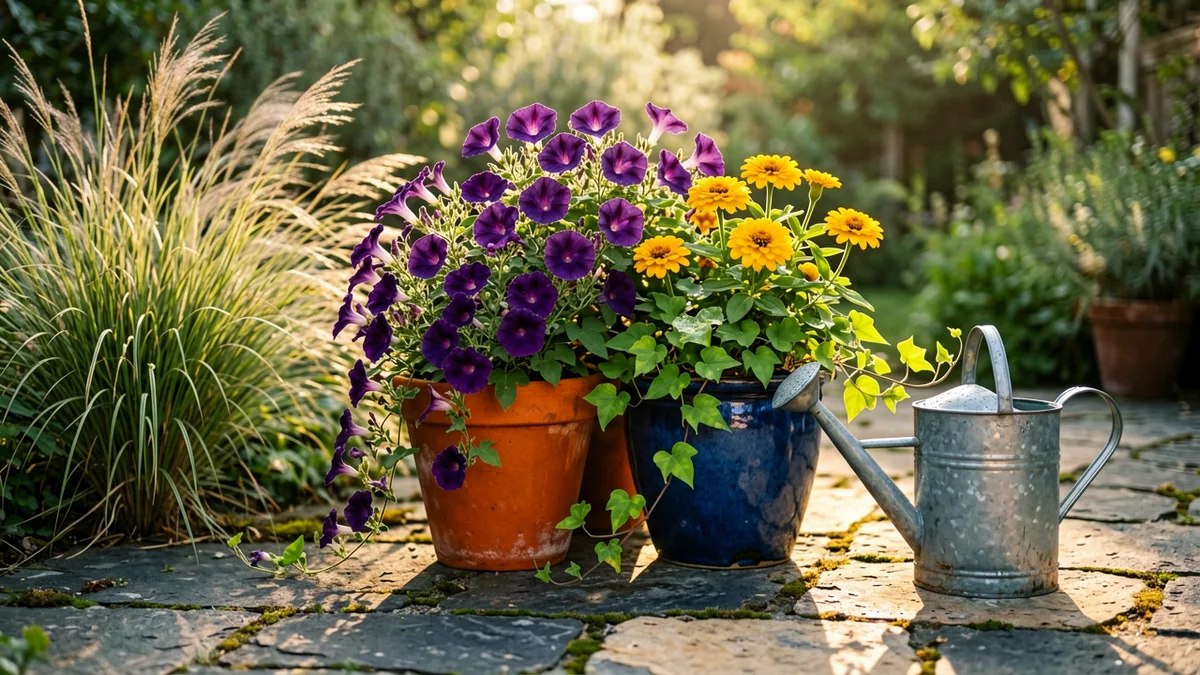
Every May, the garden centers trick us. We buy those lush, picture-perfect flowering hanging baskets and overflowing patio planters, bring them home, and by July, they look like a crispy, sad graveyard of brown stems. If your container gardening efforts always seem to tank right when summer hits its stride, you are not cursed with a black thumb. You are just falling into the same structural traps that destroy thousands of potted gardens every single year.
I have killed more potted petunias and scorched more container tomatoes than I care to admit before realizing that container gardening is its own beast. It is entirely different from growing in a spacious raised bed or straight in the ground. When you confine a plant's roots to a small plastic or terracotta box, you become its entire life support system. Let us fix the hidden design, soil, and watering blunders that are tanking your pots so you can finally keep them roaring with color until the first frost.
Quick Tips Before You Start
Go Bigger
Never choose a pot smaller than 12 inches in diameter for outdoor summer survival.
Ditch Dirt
Never use garden soil; it packs down like bricks and suffocates container roots.
Match Light
Group plants by their actual sun needs, not just because they look pretty together.
Water Deep
Saturate the pot until water streams out the bottom drainage holes every single time.
1. Buying Pots Without Operational Bottom Drainage Holes
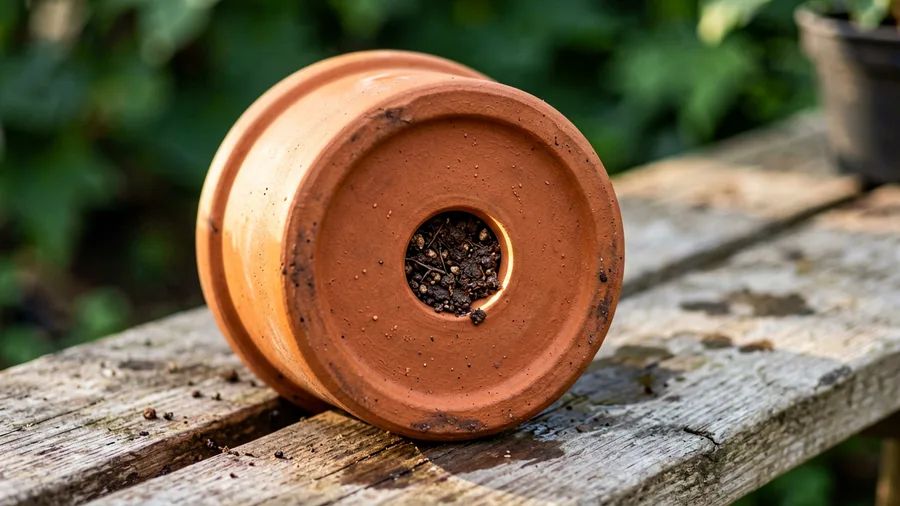
This is the absolute quickest way to drown your plants, and yet beautiful, expensive pots are sold every day without a single hole in the bottom. People think they can create a drainage layer by throwing an inch of gravel, charcoal, or broken pottery shards at the bottom of a solid planter. This is a dangerous myth that actually raises the perched water table inside the pot, keeping the soggy root zone permanently waterlogged.
Roots need oxygen just as much as they need water. When water pools at the base of a container with nowhere to go, it creates an anaerobic environment. Rot sets in within days, turning healthy white roots into mushy brown strings. By the time the leaves start wilting from root rot, the damage is usually fatal.
Look at the bottom before you buy. If you fall in love with a ceramic pot that lacks holes, buy a cheap plastic nursery liner that fits snugly inside it. Plant into the liner, pull it out to water it thoroughly, let it drain completely on the lawn, and then drop it back into your pretty decorative outer cachepot.
💡 Tip: If you love a holeless ceramic pot, use a diamond-tipped masonry drill bit on low speed to bore your own drainage hole.
Planter Drainage — At a Glance
🕳️ Minimum Hole Size
0.5 to 1 inch diameter
❌ Banned Material
Bottom gravel layers
🧽 Root Risk
Anaerobic rot mush
🛠️ Best Solution
Plastic nursery liners
The Golden Rule
If water cannot escape the bottom freely, your plants will drown before July arrives.
2. Filling Containers with Heavy In-Ground Garden Soil
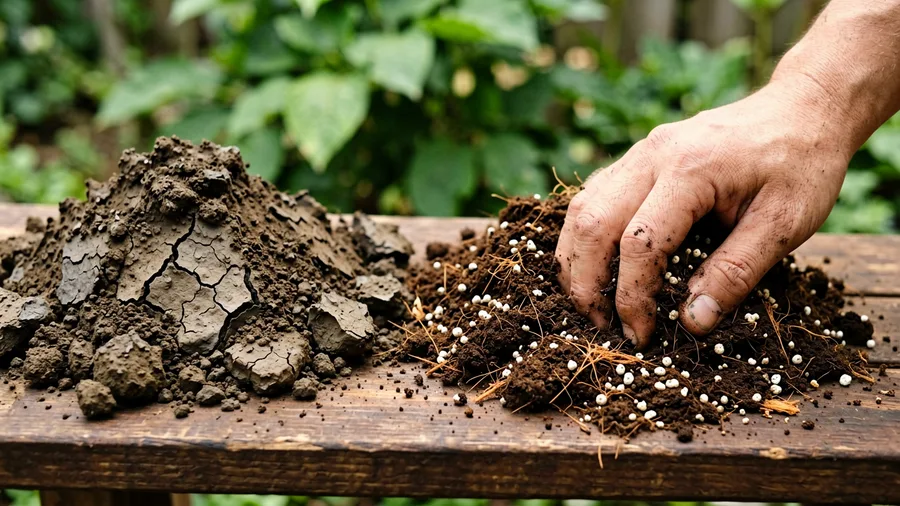
Scooping dirt straight from your yard or using cheap bagged topsoil to fill a container is a recipe for concrete-hard compaction. In-ground soil contains high levels of fine clay particles. When you put that into the strict confines of a container and water it repeatedly, those tiny particles pack down tight, sealing out air and trapping water.
Your potted plants need a dedicated potting mix, often labeled as a soilless medium. These lightweight blends are specifically formulated with materials like sphagnum peat moss, coconut coir, perlite, and vermiculite. They are designed to hold onto an appropriate amount of moisture while maintaining large air pockets so roots can breathe and expand easily.
If you try to save money by recycling old potting soil from last year, you are also inheriting depleted nutrients and potentially importing overwintered fungal spores. Start fresh each spring with a premium bag of potting mix. Brands like FoxFarm Ocean Forest or Espoma Organic Potting Mix give your container garden the airy, nutrient-rich launchpad it actually needs.
🌱 GROWING TIP
Lighten Up Heavy Commercial Mixes
If your bagged potting mix feels heavy or dense right out of the bag, mix in one part coarse perlite to every four parts soil mix before filling your containers to ensure excellent long-term aeration.
3. Underestimating Pot Size for Full-Grown Summer Plants
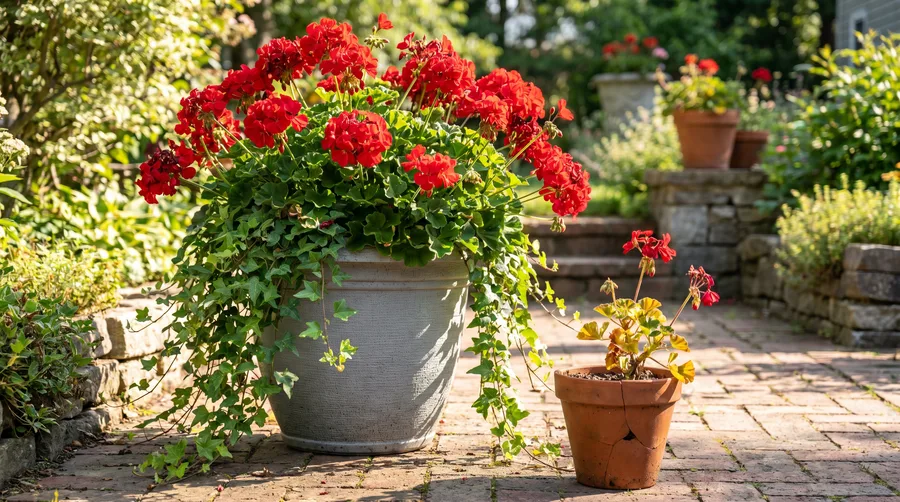
That adorable eight-inch decorative pot looks fine on the store shelf when housing a tiny starter plant, but it will become a death trap by mid-July. Small pots hold very little soil volume, which means they have virtually no water-holding capacity. Once the plant grows large and its leaf surface area expands, it will suck that tiny bit of soil dry in a matter of hours on a hot day.
When a container becomes completely root-bound, the roots tightly coil around the inside of the pot walls, displacing the soil entirely. At that stage, you are basically trying to keep a plant alive in a cup of air. You will find yourself forced to water twice a day just to stop it from dropping its blossoms.
Go big from the start. For mixed floral arrangements or single heavy feeders like patio tomatoes and bell peppers, your absolute baseline size should be a 14-inch to 16-inch container. Bigger pots mean more soil mass, which acts as a reliable thermal and moisture buffer against baking summer heat waves.
Minimum Container Diameters
4. Shallow Watering and Frequent Overhead Sprinkling
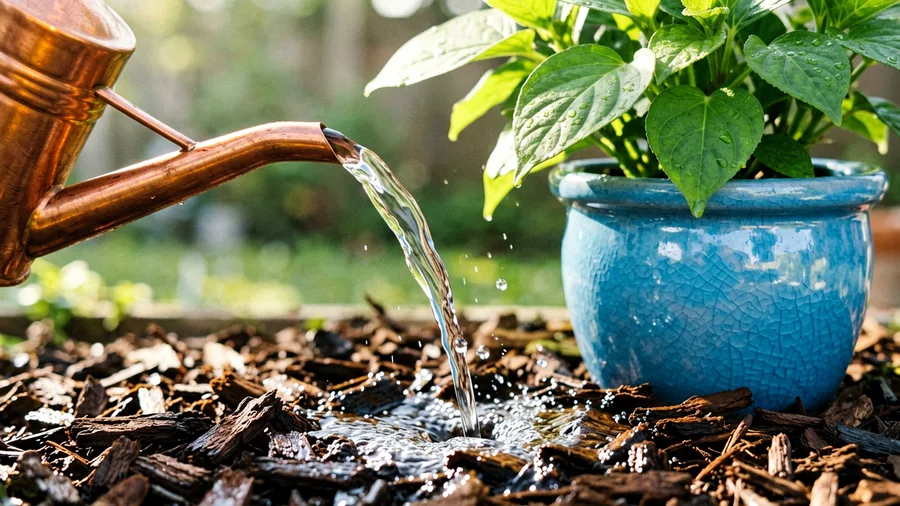
Splashing a quick cup of water onto the top of your pots every evening does more harm than good. Shallow watering only moistens the top inch of soil. This coaxes the plant's roots to grow upward toward the surface to find moisture, rather than diving deep where it stays cool. Those shallow surface roots quickly bake and fry when the midday sun hits the sides of the pot.
You must water deeply until water runs freely out of the drainage holes at the base. This ensures the entire soil column is fully saturated and encourages a deep, resilient root system. If your soil has dried out into a hardened, shrunken brick that has pulled away from the sides of the container, water will just slide down the inside gap and escape out the bottom without soaking the roots. If this happens, sit the entire pot in a shallow tub of water for an hour to let it rehydrate from the bottom up.
Keep the water off the leaves. Overhead watering wet leaves in the humid heat creates a playground for fungal diseases like powdery mildew and black spot. Aim your watering can spout or hose wand directly at the soil surface, right at the base of the stems.
🛁 How to Properly Rehydrate a Bone-Dry, Shrunken Container
Identify the Gap
Check if the soil brick has dried out completely and pulled away from the inner edges of the pot.
Find a Tub
Place the entire dried container inside a larger bucket, plastic storage tub, or deep saucer.
Add Water Outside
Fill the outer tub with three to four inches of water, allowing the pot to sit submerged.
Soak Bottom-Up
Leave the pot to wick moisture upward through its bottom drainage holes for roughly forty-five minutes.
Drain Excess
Remove the container from the tub and let all the residual free-flowing water escape before replacing it.
5. Starving Your Heavy-Feeding Potted Plants
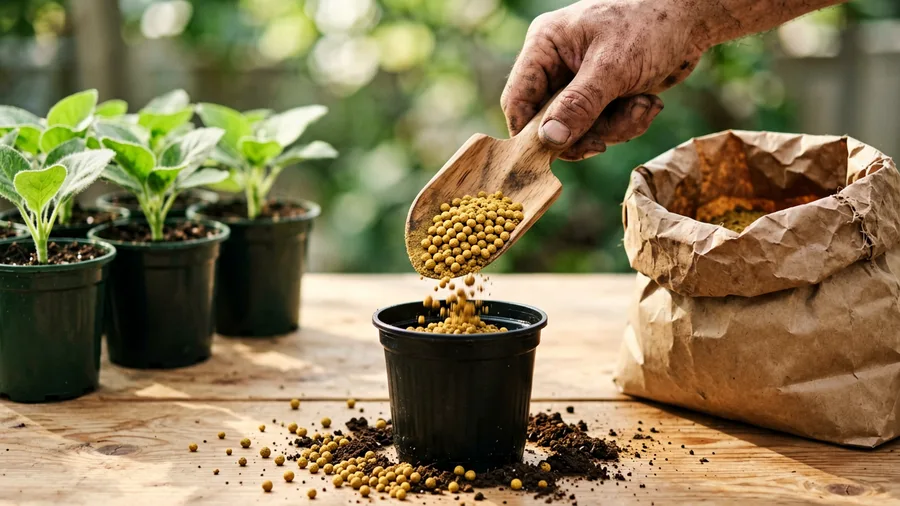
Potting mix is great for structure and aeration, but it is practically devoid of long-term nutrition. Most commercial bags come pre-mixed with a tiny charge of synthetic fertilizer that lasts about four to six weeks. Once that initial fuel supply runs out around late June, your plants will starve if you do not step in.
Because you are watering your containers thoroughly and causing water to flush out the bottom, you are constantly leaching out water-soluble nutrients. In-ground plants can stretch their roots deeper into native soil to hunt for minerals, but your potted plants are locked in a barren cage. Their leaves will fade to pale yellow, and flower production will grind to a halt.
Mix a slow-release granular organic fertilizer, like Jobes Organics Flower Fertilizer, into the soil during spring planting. Then, starting in mid-summer, supplement their diet every two weeks with a liquid fish emulsion or seaweed fertilizer. This consistent feeding schedule keeps aggressive bloomers like petunias and calibrachoa producing new buds without skipping a beat.
⚠️ COMMON MISTAKE
Never Fertilize Bone-Dry Container Plants
Applying liquid fertilizer to bone-dry potting mix can cause immediate chemical root burn. Always water your pots thoroughly with plain water first, then apply your liquid fertilizer mixture to the damp soil.
6. Cramming Sun-Worshippers and Shade-Lovers Together
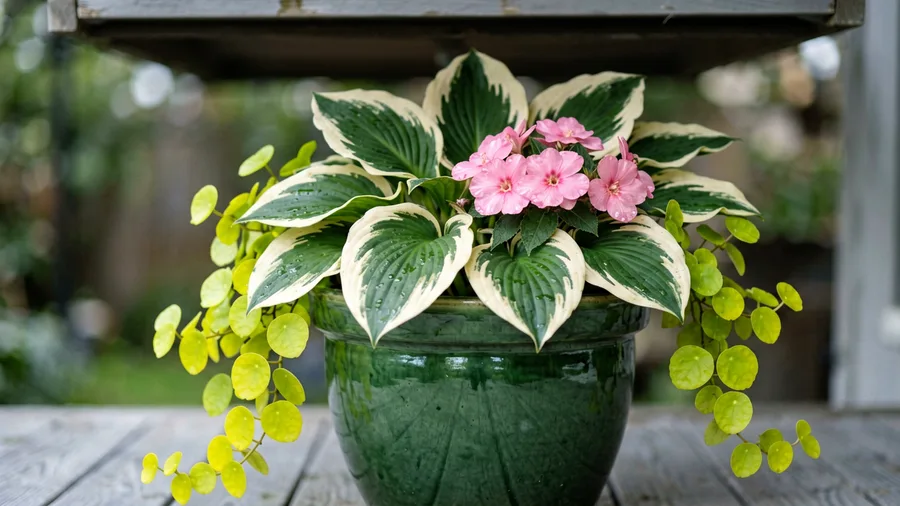
We have all seen those gorgeous, multi-variety pre-made hanging baskets at grocery stores. They mix deep red tuberous begonias with trailing silver licorice plants and bright blue lobelia. It looks stunning for a week, but it is a horticultural mismatch destined for disaster. Begonias demand deep shade or their sensitive leaves will scorch, while many trailing accents require blazing, full day sun to stay dense.
When you mix plants with conflicting light and water requirements into the same small soil volume, somebody loses. If you place the pot in full sun, the shade plants fry. If you tuck it into the shade, the sun lovers grow leggy, pale, and stop flowering. You cannot fight biology just to make an arrangement look balanced.
Check the plant tags before building your combinations. Group true sun-worshippers like zinnias, marigolds, and sweet potato vines together in your brightest locations. Keep the hostas, caladiums, fuchsias, and impatiens in a separate pot dedicated strictly to shaded porches or morning-only sun areas.
Sun vs. Shade Container Recipes
Full Sun Companions
- Profusion Zinnias for height
- Wave Petunias for cascading color
- Sweet Potato Vine for trailing texture
- Requires 6+ hours of direct light
Deep Shade Companions
- Caladiums for structural foliage
- Nonstop Begonias for bright blooms
- Creeping Jenny for vibrant trailers
- Thrives in dappled or northern light
Frequently Asked Questions
How often should I water my outdoor containers in summer?
During the peak heat of July and August, most medium-to-large outdoor containers need to be watered once a day. Small pots or hanging baskets hanging in windy spots may even need watering twice a day—once in the morning and once in the late afternoon.
Can I reuse my potting soil from last year to save money?
It is not recommended for small pots because old soil loses its structural air pockets and gets compacted. It can also harbor root rot fungi and pests. If you must reuse it in massive planters, mix it 50/50 with brand new potting mix and add fresh organic granular fertilizer.
Why are the leaves on my potted petunias turning yellow?
Yellowing lower leaves usually indicate a lack of nitrogen, meaning the plant has consumed all the nutrients in its potting mix. Frequent watering washes away nutrients quickly, so you need to feed them with a water-soluble fertilizer every two weeks.
Is terracotta better than plastic for summer container gardening?
Terracotta is porous, allowing roots to breathe, but it evaporates moisture out of the sides incredibly fast. If you struggle to water daily, stick to high-quality thick plastic, resin, or glazed ceramic pots that hold moisture significantly longer.
Final Thoughts
If you only fix one mistake from this list for your summer setup, make it your container size. Throw out those tiny eight-inch pots and swap them for substantial fourteen-inch or sixteen-inch resin planters with open drainage holes. That extra soil volume acts as an insurance policy for your plants' roots, holding onto moisture and giving you a much wider margin for error when the scorching July sun tries its absolute hardest to bake your patio garden to a crisp.
Keep Your Pots Blooming All Year Long
Subscribe to our weekly kitchen garden newsletter for concrete, seasonal planting blueprints and honest pest control tips delivered right to your inbox.

John Smith is the founder and CEO of Karaoke Machines Guru. He is a karaoke tutor and karaoke enthusiast and has been passionate about karaoke since he was a child. He also writes about karaoke-related tips, guides, and product reviews on this website.
He overlooks the whole website and makes sure that everything is running smoothly. Learn more!